
This is my take on a subset of booking, appointment, PMS or reservation solutions for WordPress.
Update 02.04.2024
Moving down the rabbit hole again :)
Will be diving a bit deeper into some the solutions and their feature-sets. Might split this up into multiple posts :) Will see, which of the developers are interested in an open review or not.
Possible deep-dive reviews for this year:
There are so many booking / appointment solutions out there, that its really hard to decide, which solution is the right one for your specific project and needs.
I will only list those that fit my own internal criteria.
Not all of them will always match, but it should be as close as possible :)
Just to be clear, this is highly opinionated, as is every other list claiming to have the best available solutions for you ;)
But this is how I would approach it together with my clients!
A Property Management System ( PMS ) or Hotel Operating System ( HOS ) is an overkill for most projects, but provides booking, reservations, appointment logic, logistics, accounting and many other features.
My main focus is not the PMS market, but its always nice to have the option to extend a setup in the future, if additional requirements come up.
This is about full WordPress solutions, but there are also solutions that integrate with WordPress, but are hosted externally.
Like Checkfront for example and their WordPress integration.
You pay a monthly fee, depending on your yearly requirements.
The problem with a SaaS, is that you are limited to their feature set. If you want to integrate your own features and develop a specific extension for them, it is not always possible.
Some provide API access for extendability, but extending upon that can be pricey. And often its hard to decide, which service will really stick around and not vanish at some point.
But they are a nice quick solution, to get you started.
This is where many offers try to lure you in. They offer premium themes that look amazing with demo content, bundled with a basic addon that features common functionality for the hotel booking market.
Some are pretty basic, some of these addons go pretty far.
For a B&B or hotel owner, it is pretty difficult to decide, which is the right one to choose.
You just see pretty pictures, perfect matching text and a workflow of many things, that just seem to work.
But does it really work for your feature-set?
How good is the documentation for the booking addon?
Do they provide a community forum to help with adjustments?
If none of the above is satisfying, please RUN :)
Don’t waste your money and stay away from frustration!
Most of the booking solutions are based around WooCommerce and there are 1000s of themes that are compatible.
There is no reason to bundle theme and booking addons, unless you really have a feature-set, that perfectly matches and will not grow in the future!
Choose a theme that is well supported, uses the framework of your choice and liking OR find someone to build a unique theme for you.
A Channel Manager is a module that allows you to connect & synchronize your OTA channels (such as Booking.com, AirBnB, Expedia, Hotels.com, HomeAway, Trip Advisor, etc.).
The goal is to have no overbooking, just one calendar to manage all reservations, rates & availability.
This is a big topic and complicated in many ways. Some solutions offer some kind of 1-way or 2-way sync via iCal.
You can also use external services like Syncbnb or OTA Sync. This alone is a rabbit-hole of its own :) Not going there yet …. But it is an important question, if you plan to offer your bookings externally and do not wish to sync availability / reservations manually.
Before choosing anything you should really pinpoint your own requirements.
This is a starting list of solutions, that I handpicked following the rules I set myself. This list might grow in the future, depending on additional plugins I discover.
I have a new WPML client, that is starting fresh and already leaned on a theme based solution. He has some project requirements, that already leave him stuck in certain areas.
That is why I decided to take a deeper look at things currently available. I have touched many of these before, but taking a fresh look at them ;)
I am not comparing features, just presenting those that are good candidates to build a great booking setup.
You will need to do a feature matrix for your project and see which areas are covered by each plugin. No way around that :)
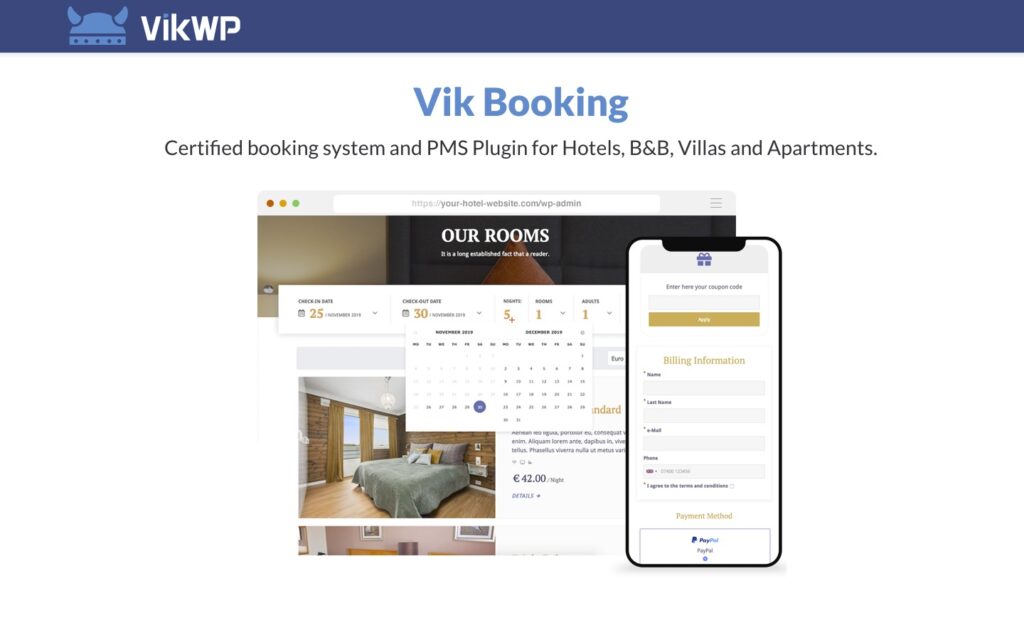
Certified booking system and PMS Plugin for Hotels, B&B, Villas and Apartments.
E4J started with Joomla CMS integrations and added WordPress in 2018.
From their website: “The project VikWP – VikWordPress.com was born in 2018, it’s a newly born project, but it has more experience than ever by background. The company E4J has been one of the leading extensions development companies for Joomla since 2009. That’s how we started to get known with our software. “
Not many websites talk about it, but it has an amazing feature-set at a pretty descent price for the Pro version.
This plugin has no WooCommerce support and relies solely on their own payment integrations. They offer full PCI-DSS compliance for their payment gateways.
They offer a free and pro version, with the free version already having a good set of features.
One of the biggest benefits of the Pro Version is the possible integration of the channel manager, which allows you to sync your bookings with other external services (booking.com, airbnb …)
And if PMS features are important to you, the Pro version is the right plugin for you.
The price can quickly accumulate, depending on the payment gateways needed, which is not so much different to WooCommerce ;)
You also have to calculate in the Channel Manager, if you want to sync with external service providers.
The plugins target audience is more single properties or appartment complexes.
To get you started
A Vik Theme – Plaza – LINK
Appointment Manager – LINK
Documentation – LINK
Frontend Demo – LINK
Admin Demo- LINK
Price Range
FREE (Limited Payment Gateways / No Channel Manager)
or
PRO – 140 EUR (≈ $165) + Channel Manager: 79 EUR (≈ $93)
What is missing?
A merged use of the booking plugin, appointment plugin, item rent plugin is not possible. There is no shared shopping basket.
Pinpoint Booking System comes with a clean interface, a multipurpose functionality and an amazing range of booking features.
Suitable for businesses such as hotel accommodation, guesthouses rentals, appointments, scheduling conferences, and meetings or rental businesses to simplify the booking process for their customers.
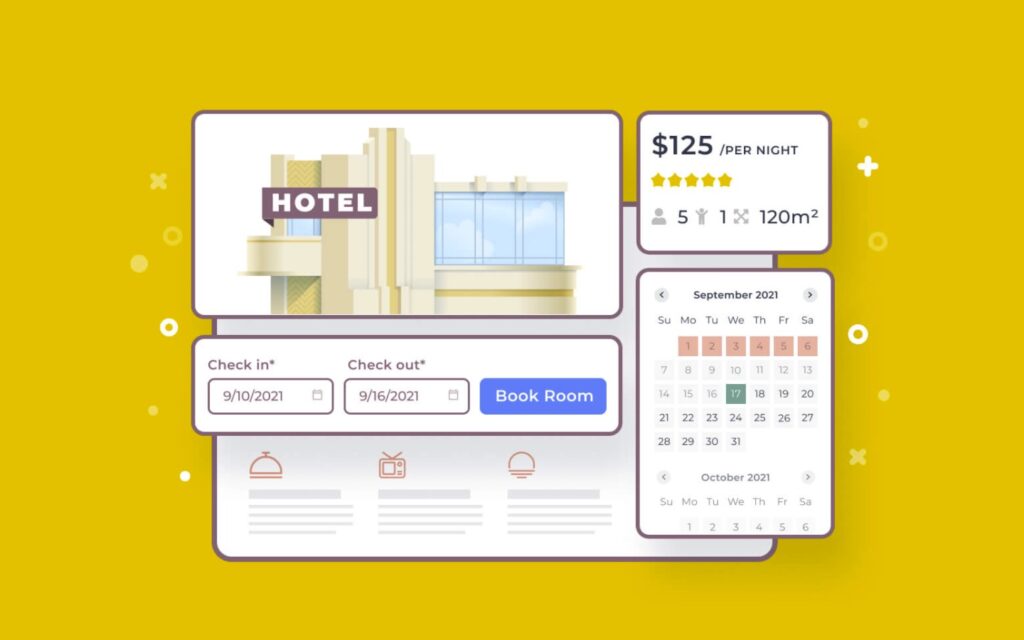
Motopress has been a go-to for many projects in the past. When you search for booking solutions, it will always come up.
“The MotoPress WordPress Hotel Booking plugin is an all-in-one property management suite for rental property websites. List unlimited accommodations and services, accept direct online reservations, synchronize all bookings across OTAs and more (no per-booking or per-property commission). This WordPress hotel booking plugin is perfect for running any hospitality business establishment regardless of the size, function or cost: a hotel, vacation rental, apartments agency, hostel and more.” – statement from their website.

Another plugin that has been around for a long time and grown in popularity as well as features.
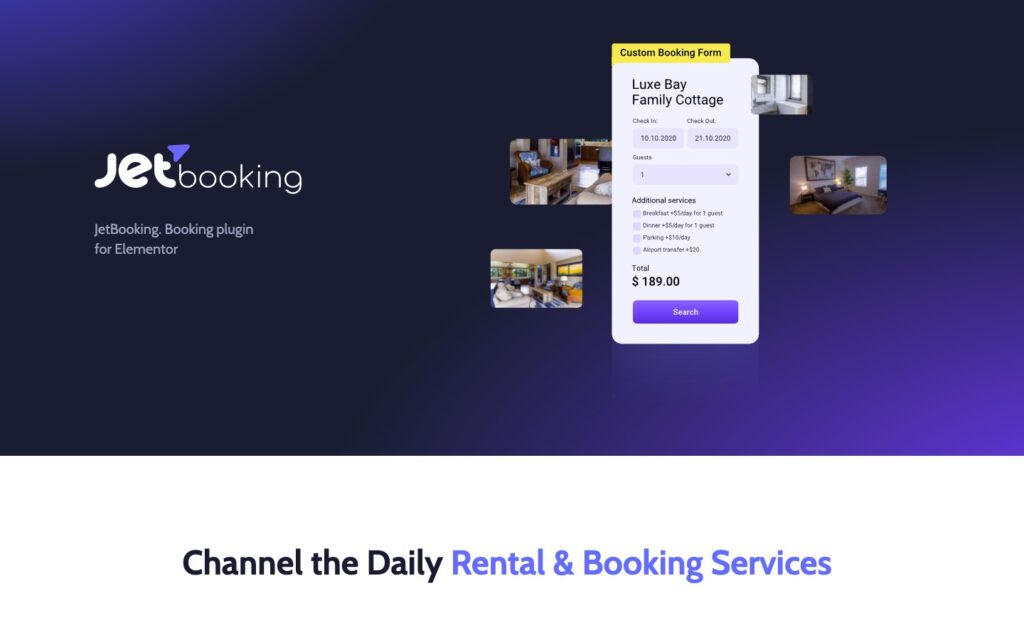
“JetBooking plugin is a unique addon developed by the Crocoblock team specifically for rent and booking services, such as vehicles, dresses, apartments, etc.” – Introduction
If you love the possibilities and concept of Elementor, JetBooking could be of interest for you. The extension provides a different approach with similar features or better than those above.
Check their feature comparison here.
I have not played with JETbooking yet, but have worked with almost all their other extensions so far!
Love their style and integration with Elementor.
crocoblock offers a whole suite of plugins that enhance Elementor.
Really high quality extensions, with an amazing detail to design and functionality.
Feature highlights
To get you started
Demo – LINK
Documentation – LINK
REST API – LINK
JETengine – LINK
JETsmartfilters – LINK
Free Kava Theme – LINK
Dynamic Templates – LINK
JETThemeCore – LINK
crocoblock JETPlugins – LINK
Price Range
JETbooking $19 + JETengine $26 + JETsmartfilters $24 or JET Bundle $130
What is missing?
A channel manager to sync with Airbnb / Booking.com etc, is missing. They have a video tutorial up, that showcases synchronisation to Google Calendar via Zapier / Integromat. I am sure you could also use n8n.io, which you can host yourself ;)
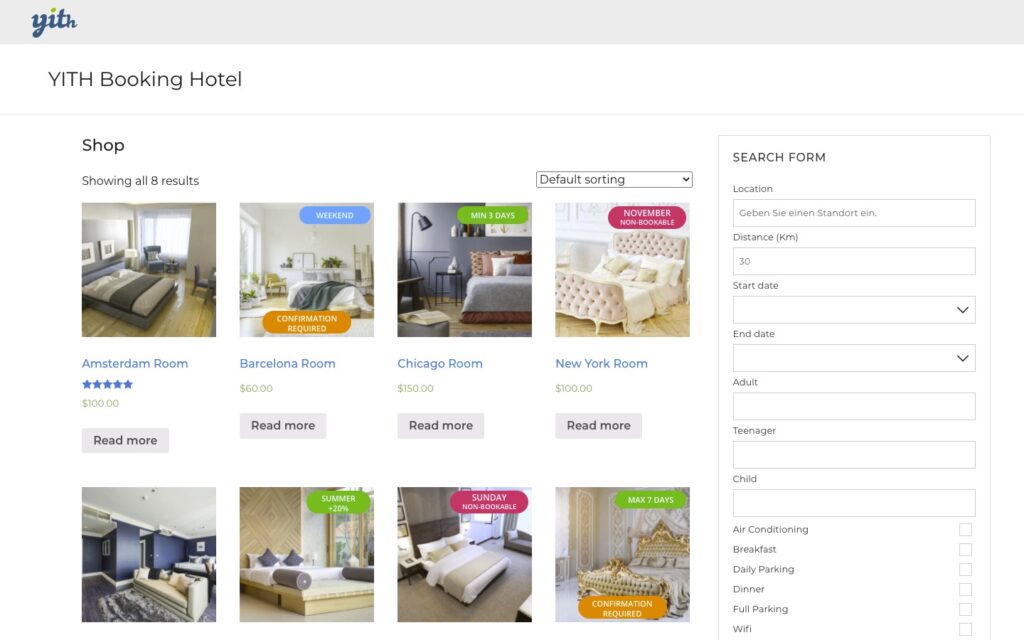
I totally forgot about YITH, even though they are the poster child for good WooCommerce solutions.
The plugin implements a booking/appointment system to manage booking of services, rooms, accommodation facilities and more.
It feels more expensive than those above, but it has a huge feature-set and includes bookings and appointments!
YITH shines, when it comes to their documentation.
These are just some possible solutions. Hope this gives you a little jump-start.
D’ont just use the first best thing, even if it looks impressive on first glance!
I will adjust and tweak this article, as new things come up.

This is not a tutorial, but more like sharing a nice geeky road-trip ;)
I have a pretty good understanding of the Youtube Data API, as I have actively used it on portalZINE TV in the past, to upload videos and dynamically link them to my local post-types.
For one of my latest customer projects (TYPEMYKNIFE / typemyknife.com), the task was a bit more complicated and the goal was to make it as future-proof as it can be with the Google APIs :)
Prerequisites / References to get you started:
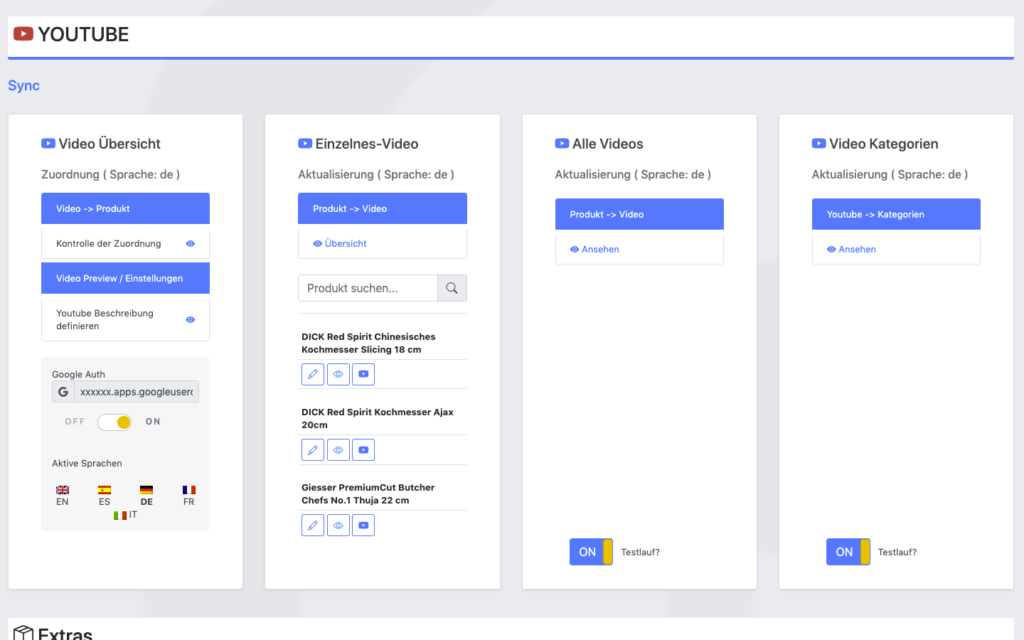
The goal for the setup was to actively synchronize WooCommerce products with linked / attached videos, with their source at Youtube.
As the website is multilingual, WPML integration is critical as well. And as Youtube allows localization of title and description, that can be added into the mix quiet easily in the future ;)
The following product attributes should be mirrored and optimised for Youtube:
The following attributes should be integrated into the description to enrich the Youtube description:
All of these attributes will be collected internally and assigned using a simple template system, which allows the customer to move parts around freely and freely layout the description for Youtube.
The following stats will be collected for review:
Youtube SEO
These are the relevant key aspects, that help to get your videos more views.
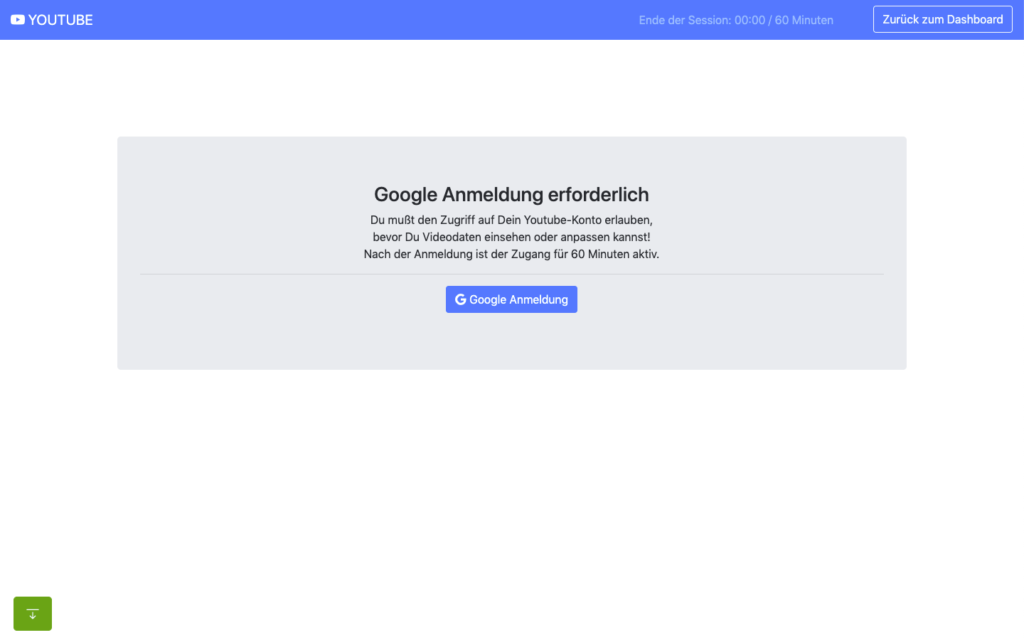
In the past access to the Youtube Data API was far easier and less limited, when it comes to offline / none expiring OAuth2 refresh tokens.
When you are building a server-side application that is only available to your customer or moderators, it makes no sense to run that app through the Google App verification. Your app will never be used in public.
The Youtube Data API and its scopes, are defined as sensitive and therefor require third-party security assessment for public access.
The scopes I am requesting are https://www.googleapis.com/auth/youtube.upload + https://www.googleapis.com/auth/youtube.
Because of that its far easier to just setup OAuth 2 in test mode and restrict access to your customer and specific additional accounts only (up to 100 test users allowed). What all these account need, is access to your own or Brand Youtube Channel.
Preparation in the Google Cloud Console:
A detailed description can be found here.
You can circumvent verification for the consent screen, by using an organisation setup at Google. Here some infos about that. With that setup offline refresh tokens should work fine.
Update: Just tried that, but wont work with a branded youtube account, even though the cloud user has admin access to it. Not giving up yet, but Google / Youtube really makes it difficult to just have a simple offline solution for specific tasks ;) BTW also forced the login hint, to make sure the right account is logged in : $client->setLoginHint(‘YourWoreksapceAccount’); !
You might have heard of the “The League of Extraordinary Packages“. It is a group of developers who have banded together to build solid, well tested PHP packages using modern coding standards.
They also offer an OAuth2-client + OAuth2 Google extension that can be used.
On the server, the Google API PHP SDK can be easily integrated using Composer.
In my customer plugin I neatly separated all relevant areas in classes & traits:
You can check the expiry time of your access token by accessing:
https://www.googleapis.com/oauth2/v1/tokeninfo?access_token=YOUR_TOKEN“A Google Cloud Platform project with an OAuth consent screen configured for an external user type and a publishing status of “Testing” is issued a refresh token expiring in 7 days.” – Google
Basic Auth example from the SDK:
|
1 2 3 4 5 6 7 8 9 10 11 12 13 14 15 16 17 18 19 20 21 22 23 24 25 26 27 28 29 30 31 32 33 34 35 36 37 38 39 40 41 42 43 44 45 46 47 48 49 50 51 52 53 54 55 56 57 58 59 60 61 62 63 64 65 66 67 68 69 70 71 72 73 74 75 76 77 78 79 80 81 82 83 84 85 86 87 88 89 90 91 92 93 94 95 96 97 98 99 100 101 102 103 104 105 106 107 |
<?php // Call set_include_path() as needed to point to your client library. set_include_path($_SERVER['DOCUMENT_ROOT'] . '/directory/to/google/api/'); require_once 'Google/Client.php'; require_once 'Google/Service/YouTube.php'; session_start(); /* * You can acquire an OAuth 2.0 client ID and client secret from the * {{ Google Cloud Console }} <{{ https://cloud.google.com/console }}> * For more information about using OAuth 2.0 to access Google APIs, please see: * <https://developers.google.com/youtube/v3/guides/authentication> * Please ensure that you have enabled the YouTube Data API for your project. */ $OAUTH2_CLIENT_ID = 'XXXXXXX.apps.googleusercontent.com'; $OAUTH2_CLIENT_SECRET = 'XXXXXXXXXX'; $REDIRECT = 'http://localhost/oauth2callback.php'; $APPNAME = "XXXXXXXXX"; $client = new Google_Client(); $client->setClientId($OAUTH2_CLIENT_ID); $client->setClientSecret($OAUTH2_CLIENT_SECRET); $client->setScopes('https://www.googleapis.com/auth/youtube'); $client->setRedirectUri($REDIRECT); $client->setApplicationName($APPNAME); $client->setAccessType('offline'); // Define an object that will be used to make all API requests. $youtube = new Google_Service_YouTube($client); if (isset($_GET['code'])) { if (strval($_SESSION['state']) !== strval($_GET['state'])) { die('The session state did not match.'); } $client->authenticate($_GET['code']); $_SESSION['token'] = $client->getAccessToken(); } if (isset($_SESSION['token'])) { $client->setAccessToken($_SESSION['token']); echo '<code>' . $_SESSION['token'] . '</code>'; } // Check to ensure that the access token was successfully acquired. if ($client->getAccessToken()) { try { // Call the channels.list method to retrieve information about the // currently authenticated user's channel. $channelsResponse = $youtube->channels->listChannels('contentDetails', array( 'mine' => 'true', )); $htmlBody = ''; foreach ($channelsResponse['items'] as $channel) { // Extract the unique playlist ID that identifies the list of videos // uploaded to the channel, and then call the playlistItems.list method // to retrieve that list. $uploadsListId = $channel['contentDetails']['relatedPlaylists']['uploads']; $playlistItemsResponse = $youtube->playlistItems->listPlaylistItems('snippet', array( 'playlistId' => $uploadsListId, 'maxResults' => 50 )); $htmlBody .= "<h3>Videos in list $uploadsListId</h3><ul>"; foreach ($playlistItemsResponse['items'] as $playlistItem) { $htmlBody .= sprintf('<li>%s (%s)</li>', $playlistItem['snippet']['title'], $playlistItem['snippet']['resourceId']['videoId']); } $htmlBody .= '</ul>'; } } catch (Google_ServiceException $e) { $htmlBody .= sprintf('<p>A service error occurred: <code>%s</code></p>', htmlspecialchars($e->getMessage())); } catch (Google_Exception $e) { $htmlBody .= sprintf('<p>An client error occurred: <code>%s</code></p>', htmlspecialchars($e->getMessage())); } $_SESSION['token'] = $client->getAccessToken(); } else { $state = mt_rand(); $client->setState($state); $_SESSION['state'] = $state; $authUrl = $client->createAuthUrl(); $htmlBody = <<<END <h3>Authorization Required</h3> <p>You need to <a href="$authUrl">authorise access</a> before proceeding.<p> END; } ?> <!doctype html> <html> <head> <title>My Uploads</title> </head> <body> <?php echo $htmlBody?> </body> </html> |
A simple upload example can be found here .
|
1 2 3 4 5 6 7 8 9 10 11 12 13 14 15 16 17 18 19 20 21 22 23 24 25 26 27 28 29 30 31 32 33 34 35 36 37 38 39 40 41 42 43 44 45 46 47 48 49 50 |
try{ // REPLACE this value with the video ID of the video being updated. $videoId = "VIDEO_ID"; // Call the API's videos.list method to retrieve the video resource. $listResponse = $youtube->videos->listVideos("snippet", array('id' => $videoId)); // If $listResponse is empty, the specified video was not found. if (empty($listResponse)) { $htmlBody .= sprintf('<h3>Can\'t find a video with video id: %s</h3>', $videoId); } else { // Since the request specified a video ID, the response only // contains one video resource. $video = $listResponse[0]; $videoSnippet = $video['snippet']; $tags = $videoSnippet['tags']; // Preserve any tags already associated with the video. If the video does // not have any tags, create a new list. Replace the values "tag1" and // "tag2" with the new tags you want to associate with the video. if (is_null($tags)) { $tags = array("tag1", "tag2"); } else { array_push($tags, "tag1", "tag2"); } // Set the tags array for the video snippet $videoSnippet['tags'] = $tags; // Update the video resource by calling the videos.update() method. $updateResponse = $youtube->videos->update("snippet", $video); $responseTags = $updateResponse['snippet']['tags']; $htmlBody .= "<h3>Video Updated</h3><ul>"; $htmlBody .= sprintf('<li>Tags "%s" and "%s" added for video %s (%s) </li>', array_pop($responseTags), array_pop($responseTags), $videoId, $video['snippet']['title']); $htmlBody .= '</ul>'; } } catch (Google_Service_Exception $e) { $htmlBody .= sprintf('<p>A service error occurred: <code>%s</code></p>', htmlspecialchars($e->getMessage())); } catch (Google_Exception $e) { $htmlBody .= sprintf('<p>An client error occurred: <code>%s</code></p>', htmlspecialchars($e->getMessage())); } |
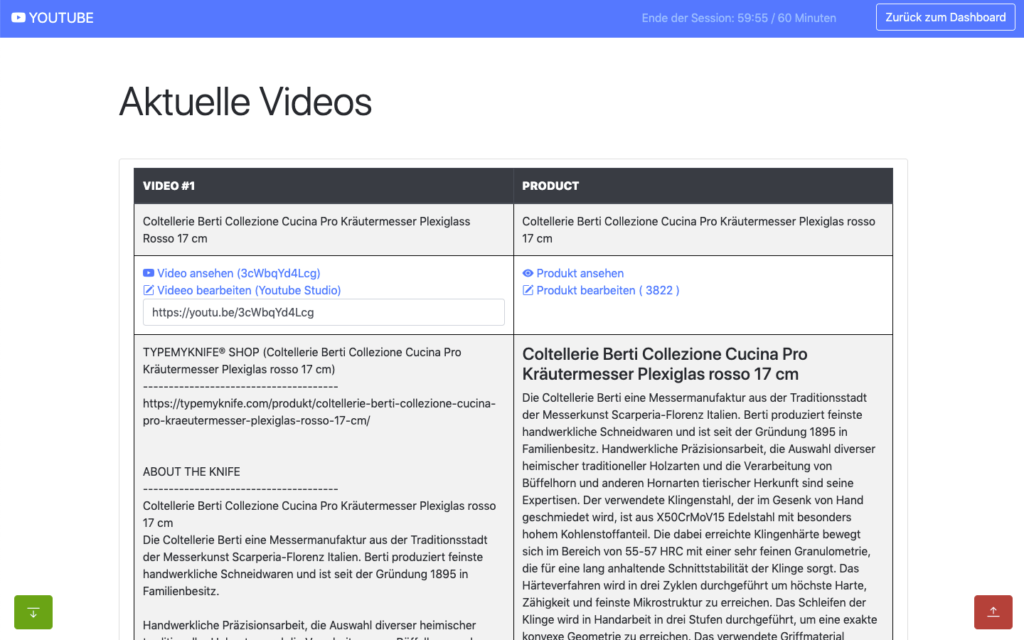
All operations to and from the Youtube Data API are rate limited. What is important for us, are the queries per day.
The default quota is 10.000 queries per day, sounds a lot, but is easily gone after updating 150-200 videos. You can request this limit to be raised, but again a lot of paperwork and questions that are just not needed.
The above limit just means, that you need to cache as many queries as possible, to only query live when needed ;)
Something you learn fast, when experimenting with different things! I hit that limit multiple times in the first few days, with around 500 videos in the queue.
Different operation cost you different amount of units
It also helps to use the Google Developer Playground to testdrive the Youtube Data API with your own credentials while optimising your own code.
You can define your own OAuth 2.0 configuration by clicking the cog in the upper right corner.
I setup the bulk updating to allow splitting it over multiple days, if required. For this an offline refresh token is needed, as the standard token expires after 60 minutes.
My customer can also just update a single video, when changes are applied to the product or a new product has been added.
If more frequent updates are required, I will ask for a raise of the queries per day. You can circumvent the limit by using multiple Google Cloud Platform accounts with new OAuth credentials, but really an overkill right now. I have done that in the past ;)
The GUI is just based of Bootstrap, to make it simple and clean. Using my own wrapper to make it work within the WordPress admin.
For all ajax operations, I am using htmx and _hyperscript, which I will talk about in another article in the future.
Really neat and clean way to build single page interfaces.
The whole plugin runs of its own REST API endpoint. Just love using WordPress as a headless system.
I used TWIG / Timber for the templates, to separate logic and layout. Timber has been my goto solution for years now. It drives my own and many customer websites.

This has been a lot of fun, maybe a bit too much LOL
I do geek-out about many of my projects, but this experience helped me to bring my WordPress toolbox to the next level. This will help to drive other things in the future.
Working so deeply with the Youtube Data API has been fun and feels so easy now, after all remaining problems have been solved.
Would have loved this during my portalZINE TV days ;)
I you read all this, you just earned yourself a badge for completion ;)
Need something similar or something else? Just say hi and we can talk.

Together with my partners in crime (Dorit & Micha), we have finally opened our own personal online store.
We have been selling our single origin coffees (1st Single Malt Whisky Coffee, Basic – Single Origin Arabica, Kill me Quick Espresso -Single Origin Robusta), teas (Kräuterschorle – Kräutertee, Feuerkieker – Schwarztee) and rum (Fortune Teller – Double Aged Barbados Rum) using the Amazon Marketplace for the past 2 years.
GreenApe has been a side project for the past years and I never wanted to deal with the maintenance of our own store. But its time to move on and do our own thing. Amazon has removed so many useful features over the years or added a new fee on top of other fees. Even though Amazon provides access to a large amount of customers, for small companies the fees build up quickly.
With our own store we can finally do bundles, coupons again and better optimized shipping. It will also allow me to better testdrive some new interesting features for my customers ;) Yeah its kind of my new toy or shopping lab! Its fun being able to work on untested new SEO features, structured data, merchant tools, shopping ads and tracking of all of those.
We have been selling in Germany for the past 2 years, but that might be changing in the future depending how well the new store shapes up :)
If you live in Germany, love good coffee, tee or rum … say Hi!
GreenApe – Makes Your Life Better
Homepage
Shop
Contact us

Updated 25.03. : Some function names changed in the latest beta version.
ACF 5.8 Beta introduced an easy way to create your custom Gutenberg blocks. I am already using it heavily for a current project, to easily organize content and media assets.
Really powerful, when combined with Timber as well, which has been the foundation of many of my themes for years now ;)
Organizing data using ACF is nice, but sometimes you seek access to that saved block data directly. I hate it when I am confined to boundaries and the data flow is restricted or hidden. I need things to be accessible to choose the creative flow myself.
|
1 2 3 4 5 6 7 8 9 10 11 12 13 14 15 16 17 18 19 20 21 22 23 24 25 26 27 28 |
// Parse blocks from post content $blocks = parse_blocks($your_post_content); $collect = array(); // Loop through the blocks foreach($blocks as $block){ //Setup global block post data context // before: acf_setup_postdata acf_setup_meta( $block['attrs']['data'], $block['attrs']['id'], true ); // Get ACF fields $fields = get_fields(); // I am using this to organize my assets. // Each block of mine has a unique identifier as its first field: // $uid = $block['attrs']['data'][array_keys($block['attrs']['data'])[0]] // I would do: // $collect[$uid] = $fields; // Collection of fields using the block id. $collect[$block['attrs']['id']] = $fields; // Restore global context // before: acf_reset_postdata acf_reset_meta( $block['attrs']['id'] ); } |
There you go, enjoy some free block data :)
I was a big skeptic, when it comes to WordPress and the new Gutenberg editor, but combined with ACF + Timber its pure magic :) Looking forward to things to come!
Cheers
Alex
Extended example:
|
1 2 3 4 5 6 7 8 9 10 11 12 13 14 15 16 17 18 19 20 21 |
$collect = []; $blocks = parse_blocks($your->post_content); foreach($blocks as $block){ if( isset($block['attrs']['data']) && !empty($block['attrs']['data'][array_keys($block['attrs']['data'])[0]])){ acf_setup_meta( $block['attrs']['data'], $block['attrs']['id'], true ); $fields = get_fields(); acf_reset_meta( $block['attrs']['id'] ); $collect[$block['attrs']['data'][array_keys($block['attrs']['data'])[0]]] = array('render' => render_block( $block ), 'field' => $fields, 'block' => $block ); }else{ $collect['main'] .= render_block( $block ); } } |
The $collect array will hold all data, including all ACF fields. You will have full access to any field, including repeater fields. The $collect[‘main’] will just collect the standard post content.

After some downtime, GreenApe is breathing again. I revived the brand with a good friend of mine and we will be reopening shop options shortly.
Michael and I have been friends for a long time. We have been working on many different projects over the years.
He launched GreenApe in 2011 and I helped him with his first steps. A couple of months ago we decided to merge our competences and expand what GreenApe offers and stands for.
From the website: “The GreenApe brand was established in 2011. GreenApe’s career began with the 1st Single Malt Whisky Coffee.
As the first of its kind, our coffee is refined with Original Single Malt Whisky. To this day, he pampers many connoisseurs and gourmets with his unique taste. Now there is another reason to rejoice.
From now on, we are continuously expanding the GreenApe product world with several stylish gadgets and useful accessories. For you this means that you will be able to discover even more beautiful, special or practical things in the future.“
GreenApe is all about lifestyle & leisure products, fun gadgets and unique food & drinks.
Some options to get those translatable strings out of your templates. I will be adding new things, as I discover them :)

Timber / Twig templates are normally not recognized by Poedit. Its just a matter of tweaking the C/C++ extractor within the settings panel.
Add TWIG to the filetypes: *.c;*.cpp;*.h;*.hpp;*.cc;*.C;*.cxx;*.hxx;*.twig
Gettext calls, like {{__(“Points Conversion Rate”, “wplms-extras”)}} in Timber, are being extracted from your templates after that.
Easier than using the gettext extractor :)
|
1 2 3 4 5 |
$function = new Twig_SimpleFunction('__', function ($args) { return __($args); }); $twig->addFunction($function); |
I am currently working on a WPLMS enhancement for a customer, that allows to simplify the payout of instructor commissions. The whole system runs on the MyCred Points System and students pay for courses with Points. The problem is how to easily payout the instructor commissions via PayPal.
There is currently no addon for MyCred available that does that magic, so I build one myself.
At the moment the payment process via PayPal is completely manual, due to budget constraints. I am basically generating a custom “Send Money” link that prefills the PayPal email and amount to send.
The interface itself handles the payout sessions, tracks the instructor balance, paid and unpaid points.
Here some images to illustrate the admin dashboard:
This list the instructors and their point balance and allows to start the payment process.
Payout sessions make sure, that only one session can be started per instructor, as the instructor could earn new points during the process. The points converted can be changed, allowing you to payout a fixed amount of points.
Its a 3 step process. Login at PayPal. Open the “Send money” dialog and send money to instructor. Confirm that you manually send the money and than register the payment and payout points in the system.
The session can be cancelled at any point. You can also leave the session open and continue at a later point.
On the frontend I added an interface to the BuddyPress Profile, that allows the instructor to track his payouts and balance.
The whole setup could be updated using PayPal Adaptive Payments, to make the whole process completely automated. Something to consider for the future :) Pretty happy with the manual process so far and it will be a great help for my customer to keep track of the commission payouts.
The whole setup is currently targeted for WPLMS, but can easily be adapted to other setups using the MyCred Points System.
TWIG allows you to use regular expressions within its templates, this makes it possible to easily check if a post is sticky in Timber for WordPress.
|
1 2 |
{% if findme matches '/^[\\d\\.]+$/' %} {% endif %} |
This is the template that is called within the loop on the index.twig to show each post.
|
1 2 3 4 5 6 |
{% extends "tease.twig" %} {% block content %} <div class="{% if post.class matches '/sticky/' %}col-md-12{% else %}col-md-6{% endif %}"> <!--Your content --> </div> {% endblock %} |
The post.class holds the full set of classes assigned to a post, which includes the class “sticky”. We do the match magic and you can use that to style your sticky posts differently ;)
“Timber helps you create fully-customized WordPress themes faster with more sustainable code. With Timber, you write your HTML using the Twig Template Engine separate from your PHP files.
This cleans-up your theme code so, for example, your php file can focus on being the data/logic, while your twig file can focus 100% on the HTML and display.”
Twig is a modern template engine for PHP