
A fullstack developer is a software engineer who has expertise in all layers of a web application’s stack. This includes both the frontend, which is the user-facing part of the application, and the backend, which is the server-side portion of the application.
To become a fullstack developer, one must have a solid understanding of a wide range of technologies. This includes proficiency in at least one programming language, such as JavaScript or Python, as well as knowledge of databases, server infrastructure, and web development frameworks.
One of the key benefits of being a fullstack developer is that they can work on any part of a web application, from the design and user experience to the underlying server-side logic. This means that they can take on a wide range of roles and responsibilities, from designing the user interface to implementing complex business logic.
Fullstack developers are also in high demand, as the skills they possess are highly sought-after in the job market. This is because companies are increasingly looking for engineers who can work on both the frontend and backend of their web applications, rather than hiring separate teams for each layer of the stack.
In addition to their technical skills, fullstack developers must also have strong problem-solving and communication skills. This is because they often work on teams and need to be able to collaborate effectively with other developers, as well as communicate their ideas to non-technical stakeholders.
Overall, being a fullstack developer is a challenging but rewarding career path. It requires a diverse set of skills and the ability to adapt to new technologies, but the rewards include the opportunity to work on a wide range of projects and the satisfaction of seeing your work come to life in the form of a web application.

Facebook sucks …. and now how to solve saving pages connected to a gray account! Might not work for everyone, but it solved it for me.
“A gray account is an account used to log into Facebook that is not associated with a personal profile or account. People used to be able to manage their Pages with gray accounts before we required individuals to have a personal Profile in order to create, manage, or run ads on a Page.” – Facebook Help
Normally it should be easy to transfer a page to a new administration account. Right? RIGHT!
My customers page was on the new profile page layout, that was introduced a while back. So normally you should go to the Page -> Professional Dashboard -> Settings -> Site Access. This would than allow you to assign a new page admin.
This just straight fails for me! I can easily choose a new person , select person and allow full access, confirm with password and than nothing happens. When checking the console, i see a couple of random errors …
Tried with different accounts, different browsers, different OS. Always the same …
After trying everything and almost giving up. I though, well you can still switch back to the old page layout, maybe that works!
And that is what finally worked for me. I was able to assign my customer as a new admin, within Settings -> Site Roles and than switch back to the new page layout!
Again … Facebook sucks! Who is testdriving updates and checking for incoming errors … seems that noone cares. Just leave it to the user, to solve their own problems. Not a single resource, that actually helps. I am sure that there are many, that already lost their pages! Just unbelievable !!!
Happy coding!

A while back a potential customer asked me, if it is possible to restructure a WordPress Multisite setup and WPML with a more simplified and custom url structure?
web.site/de/
web.site/en/
Languages would normally be added like this:
web.site/nl-nl/de/
web.site/nl-nl/en/
The customer wanted it to be restructured / simplified like this:
web.site/de-nl/
web.site/en-nl/
This basically mimics the structure of a single WPML website with custom languages, but with all the benefits of a multisite.
This is nothing that WPML or WordPress Multisite provides out of the box.
I built a prototype setup to make it work.
Not something that I would propose for anyone, as it requires a lot of tweaks for anything that handles dynamic links (plugins, hooks, core systems, page.builder …)
Its doable :)
One thing that needs to be tweaked globally, is the mapping of the new url structure.
So web.site/nl-nl/en/ needs to become web.site/en-nl/
This needs to be handled on the server side, by proxying the original to the new structure.
This can be easily done using Apache or NGINX.
With that web.site/nl-nl/en/ will be proxied to web.site/en-nl/, but any core navigation will not work yet.
This is the fastest solution that I came up with, within the hour I gave myself ;)
There surely are other options, like the core rewrites / restructuring of the core shorturl handling. But these approaches might break things in far more areas.
Using the proxy approach, keeps the core as it is. The solution needs to be as simple as possible, allowing to maintain it in the future :)
Just for the basic setup a couple of hooks are required to make this work, more might be needed depending on the plugins in use.
Here a couple of examples ….
WordPress site_url
|
1 2 3 4 5 6 7 8 9 |
add_filter( 'site_url', 'custom_site_url' ); function custom_site_url( $url ) { if( is_admin() ) // you probably don't want this in admin side return $url; return str_replace( "/nl-nl/en/","/en-nl/", $url); } |
WordPress Nav Links
|
1 2 3 4 5 6 7 8 9 10 11 12 13 14 |
add_filter( 'post_link', 'changePermalinks', 10, 3); add_filter( 'page_link', 'changePermalinks', 10, 3); add_filter( 'post_type_link', 'changePermalinks', 10, 3); add_filter( 'category_link', 'changePermalinks', 11, 3); add_filter( 'tag_link', 'changePermalinks', 10, 3); add_filter( 'author_link', 'changePermalinks', 11, 3); add_filter( 'day_link', 'changePermalinks', 11, 3); add_filter( 'month_link','changePermalinks', 11, 3); add_filter( 'year_link', 'changePermalinks', 11, 3); function changePermalinks( $url, $post, $leavename=false ) { $url = str_replace("/nl-nl/en/","/en-nl/", $url); return $url; } |
WPML
|
1 2 3 4 5 6 7 8 9 10 11 12 13 14 15 |
add_filter( 'icl_ls_languages', 'wpml_url_fix'); function wpml_url_fix( $languages ) { global $wpml_url_converter; $abs_home = $wpml_url_converter->get_abs_home(); foreach( $languages as $lang => $element ){ $languages[$lang]['url'] = str_replace( "/nl-nl/en/","/en-nl/", $languages[$lang]['url'] ); } return $languages; } |
Rankmath
|
1 2 3 |
add_filter( 'rank_math/frontend/canonical', function( $canonical ) { return str_replace( "/nl-nl/en/","/en-nl/", $canonical); }); |
This will not cover every angle, but will give you a starting point! I love my puzzles and there always is a viable solution :)
Need something similar … get in touch!

When you look at Youtube, Twitter, certain Facebook groups and even some software companies, they are all building up fear for the upcoming / in-progress Google “Helpful Content” algorithm update.
– Our “helpful content update” launching next week will better surface original, helpful content made by people, for people, rather than content made primarily to gain search traffic. It’s part of a broad effort to show more unique, authentic info in results – Google SearchLiaison@Twitter
Its happening as I write this and its about time!
The goal of this update is to rank websites that publish original and unique content. Content written by real writers and not AIs.
This also downgrades websites, that write about content that is not relevant to their core expertise. So no more content domain dominance, by posting about every possible content angle to lure visitors in.
Also old content, when not updated regularly, will loose prominence.
This all is a plus for the enduser and knowledge seeker. Google has been preparing for this for years now and its not happening suddenly.
Structured data gained more and more importance over the past few years. Google is finally using it to cleanup search!
Hard to tell. But change was needed! There are so many underrated websites out there, that deliver quality content, but never got a chance to bubble up or shine :) This will hopefully get us better search results and better quality control.
LOOKING FORWARD TO THE RESULTS!
Keep on breathing …. ALEX

Ich hatte dieses Jahr die Möglichkeit, über meinen Kunden TYPEMYKNIFE®, an der “Nacht der Sterne” in Stuttgart, im Mercedes-Benz Museum, teilzunehmen. Auf der Gala kommen mehr als 800 Gäste aus Gastronomie, Hotellerie, Politik, Kultur und Wirtschaft zusammen.
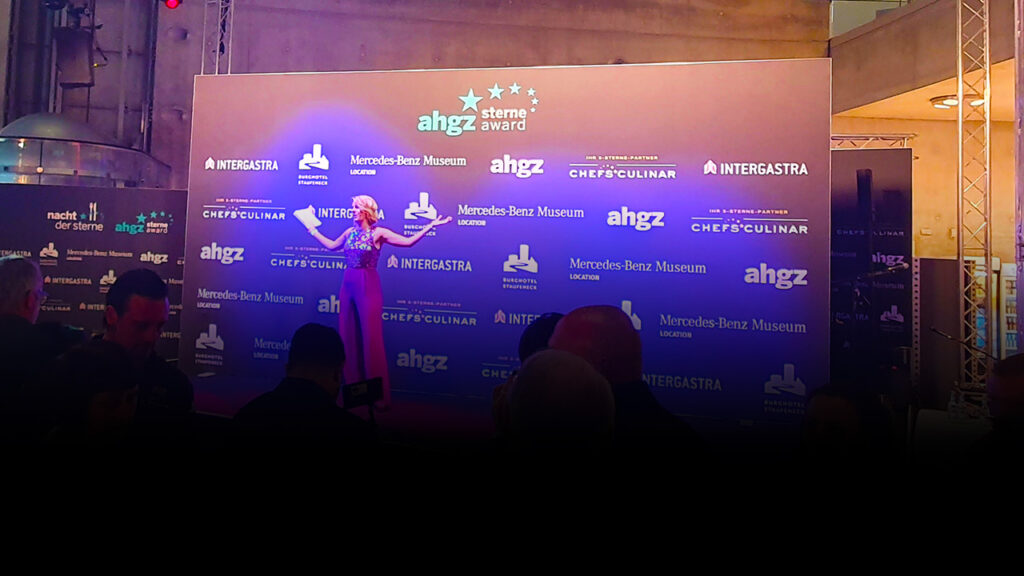
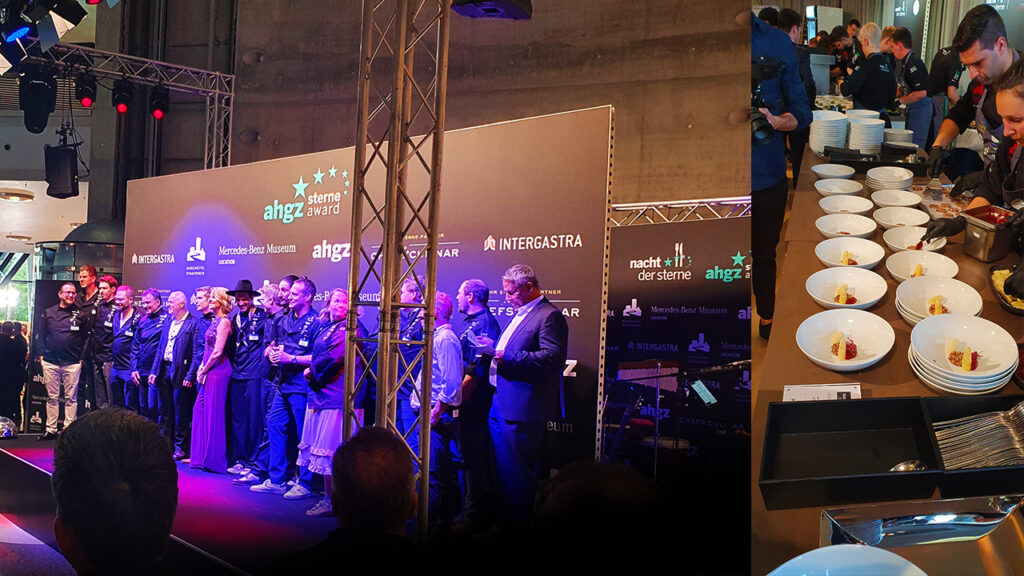
Es war ein klasse Abend, auf dem nicht nur die Spitzenköche aus Deutschland, der Schweiz, Südtirol und Österreich ausgezeichnet wurden, sondern diese auch Live zeigen konnten was sie so können.
Veranstaltet wird die Party von der Allgemeinen Hotel- und Gastronomie-Zeitung (Ahgz) und Burg Staufeneck / Rolf Straubinger.
Moderatorin des Abends waren die Journalistin und Fernsehköchin Felicitas Then und Rolf Westermann von der ahgz-Chefredaktion.
Informationen zum Award, den Methoden und Siegern findet man hier.


TYPEMYKNIFE® hat Vorort an einem Stand eine kleine Auswahl seiner Küchenmesser, die über den 3D Gravur Konfigurator vorbereitet und graviert wurden, präsentiert. Dadurch hatten Gäste die Möglichkeit, die gravierten Küchenmesser einmal persönlich zu entdecken und die Qualität zu bestaunen.

Die fast 1400 km Rundreise aus dem Norden hat sich gelohnt. Es ist immer schön Kunden mal nicht nur virtuell zu treffen, besonders wenn die Distanz so groß ist. Bei der Entfernung trifft man sich nicht immer mal kurz auf einen Kaffee oder Gin-Tonic :)
Gruß an TYPEMYKNIFE® / Schwäbisch Gmünd / Stuttgart

Color correction is important to me and to the projects I do. Regularly calibrating your monitor is essential in order to create prints that accurately represents what you see on your monitor.
I have color-profiles (ICC – International Color Consortium) for different light conditions and I do recalibrate every few months, as the light output and colors degrade on my displays.
I am still using an old Spyder3 from datacolor for calibration, which is not really supported anymore. Hard to find working software for my Windows 10 machines and Mac M1.
To the rescue comes DisplayCAL, an Open Source calibration solution that allows you to calibrate your displays using even older calibration hardware.
ArgyllCMS – is an ICC compatible color management system, available as Open Source. This is requested by DisplayCAL to make the magic work. ( MAC M1 – Fork)
I have calibrated all machines with this and love it :)

I am doing a Podcast on portalZINE.TV since last year and always host a backup of the MP3 episodes on Google Drive.
The link that you create, when enabling file sharing on Google Drive, can not be used to actually embed it on your website.
The link looks something like that:
|
1 |
https://drive.google.com/file/d/78BygKccgGms9ET2lUM0RPVUI1T0U/view?usp=sharing |
To actually use it directly, we need to get the ID. Sure, you could just extract the ID, but often we just want to copy and paste. The sharing link is also your actual reference to the original file, which I store together with the podcast.
We use a simple Regex to extract the ID:
|
1 |
https://drive.google.com/file/d/([a-zA-Z0-9_]+)\/ |
PHP
|
1 2 3 4 5 |
$input = "https://drive.google.com/file/d/78BygKccgGms9ET2lUM0RPVUI1T0U/view?usp=sharing"; preg_match("/https:\/\/drive.google.com\/file\/d\/([a-zA-Z0-9_]+)\//", $input, $match); $GoogleDriveFileID = $match[1]; |
JAVASCRIPT
|
1 2 3 4 5 |
var input = "https://drive.google.com/file/d/78BygKccgGms9ET2lUM0RPVUI1T0U/view?usp=sharing"; var res = input.match(/https:\/\/drive.google.com\/file\/d\/([a-zA-Z0-9_]+)\//) var googleDriveFileID = res[1]; |
This ID can than be used to embed the file directly using HTML5 audio controls.
Its important to use the “https://docs.google.com/uc?export=open&id=” url to open the file, as it provides the direct access to the shared file
|
1 2 3 4 |
<audio controls> <source src="https://docs.google.com/uc?export=open&id=<?php echo $GoogleDriveFileID; ?>" type="audio/mp3"> <p>This browser does not support HTML5 audio</p> </audio> |

Papa Parse is a powerful, in-browser CSV parser for the big boys and girls :)
If you do need easy CSV parsing and conversion back to CSV, take a look at it!
|
1 2 3 4 5 6 7 8 9 10 11 12 13 14 15 16 17 18 19 20 |
// Parse CSV string var data = Papa.parse(csv); // Convert back to CSV var csv = Papa.unparse(data); // Parse local CSV file Papa.parse(file, { complete: function(results) { console.log("Finished:", results.data); } }); // Stream big file in worker thread Papa.parse(bigFile, { worker: true, step: function(results) { console.log("Row:", results.data); } }); |
|
1 |
<input type="file" name="File Upload" id="txtFileUpload" accept=".csv" /> |
|
1 2 3 4 5 6 7 8 9 10 11 12 13 14 15 16 17 18 19 20 21 |
document.getElementById('txtFileUpload').addEventListener('change', upload, false); function upload(evt) { var data = null; var file = evt.target.files[0]; var reader = new FileReader(); reader.readAsText(file); reader.onload = function(event) { var csvData = event.target.result; var data = Papa.parse(csvData, {header : true}); console.log(data); }; reader.onerror = function() { alert('Unable to read ' + file.fileName); }; } |
Papa Parse is the fastest in-browser CSV (or delimited text) parser for JavaScript. It is reliable and correct according to RFC 4180, and it comes with these features:
<input type="file"> elementsI am currently using it to quickly parse Adobe Audition CSV marker files and prepare them for storage for my podcast.
|
1 2 3 4 5 6 |
Name Start Duration Time Format Type Description Ankündigungen 0:20.432 0:00.000 decimal Cue Stargate Table Read 1:12.811 0:00.000 decimal Cue Dune Part One 2021 1:58.677 0:00.000 decimal Cue Dust - Cosmo 2:20.925 0:00.000 decimal Cue Nina - Beyond Memory 2:51.276 0:00.000 decimal Cue |
|
1 2 3 4 5 6 |
Papa.unparse(tabData, { delimiter: "\tab", header: true, newline: "\r\n", skipEmptyLines: true }) |

This is not a tutorial, but more like sharing a nice geeky road-trip ;)
I have a pretty good understanding of the Youtube Data API, as I have actively used it on portalZINE TV in the past, to upload videos and dynamically link them to my local post-types.
For one of my latest customer projects (TYPEMYKNIFE / typemyknife.com), the task was a bit more complicated and the goal was to make it as future-proof as it can be with the Google APIs :)
Prerequisites / References to get you started:
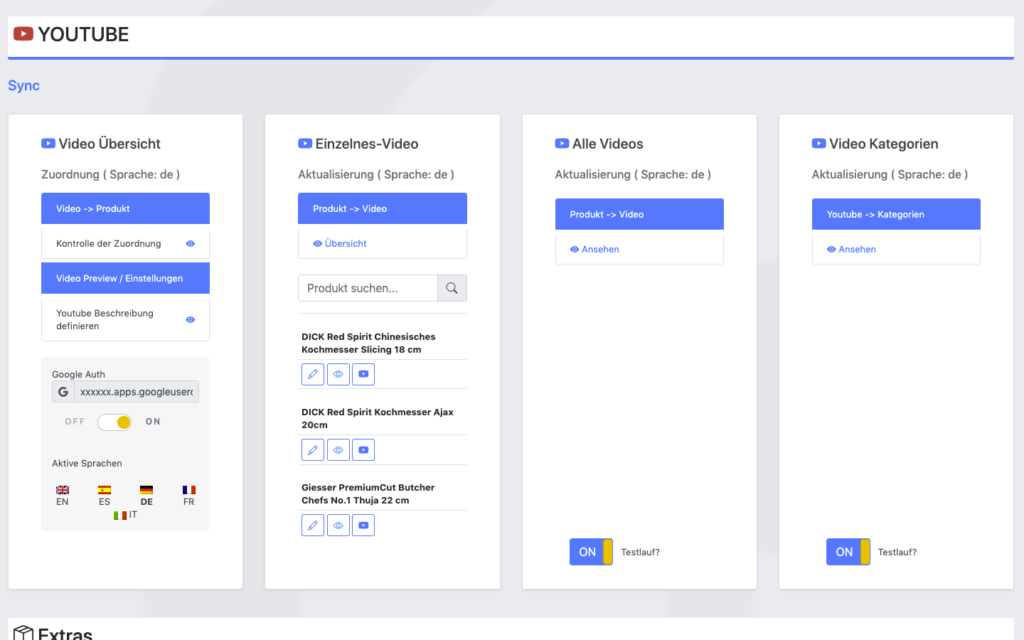
The goal for the setup was to actively synchronize WooCommerce products with linked / attached videos, with their source at Youtube.
As the website is multilingual, WPML integration is critical as well. And as Youtube allows localization of title and description, that can be added into the mix quiet easily in the future ;)
The following product attributes should be mirrored and optimised for Youtube:
The following attributes should be integrated into the description to enrich the Youtube description:
All of these attributes will be collected internally and assigned using a simple template system, which allows the customer to move parts around freely and freely layout the description for Youtube.
The following stats will be collected for review:
Youtube SEO
These are the relevant key aspects, that help to get your videos more views.
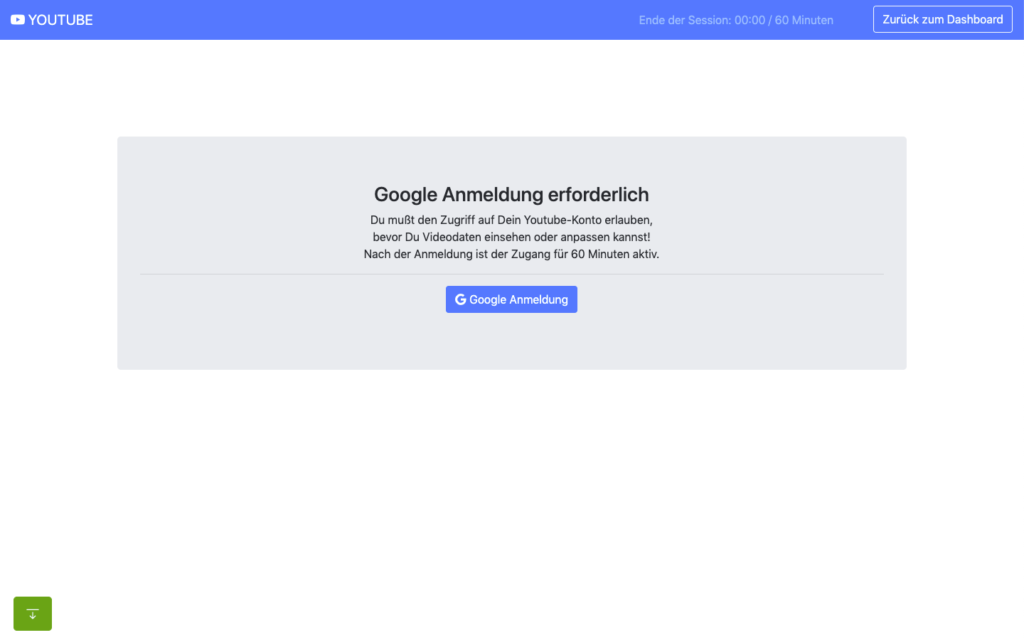
In the past access to the Youtube Data API was far easier and less limited, when it comes to offline / none expiring OAuth2 refresh tokens.
When you are building a server-side application that is only available to your customer or moderators, it makes no sense to run that app through the Google App verification. Your app will never be used in public.
The Youtube Data API and its scopes, are defined as sensitive and therefor require third-party security assessment for public access.
The scopes I am requesting are https://www.googleapis.com/auth/youtube.upload + https://www.googleapis.com/auth/youtube.
Because of that its far easier to just setup OAuth 2 in test mode and restrict access to your customer and specific additional accounts only (up to 100 test users allowed). What all these account need, is access to your own or Brand Youtube Channel.
Preparation in the Google Cloud Console:
A detailed description can be found here.
You can circumvent verification for the consent screen, by using an organisation setup at Google. Here some infos about that. With that setup offline refresh tokens should work fine.
Update: Just tried that, but wont work with a branded youtube account, even though the cloud user has admin access to it. Not giving up yet, but Google / Youtube really makes it difficult to just have a simple offline solution for specific tasks ;) BTW also forced the login hint, to make sure the right account is logged in : $client->setLoginHint(‘YourWoreksapceAccount’); !
You might have heard of the “The League of Extraordinary Packages“. It is a group of developers who have banded together to build solid, well tested PHP packages using modern coding standards.
They also offer an OAuth2-client + OAuth2 Google extension that can be used.
On the server, the Google API PHP SDK can be easily integrated using Composer.
In my customer plugin I neatly separated all relevant areas in classes & traits:
You can check the expiry time of your access token by accessing:
https://www.googleapis.com/oauth2/v1/tokeninfo?access_token=YOUR_TOKEN“A Google Cloud Platform project with an OAuth consent screen configured for an external user type and a publishing status of “Testing” is issued a refresh token expiring in 7 days.” – Google
Basic Auth example from the SDK:
|
1 2 3 4 5 6 7 8 9 10 11 12 13 14 15 16 17 18 19 20 21 22 23 24 25 26 27 28 29 30 31 32 33 34 35 36 37 38 39 40 41 42 43 44 45 46 47 48 49 50 51 52 53 54 55 56 57 58 59 60 61 62 63 64 65 66 67 68 69 70 71 72 73 74 75 76 77 78 79 80 81 82 83 84 85 86 87 88 89 90 91 92 93 94 95 96 97 98 99 100 101 102 103 104 105 106 107 |
<?php // Call set_include_path() as needed to point to your client library. set_include_path($_SERVER['DOCUMENT_ROOT'] . '/directory/to/google/api/'); require_once 'Google/Client.php'; require_once 'Google/Service/YouTube.php'; session_start(); /* * You can acquire an OAuth 2.0 client ID and client secret from the * {{ Google Cloud Console }} <{{ https://cloud.google.com/console }}> * For more information about using OAuth 2.0 to access Google APIs, please see: * <https://developers.google.com/youtube/v3/guides/authentication> * Please ensure that you have enabled the YouTube Data API for your project. */ $OAUTH2_CLIENT_ID = 'XXXXXXX.apps.googleusercontent.com'; $OAUTH2_CLIENT_SECRET = 'XXXXXXXXXX'; $REDIRECT = 'http://localhost/oauth2callback.php'; $APPNAME = "XXXXXXXXX"; $client = new Google_Client(); $client->setClientId($OAUTH2_CLIENT_ID); $client->setClientSecret($OAUTH2_CLIENT_SECRET); $client->setScopes('https://www.googleapis.com/auth/youtube'); $client->setRedirectUri($REDIRECT); $client->setApplicationName($APPNAME); $client->setAccessType('offline'); // Define an object that will be used to make all API requests. $youtube = new Google_Service_YouTube($client); if (isset($_GET['code'])) { if (strval($_SESSION['state']) !== strval($_GET['state'])) { die('The session state did not match.'); } $client->authenticate($_GET['code']); $_SESSION['token'] = $client->getAccessToken(); } if (isset($_SESSION['token'])) { $client->setAccessToken($_SESSION['token']); echo '<code>' . $_SESSION['token'] . '</code>'; } // Check to ensure that the access token was successfully acquired. if ($client->getAccessToken()) { try { // Call the channels.list method to retrieve information about the // currently authenticated user's channel. $channelsResponse = $youtube->channels->listChannels('contentDetails', array( 'mine' => 'true', )); $htmlBody = ''; foreach ($channelsResponse['items'] as $channel) { // Extract the unique playlist ID that identifies the list of videos // uploaded to the channel, and then call the playlistItems.list method // to retrieve that list. $uploadsListId = $channel['contentDetails']['relatedPlaylists']['uploads']; $playlistItemsResponse = $youtube->playlistItems->listPlaylistItems('snippet', array( 'playlistId' => $uploadsListId, 'maxResults' => 50 )); $htmlBody .= "<h3>Videos in list $uploadsListId</h3><ul>"; foreach ($playlistItemsResponse['items'] as $playlistItem) { $htmlBody .= sprintf('<li>%s (%s)</li>', $playlistItem['snippet']['title'], $playlistItem['snippet']['resourceId']['videoId']); } $htmlBody .= '</ul>'; } } catch (Google_ServiceException $e) { $htmlBody .= sprintf('<p>A service error occurred: <code>%s</code></p>', htmlspecialchars($e->getMessage())); } catch (Google_Exception $e) { $htmlBody .= sprintf('<p>An client error occurred: <code>%s</code></p>', htmlspecialchars($e->getMessage())); } $_SESSION['token'] = $client->getAccessToken(); } else { $state = mt_rand(); $client->setState($state); $_SESSION['state'] = $state; $authUrl = $client->createAuthUrl(); $htmlBody = <<<END <h3>Authorization Required</h3> <p>You need to <a href="$authUrl">authorise access</a> before proceeding.<p> END; } ?> <!doctype html> <html> <head> <title>My Uploads</title> </head> <body> <?php echo $htmlBody?> </body> </html> |
A simple upload example can be found here .
|
1 2 3 4 5 6 7 8 9 10 11 12 13 14 15 16 17 18 19 20 21 22 23 24 25 26 27 28 29 30 31 32 33 34 35 36 37 38 39 40 41 42 43 44 45 46 47 48 49 50 |
try{ // REPLACE this value with the video ID of the video being updated. $videoId = "VIDEO_ID"; // Call the API's videos.list method to retrieve the video resource. $listResponse = $youtube->videos->listVideos("snippet", array('id' => $videoId)); // If $listResponse is empty, the specified video was not found. if (empty($listResponse)) { $htmlBody .= sprintf('<h3>Can\'t find a video with video id: %s</h3>', $videoId); } else { // Since the request specified a video ID, the response only // contains one video resource. $video = $listResponse[0]; $videoSnippet = $video['snippet']; $tags = $videoSnippet['tags']; // Preserve any tags already associated with the video. If the video does // not have any tags, create a new list. Replace the values "tag1" and // "tag2" with the new tags you want to associate with the video. if (is_null($tags)) { $tags = array("tag1", "tag2"); } else { array_push($tags, "tag1", "tag2"); } // Set the tags array for the video snippet $videoSnippet['tags'] = $tags; // Update the video resource by calling the videos.update() method. $updateResponse = $youtube->videos->update("snippet", $video); $responseTags = $updateResponse['snippet']['tags']; $htmlBody .= "<h3>Video Updated</h3><ul>"; $htmlBody .= sprintf('<li>Tags "%s" and "%s" added for video %s (%s) </li>', array_pop($responseTags), array_pop($responseTags), $videoId, $video['snippet']['title']); $htmlBody .= '</ul>'; } } catch (Google_Service_Exception $e) { $htmlBody .= sprintf('<p>A service error occurred: <code>%s</code></p>', htmlspecialchars($e->getMessage())); } catch (Google_Exception $e) { $htmlBody .= sprintf('<p>An client error occurred: <code>%s</code></p>', htmlspecialchars($e->getMessage())); } |
All operations to and from the Youtube Data API are rate limited. What is important for us, are the queries per day.
The default quota is 10.000 queries per day, sounds a lot, but is easily gone after updating 150-200 videos. You can request this limit to be raised, but again a lot of paperwork and questions that are just not needed.
The above limit just means, that you need to cache as many queries as possible, to only query live when needed ;)
Something you learn fast, when experimenting with different things! I hit that limit multiple times in the first few days, with around 500 videos in the queue.
Different operation cost you different amount of units
It also helps to use the Google Developer Playground to testdrive the Youtube Data API with your own credentials while optimising your own code.
You can define your own OAuth 2.0 configuration by clicking the cog in the upper right corner.
I setup the bulk updating to allow splitting it over multiple days, if required. For this an offline refresh token is needed, as the standard token expires after 60 minutes.
My customer can also just update a single video, when changes are applied to the product or a new product has been added.
If more frequent updates are required, I will ask for a raise of the queries per day. You can circumvent the limit by using multiple Google Cloud Platform accounts with new OAuth credentials, but really an overkill right now. I have done that in the past ;)
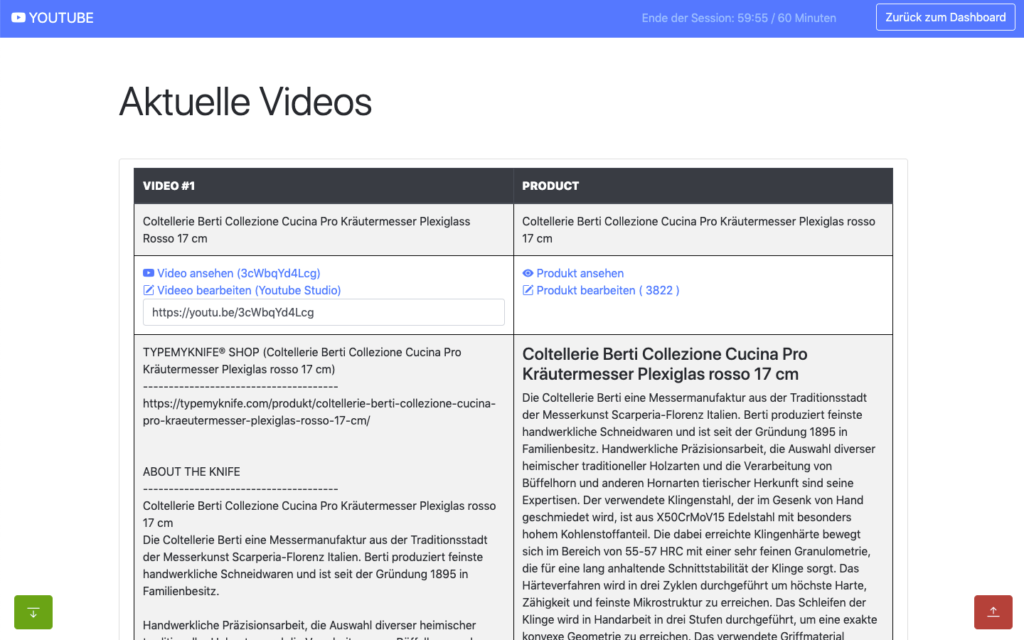
The GUI is just based of Bootstrap, to make it simple and clean. Using my own wrapper to make it work within the WordPress admin.
For all ajax operations, I am using htmx and _hyperscript, which I will talk about in another article in the future.
Really neat and clean way to build single page interfaces.
The whole plugin runs of its own REST API endpoint. Just love using WordPress as a headless system.
I used TWIG / Timber for the templates, to separate logic and layout. Timber has been my goto solution for years now. It drives my own and many customer websites.

This has been a lot of fun, maybe a bit too much LOL
I do geek-out about many of my projects, but this experience helped me to bring my WordPress toolbox to the next level. This will help to drive other things in the future.
Working so deeply with the Youtube Data API has been fun and feels so easy now, after all remaining problems have been solved.
Would have loved this during my portalZINE TV days ;)
I you read all this, you just earned yourself a badge for completion ;)
Need something similar or something else? Just say hi and we can talk.

“WPML (WordPress Multilingual) makes it easy to build multilingual sites and run them. It’s powerful enough for corporate sites, yet simple for blogs.” – WPML
I have been running and setting up multilingual websites for more than 12 years. WordPress and related integrations have gladly come a long way to make our life’s a lot easier.
For basic content WPML is almost plug & play, but I do see more and more sites / customers struggling with more complex setups. WPML is one of the most popular multilingual plugins and is used on x00.000 of websites.
Just so you know, WPML is a commercial solution!
The amount of settings has increased a lot over the years and offers possible solutions for almost any content / plugin setup.
But for more complex setups, I would suggest to hire a professional to look over the settings or study the plugin documentation carefully.
Especially with a lot of content, it can quickly increase problems and the need to revisit specific content over and over again.
WPML lets you translate any text that comes from themes / theme frameworks (DIVI, Elemetor, Gutenberg …), plugins, menus, slugs, SEO and additionally supported integrations (Gravity Forms, ACF, WooCommerce …).
You can translate content internally for yourself, using translation management to translate with an internal team of translators or get help from external translators / translation services.
The latest version also offers AI translations, which allows you to get a decent start for most of your content.
In addition to the above, WPML String Translation allows you to translate texts that are not in posts, pages and taxonomy. This includes the site’s tagline, general texts in admin screens, widget titles and many other areas.
Well, I am a bit biased. I have not looked much at other solutions for the past 5 years, as it offers all I really need.
I have used it on projects from 2 to 15 languages and it scales nicely. At least with proper hosting attached!
Anything can be tweaked through the API, Hooks and custom integrations. I have build additional WPML tools for my customers, to streamline some of the repeating / boring tasks.
Their support is responsive and the forum already provides a huge amount of answers to most of the questions that might come up.
If you develop / maintain multiple customer websites with multilingual content, the investment is quickly
amortized. I do offer WPML to my maintenance package customers, maybe something to consider ;)
Its an essential solution in my WP toolbox.
WPML 4.5 is on its way and will include a “Translate Everything” feature, among other fixes and enhancements.
Translate Everything allows you to translate all of your site’s content automatically as you create it. You can then review the translations on the front-end before publishing.
