
Extending iPanorama 360 can be a challenge, as none of the events are documented. You can talk to the developer or ask for support to get things done.
You can also read up on the core assets used:
ipanorama.min.js
jquery.ipanorama.min.js.
You can easily search for the events and figure out the parameters passed. Here a quick reference for things I used so far.
|
1 2 3 4 5 |
ipanorama:ready ipanorama:config ipanorama:fullscreen ipanorama:mode ipanorama:transform-mode-changed |
|
1 2 |
ipanorama:tooltip-show ipanorama:tooltip-hide |
|
1 2 |
ipanorama:popover-show ipanorama:popover-hide |
|
1 2 3 4 5 6 7 8 9 10 11 12 13 14 15 16 17 18 19 20 21 22 23 24 25 26 27 28 29 30 31 |
ipanorama:scene-before-load ipanorama:scene-after-load ipanorama:scene-progress ipanorama:scene-error ipanorama:scene-show-start ipanorama:scene-show-complete ipanorama:scene-hide-start ipanorama:scene-hide-complete ipanorama:scene-clear ipanorama:scene-index ipanorama:scene-point-add ipanorama:scene-point-remove ipanorama:scene-point-dragstart ipanorama:scene-point-dragend ipanorama:scene-point-select ipanorama:scene-point-deselect ipanorama:scene-point-hide ipanorama:scene-point-show ipanorama:scene-point-change ipanorama:scene-plane-add ipanorama:scene-plane-remove ipanorama:scene-plane-dragstart ipanorama:scene-plane-dragend ipanorama:scene-plane-select ipanorama:scene-plane-deselect ipanorama:scene-camera-start ipanorama:scene-camera-end ipanorama:scene-camera-change |
|
1 2 3 4 5 6 7 |
var instance = this, $ = jQuery; instance.$container.on("ipanorama:scene-after-load", function(e, data) { data.scene.control.minPolarAngle = 90 * Math.PI / 180; data.scene.control.maxPolarAngle = 90 * Math.PI / 180; }); |
|
1 2 3 4 5 6 7 8 9 10 11 12 13 14 15 |
var instance = this, $ = jQuery; function onMarkerClick(e) { var userData = this.cfg.userData; if(userData) { var $iframe = $(userData); $.featherlight($iframe); } } for(var i=0;i<instance.markers.length;i++) { var marker = instance.markers[i]; marker.$marker.on('click', $.proxy(onMarkerClick, marker)); } |
|
1 2 3 4 5 6 7 8 9 10 |
const plugin = this; const $ = jQuery; const $loading = $('<div>').addClass('myloading').text('loading'); plugin.$container.append($loading); plugin.$container.on('ipanorama:scene-progress', (e, data) => { const flag = data.progress.loaded == data.progress.total; $loading.toggleClass('active', !flag); }); |

iPanorama 360 for WordPress is a specialized plugin that enables users to create and display interactive 360-degree virtual tours or panoramic images on WordPress websites. It extends the functionality of the WordPress content management system by providing a user-friendly interface and a range of features specifically tailored for creating and showcasing 360-degree content.
With iPanorama 360 for WordPress, you can upload panoramic images or sets of photographs and convert them into interactive virtual tours or panoramic sliders. The plugin offers customization options to adjust the appearance and behavior of the panoramas, such as controlling the speed of rotation, choosing navigation controls, adding hotspots, and incorporating multimedia elements like images, videos, or audio.
The plugin integrates seamlessly with WordPress, allowing you to embed the created virtual tours or panoramic images directly into your website pages or posts. You can also customize the tour settings, such as enabling or disabling auto-rotation, adjusting the initial zoom level, or defining the starting viewpoint.
iPanorama 360 for WordPress typically provides an intuitive visual editor that enables users to create and edit their virtual tours or panoramas using a drag-and-drop interface. This makes it easier to add hotspots, link to other panoramas or external content, and customize the appearance and functionality of the tour.
You can testdrive iPanorama 360 using the Lite version or get the Pro version. The only limitation for the Lite version, is the ability to only create one panorama.
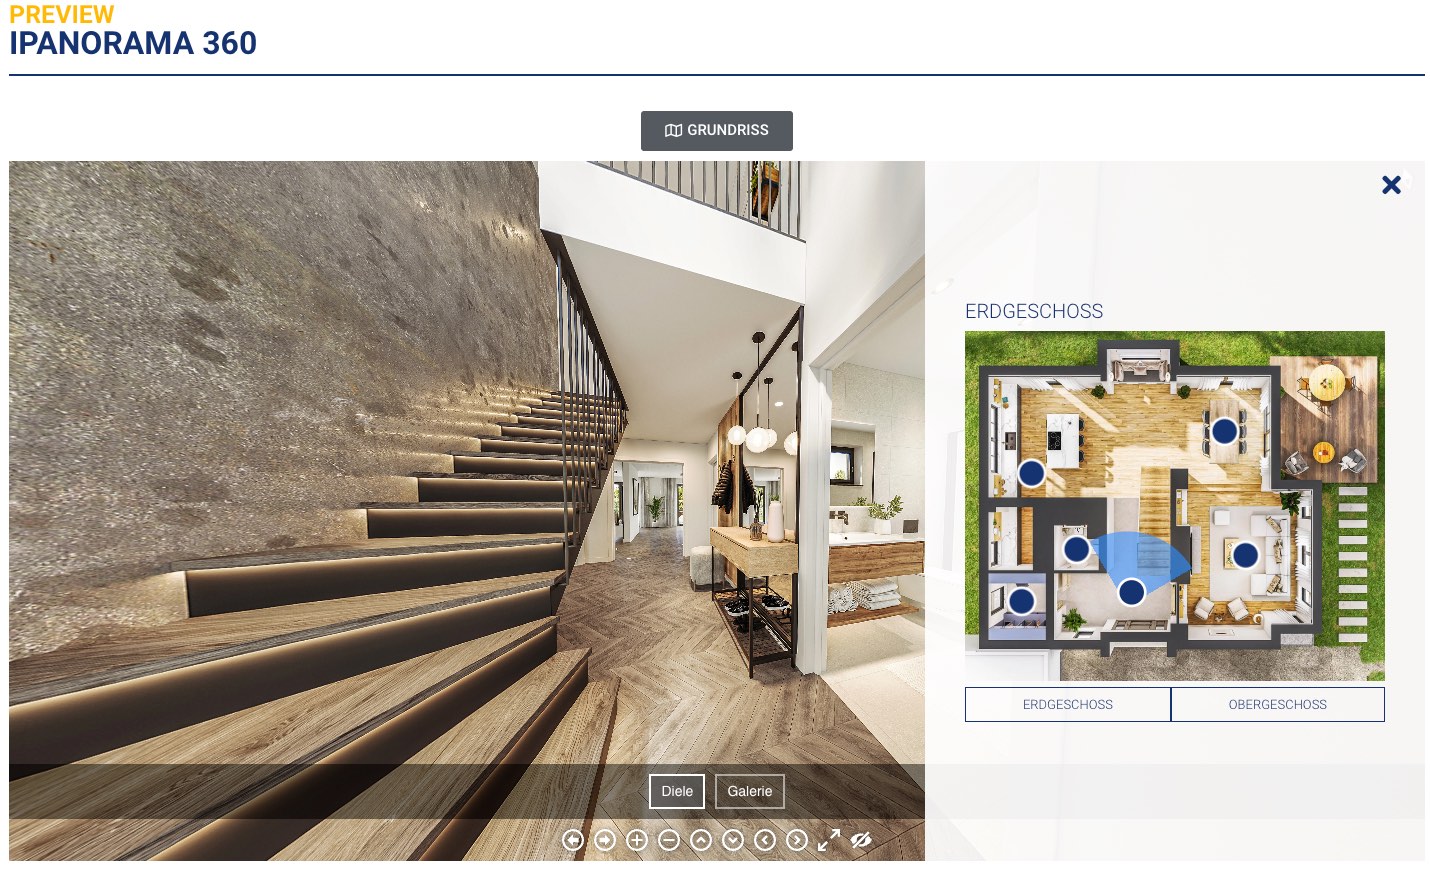
I have tested many different solutions for 360 panoramas in the past and many have been lacking in one or more areas. I always seem to be coming back to iPanorama 360 for my projects, due to its solid editor and support.
One major problem for iPanorama 360 has been the ability to attach an Arial-map / Floor-map to the panorama. Others tried to fill that void, but mostly failed on Mobile.
There are solutions out there that could be reused (Image Map Pro / ImageLinks ) and integrated with iPanorama 360.
I decided to build an image hotspot solution myself, that can also tie into iPanorama. I am building out all the things I need and more :)
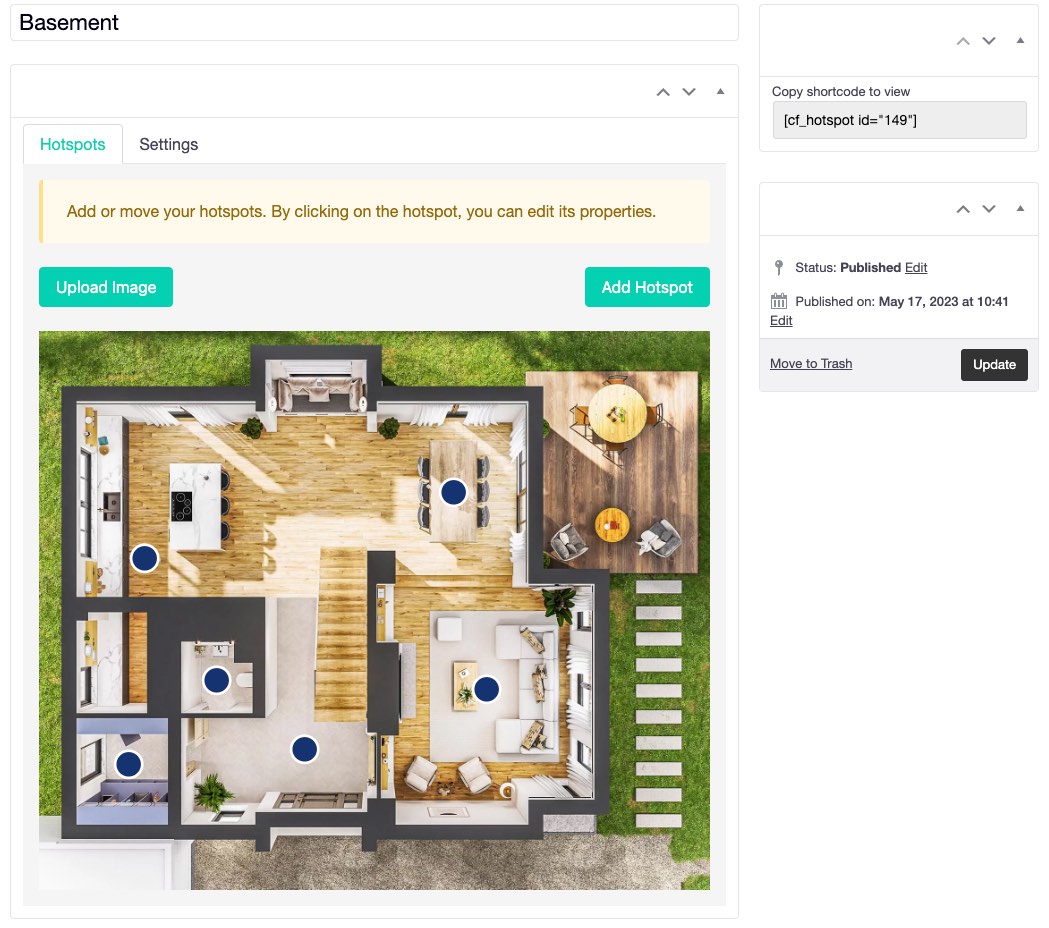
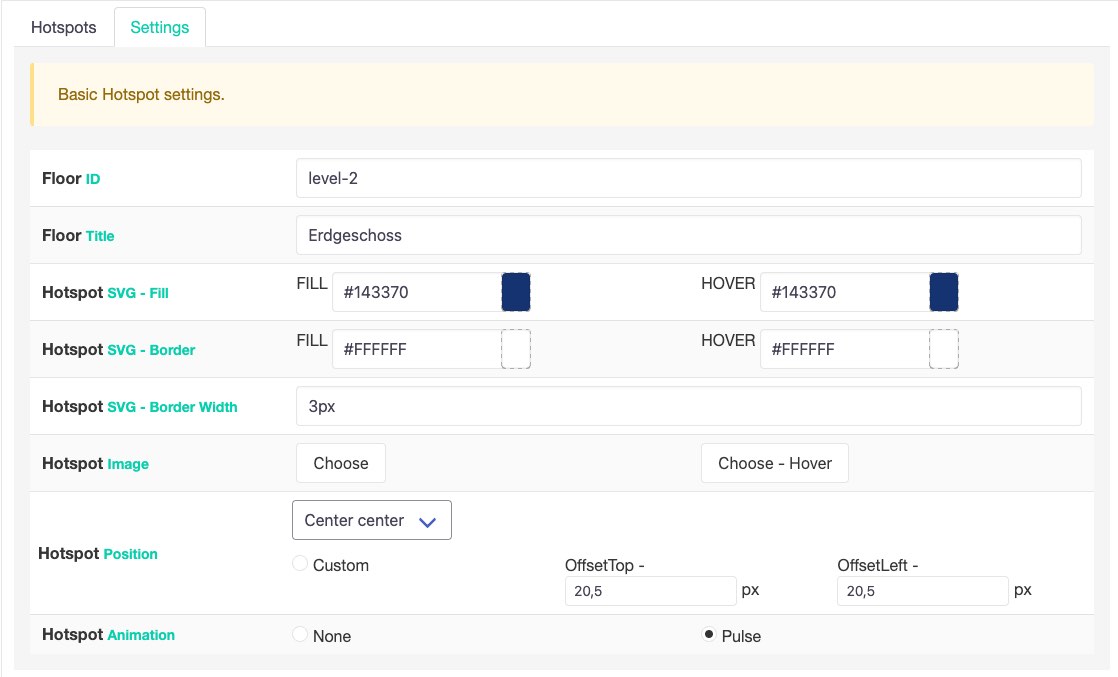
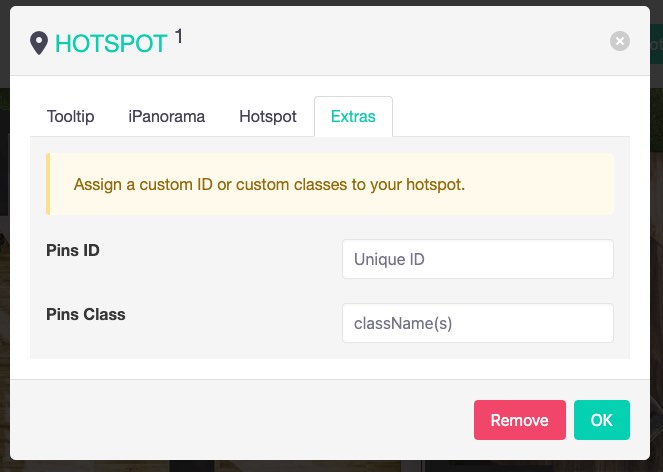
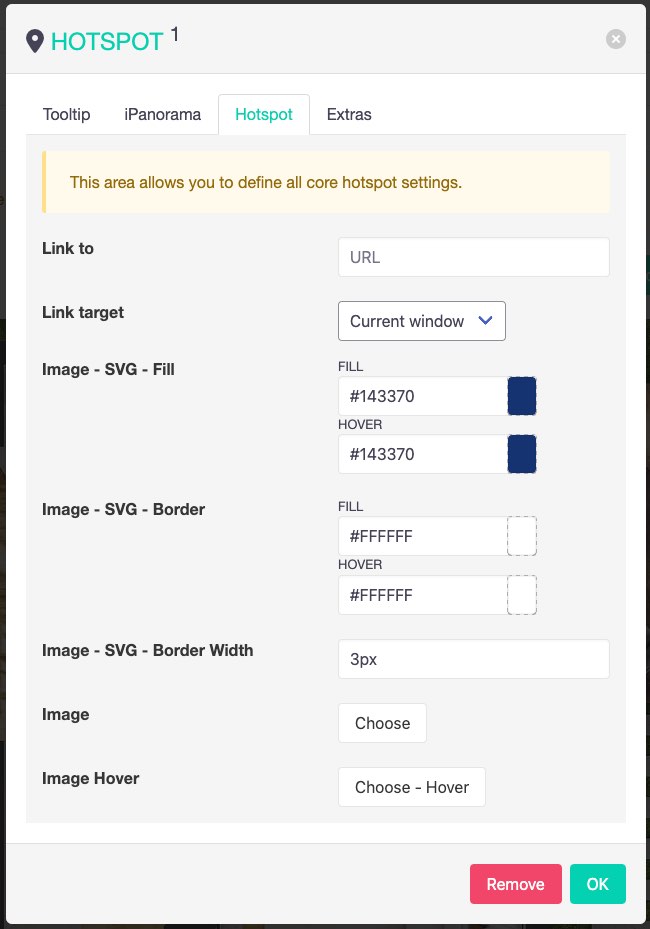
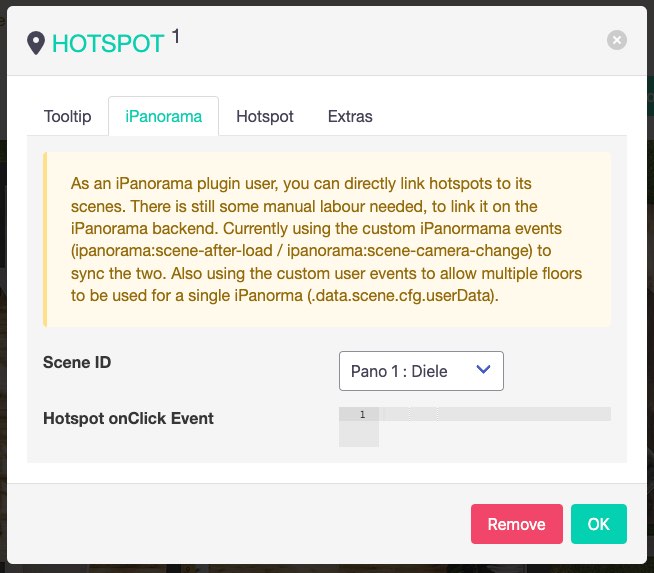
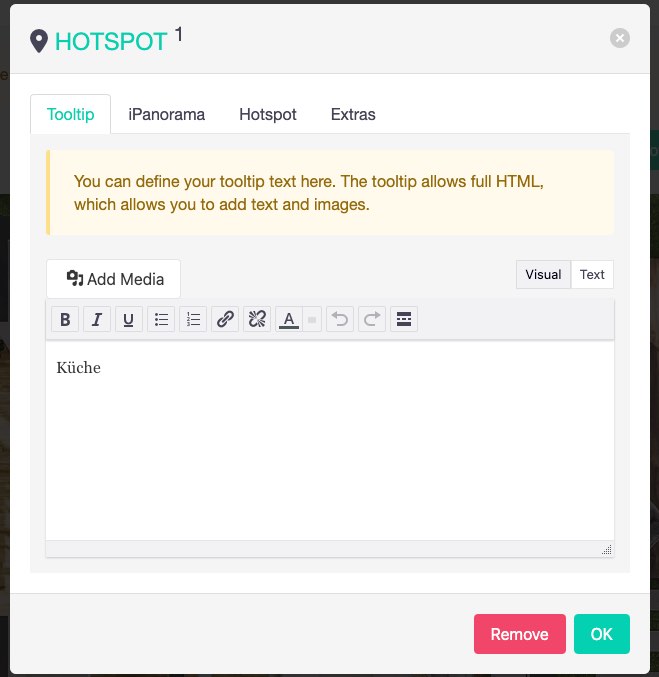
The first version is basically done and I will be using it for a client shortly. If you are interested, please feel free to get in touch. Will setup a demo page soon or link to the client using it ;)
Cheers

Typebot is a free and open-source platform that lets you create conversational apps and forms, which can be embedded anywhere on your website or mobile apps.
It provides various features like text, image, and video bubble messages, input fields for various data types, native integrations, conditional branching, URL redirections, beautiful animations, and customizable themes.
You can embed it as a container, popup, or chat bubble with the native JS library and get in-depth analytics of the results in real-time.
Typebot can be used in the Cloud (free tier available) or installed via Docker.
It drag & drop builder makes it amazingly fast to build your personal chatbot. It provides a ton of integrations (Google Analytics, Google Sheets, OpenAI, Zapier, Webhooks, Email, Chatwood) out of the box or you can connect other things via your own API Requests.
I have been a longtime user of RocketChat and build my own chatbots using Hubot or BotPress.
RocketChat
“Rocket.Chat is a free and open-source team chat platform that enables real-time communication between team members. It provides team messaging, audio and video conferencing, screen sharing, file sharing, and other collaboration features. It offers a familiar chat interface that makes it easy for teams to stay connected and collaborate effectively.
Rocket.Chat is highly customizable and extensible, with a large number of community-contributed plugins and integrations. It supports multiple platforms, including web, desktop, and mobile, making it accessible to teams regardless of their device or location. It also offers end-to-end encryption for secure communication, and compliance with various industry regulations such as HIPAA, GDPR, and others.”
Hubot
“Hubot is a popular open-source chatbot framework developed by GitHub. It allows developers to build and deploy custom chatbots that can automate tasks, integrate with various APIs, and enhance team communication and collaboration.
Hubot is built on Node.js and can be extended with various plugins and scripts, making it highly customizable and flexible. It comes with many built-in plugins, including integration with popular chat platforms like Slack, HipChat, and Campfire, as well as various APIs like Twitter, GitHub, and Google.
Hubot enables developers to build chatbots that can perform various tasks, such as scheduling meetings, deploying code, fetching data, and responding to user queries. It also provides a command-line interface for managing and interacting with the chatbot.”
Botpress
“Botpress is an open-source platform that allows you to build and deploy chatbots and conversational interfaces. It provides a user-friendly interface and a visual flow editor that allows you to create and manage your chatbot’s conversation flow. Botpress comes with many pre-built components and integrations, including natural language processing (NLP) engines, chat widgets, and webhooks, making it easy to build complex chatbots with advanced functionality.
Botpress offers features like machine learning-based NLP, conversational analytics, multi-language support, customizable themes, and a modular architecture that allows you to add custom functionalities with ease. It supports multiple channels, including web, Facebook Messenger, Slack, and WhatsApp, allowing you to reach your audience wherever they are.”
Typebot beats Botpress and could be the reason why I might be skipping RocketChat as well. Not sure I want to build an integration for RocketChat myself.
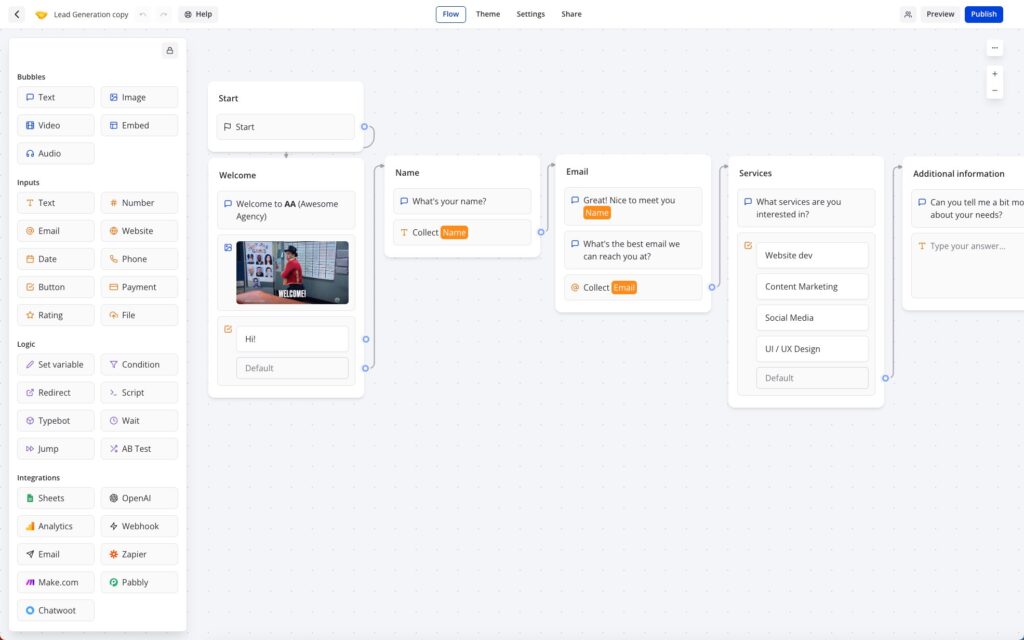
Base YAML Docker-Compose File to get you started. This will setup a Postgres instance, the typebot builder and typebot viewer.
|
1 2 3 4 5 6 7 8 9 10 11 12 13 14 15 16 17 18 19 20 21 22 23 24 25 26 27 28 29 30 31 32 33 34 35 36 37 38 |
version: '3.3' services: typebot-db: image: postgres:13 restart: always volumes: - db_data:/var/lib/postgresql/data environment: - POSTGRES_DB=typebot - POSTGRES_PASSWORD=typebot typebot-builder: image: baptistearno/typebot-builder:latest restart: always depends_on: - typebot-db ports: - '8080:3000' extra_hosts: - 'host.docker.internal:host-gateway' # See https://docs.typebot.io/self-hosting/configuration for more configuration options environment: - DATABASE_URL=postgresql://postgres:typebot@typebot-db:5432/typebot - NEXTAUTH_URL=<your-builder-url> - NEXT_PUBLIC_VIEWER_URL=<your-viewer-url> - ENCRYPTION_SECRET=<your-encryption-secret> - ADMIN_EMAIL=<your-admin-email> typebot-viewer: image: baptistearno/typebot-viewer:latest restart: always ports: - '8081:3000' # See https://docs.typebot.io/self-hosting/configuration for more configuration options environment: - DATABASE_URL=postgresql://postgres:typebot@typebot-db:5432/typebot - NEXT_PUBLIC_VIEWER_URL=<your-viewer-url> - ENCRYPTION_SECRET=<your-encryption-secret> volumes: db_data: |

IT Tools is an amazing docker image that gives you access to a ton of developer tools for different categories. All these are nicely wrapped into an intuitive web-interface.
The online tools can perform different functions. These include generating tokens, hashing text, generating UUIDs, encrypting and decrypting text, generating BIP39 passphrases, converting dates and times, converting numbers between different bases and converting Roman numerals to numbers and vice versa. Other tools listed include base64 encoders/decoders, color converters, HTML editors, user-agent parsers, crontab generators, Docker run to Docker compose converters, and various calculators for items such as IPv4 subnets, ETA and temperatures.
I am using it locally and added some of my own. These tools are a nice addition for developers to streamline their workflow and are tools you often search online anyway.
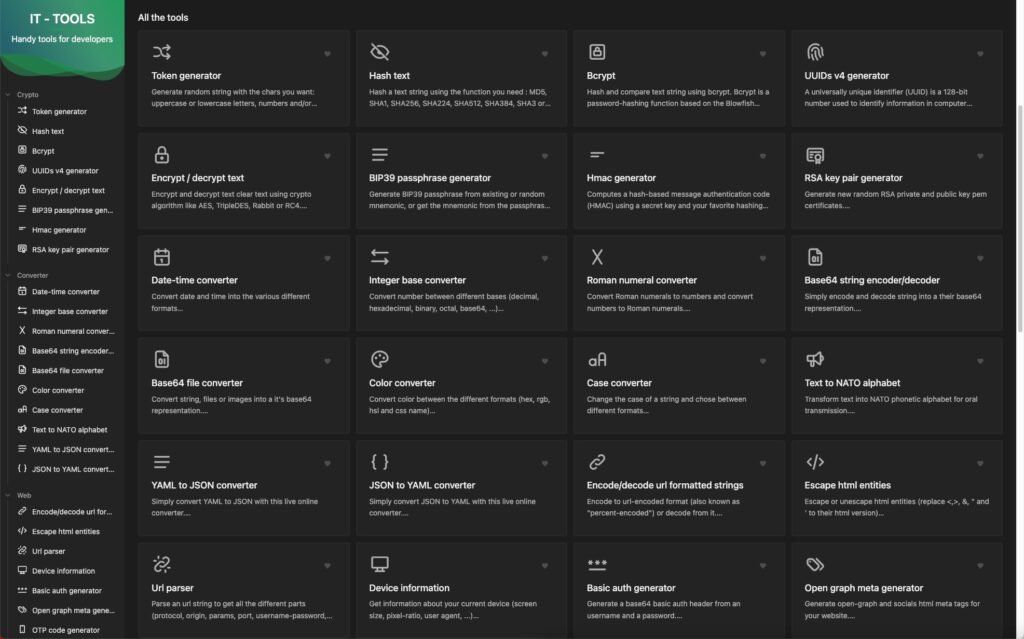
Docker is a containerization platform that allows you to create and manage containers for your applications. Not going into detail, but here the docker run command to get you started.
|
1 |
docker run -d --name it-tools --restart unless-stopped -p 8080:80 corentinth/it-tools:latest |

I am a huge Docker fan and run my own home and cloud server with it.
“Docker is a platform that allows developers to create, deploy, and run applications in containers. Containers are lightweight, portable, and self-sufficient environments that can run an application and all its dependencies, making it easier to manage and deploy applications across different environments. Docker provides tools and services for building, shipping, and running containers, as well as a registry for storing and sharing container images.
With Docker, developers can package their applications as containers and deploy them anywhere, whether it’s on a laptop, a server, or in the cloud. Docker has become a popular technology for DevOps teams and has revolutionized the way applications are developed and deployed.”
I am always looking for new ways to document the tools I use. This might help others to find interesting projects to enhance their own work or hobby life :)
I will have multiple series of this kind. I am starting with Docker this week, as it is at the core / a hub for many things I do. I often testdrive things locally, before deploying them to the cloud.
I am not concentrating on the installation of Docker itself, there are so many articles about that out there. You will have no problem to find help articles or videos detailing it for your platform.
Docker Compose and Docker CLI (Command Line Interface) are two different tools provided by Docker, although they are often used together.
Docker CLI is a command-line interface tool that allows users to interact with Docker and manage Docker containers, images, and networks from the terminal. It provides a set of commands that can be used to create, start, stop, and manage Docker containers, as well as to build and push Docker images.
Docker Compose, on the other hand, is a tool for defining and running multi-container Docker applications. It allows users to define a set of services and their dependencies in a YAML file and then start and stop the entire application with a single command. Docker Compose also provides a way to manage the lifecycle of the containers as a group, including scaling up and down the number of containers.
I prefer the use of Docker Compose, as it makes it easy to replicate and tweak a setup between different servers.
There are tools like $composerize, which allow you to easily transform a CLI command into a composer file. Also a nice way to easily combine multiple commands into a clean configuration.
Portainer is an open-source container management tool that provides a web-based user interface for managing Docker environments. With Portainer, users can easily deploy and manage containers, images, networks, and volumes using a graphical user interface (GUI) instead of using the Docker CLI. Portainer also provides features for monitoring container and system metrics, creating and managing container templates, and configuring and managing Docker Swarm clusters.
Portainer is designed to be easy to use and to provide a simple and intuitive interface for managing Docker environments. It supports multiple Docker hosts and allows users to switch between them easily from the GUI. Portainer also provides role-based access control (RBAC) to manage user access and permissions, making it suitable for use in team environments.
Portainer can be installed as a Docker container and can be used to manage both local and remote Docker environments. It is available in two versions: Portainer CE (Community Edition) and Portainer Business. Portainer CE is free and open-source, while Portainer Business provides additional features and support for enterprise users.
Portainer is my tool of choice, as it allows to create stacks. A stack is a collection of Docker services that are deployed and managed as a single entity. A stack is defined in a Compose file (in YAML format) that specifies the services and their configurations.
When a stack is deployed, Portainer creates the required containers, networks, and volumes and starts the services in the stack. Portainer also monitors the stack and its services, providing status updates and alerts in case of issues or failures.
As I said, its important for me to easily transfer a single container or stack to another server. The stack itself can be easily copied and reused. But do we easily export the setup of a current single docker file into a docker-compose file?
docker-autocompose to the rescue! This docker image allows you to generate a docker-compose yaml definition from a docker container.
|
1 |
docker pull ghcr.io/red5d/docker-autocompose:latest |
Export single or multiple containers
|
1 |
docker run --rm -v /var/run/docker.sock:/var/run/docker.sock ghcr.io/red5d/docker-autocompose <container-name-or-id> <additional-names-or-ids>... |
Export all containers
|
1 |
docker run --rm -v /var/run/docker.sock:/var/run/docker.sock ghcr.io/red5d/docker-autocompose $(docker ps -aq) |
This has been a great tool to also quickly backup all relevant container information. Apart from the persistent data, the most important information to quickly restore a setup if needed.
Backup , backup … backup! Learned my lesson, when it comes to restoring docker setups ;) Its so easy to forget little tweaks you did to the setup of a docker container.
Starting tomorrow …

Did consulting / optimisation & custom coding work for Pearlsmile® over the past few months.
Also helped with salvaging a bad server move, restoring the file / database and domain setup.
“For over 10 years Pearlsmile® has been offering cosmetic tooth whitening, dental and oral care products for home use. The company has also specialised in developing and producing professional equipment for tooth whitening.”

Archaeology Travel is an online travel guide for people who enjoy exploring the world’s pasts. Inspiration for where to go and what to see. Information and tips on how to get there and what tickets to buy. Making it possible for everyone to find or create their adventures in archaeology and history, from humanity’s earliest times to our more recent contemporary pasts.
Update 2023
Thomas and I have been working on a complete revamp of the website for more than a year. The complete content of multiple years has been cleaned and transplanted by Thomas. The website has been build up fresh from the ground. One big part of the new design and functionality, is the new itinerary system that we just opened up to the public in Beta. This allows members to collect POIs from all over the website and build their own itinerary for upcoming trips, favorites, bucket lists and more.
Changelog 2021
It has been a pleasure to work with founder Thomas Dowson so far. There is still some work ahead for both of us and looking forward to streamline the current and make room for new content.

BookStack is an open-source, web-based platform for organizing, storing, and sharing knowledge and documentation. It was developed to provide a user-friendly and intuitive interface for creating and managing knowledge bases, wikis, and other types of structured content.
BookStack allows users to create books, chapters, and pages, and to organize them hierarchically. Users can also add images, files, and links to their content, and collaborate with others by assigning roles and permissions. BookStack also supports full-text search, version control, and commenting, making it easy to find and update information.
BookStack is written in PHP and uses the Laravel framework, and it is available for free under the MIT License.
This is my internal homelab documentation system, I use it for private and client related content. Bookstack is fast, clean and well documented. It has really elevated the way I store and access important reminders / how-tos and documentation.
The system provides API access and has many ways to tweak it. Bookstack documentation.
CSV stands for “Comma-Separated Values”. It is a simple file format used to store tabular data, such as spreadsheets or databases, in plain text. In a CSV file, each line represents a row of data, and each column is separated by a comma (or sometimes a semicolon or tab).
There are always CSV exports or other data stored in CSV format, that i need quick access to sometimes.
Bookstack allows to add files to pages and insert links to them, but it does not embed or parse those files in any way. There are similar hacks to mine, this example allows to embed PDFs and here the main Hacks page.
We need something to parse the CSV file and something to display the information in a nice visual & flexible grid.
Included and linked CSV files look something like that in source.
|
1 2 3 |
<p id="bkmrk-samplecsvfile_2kb.cs"> <a href="https://bookstack.instance/attachments/12" target="_blank" rel="noopener">SampleCSVFile_2kb.csv</a> </p> |
The settings allow you to add custom code to your instance. Another option would be to tweak template files, but its easier to do these light tweaks using the header customizer.
This can be found under: https://bookstack.instance/settings/customization
Either link them externally or better use locally stored versions of these.
|
1 2 3 |
<script type="text/javascript" src="https://cdn.jsdelivr.net/npm/papaparse@5.4.0/papaparse.min.js"></script> <script src="https://unpkg.com/gridjs/dist/gridjs.umd.js"></script> <link href="https://cdn.jsdelivr.net/npm/gridjs/dist/theme/mermaid.min.css" rel="stylesheet" /> |
|
1 2 3 4 5 6 7 8 9 10 11 12 13 14 15 16 17 18 19 20 21 22 23 24 25 26 27 28 29 30 31 32 33 34 35 36 37 38 39 40 41 42 43 44 45 46 47 48 49 50 51 52 |
<script> function init() { document.querySelectorAll('.page-content a').forEach((node, i) => { let parent = node; let unique = i; let text = node.textContent let link = node.href if (text.search(".csv") !== -1) { let header; let rows = []; let json = JSON.parse(node.getAttribute("title")); Papa.parse(link, { download: true, header: false, complete: function(results) { results.data.map(function(data, index) { if(!!json){ let removeValFrom = json.remove_cols; data = data.filter(function(value, index) { return removeValFrom.indexOf(index) == -1; }) } if (index == 0) { header = data; } else { rows.push(data); } }); const csv_wrapper = document.createElement("div"); csv_wrapper.setAttribute("id", "csv_wrapper_" + unique_id); parent.after(csv_wrapper); new gridjs.Grid({ search: true, columns: header, data: rows, fixedHeader: true, sort: true, pagination: { limit: 6 } }).render(document.getElementById("csv_wrapper_" + unique_id)); } }); } }); } window.addEventListener('DOMContentLoaded', init); </script> |
Github: Will be adding more hacks, as I clean some of them up :)
You can use the title attribute to pass some config data, in JSON format. Currently only to strip columns, but will extend that a bit more for flexible usage ;)
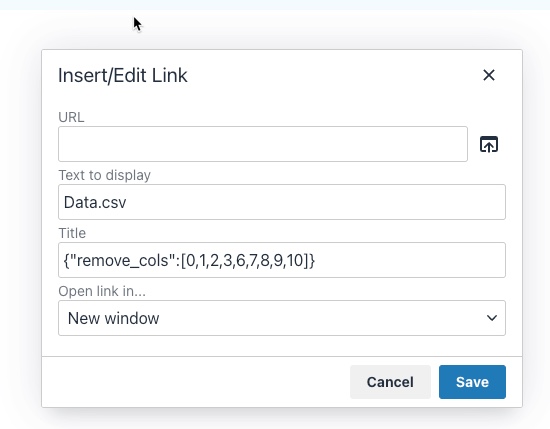
|
1 |
{"remove_cols":[0,1,2,3,6,7,8,9,10]} |
Should look something like that …
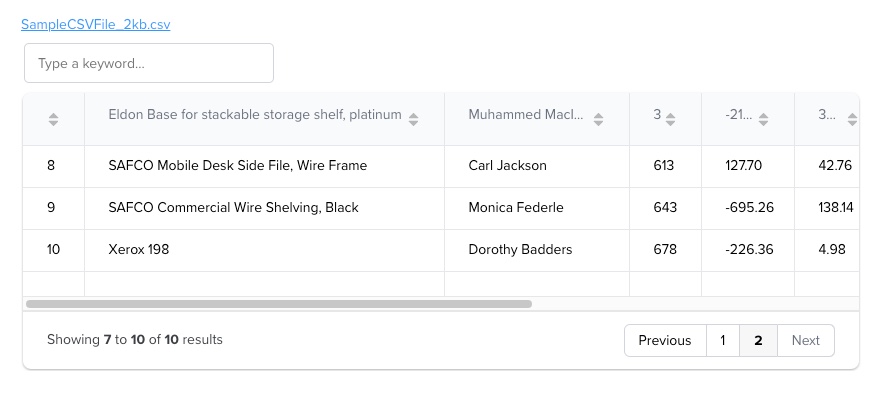
Enjoy coding …

In SEO (Search Engine Optimization), there is a concept called “E-A-T” which stands for “Expertise, Authoritativeness, and Trustworthiness”.
Google uses E-A-T as one of its many ranking factors to evaluate the quality of content on the web. Websites that consistently produce high-quality content that meets the E-A-T criteria are more likely to rank well in search engine results pages (SERPs).
E-A-T is not a specific algorithm or ranking factor that Google uses, but rather a framework or set of guidelines that Google’s quality raters use to evaluate the quality of content on the web. These quality raters assess the content using E-A-T as a benchmark, and their feedback helps Google improve its search algorithms.
It is especially important for content that falls under the category of YMYL (Your Money or Your Life), which includes content related to health, finance, legal, and other topics that can impact people’s well-being or financial stability. Google holds this type of content to a higher standard because inaccurate or misleading information can have serious consequences.
Building E-A-T for your website or content involves a multi-faceted approach that includes creating high-quality, informative, and engaging content, establishing your expertise and authority in your field, and building trust with your audience through transparency and honesty.
Some specific actions you can take to improve your website’s E-A-T include showcasing the expertise of your content creators, publishing authoritative and accurate content, providing clear and transparent information about your business, and building a positive online reputation through reviews, testimonials, and other forms of social proof.
It’s important to note that E-A-T is just one of many factors that Google uses to determine search rankings, and it’s not the only factor. Other factors that can influence search rankings include content relevance, website speed and performance, user experience, and backlinks.
Just another E, for Experience. 2023 Google wants to see that a content creator has first-hand, real-world experience with the topic discussed. Which means that content and there creators are becoming far more entwined. Further pushing the trend for authoritative quality content for audiences.
So back to a solid author bios, detailed author pages and all relevant links that detail an authors expertise. Thank you! Search is really shifting and things are changing rapidly. Real content is queen or king again :)
Enjoy coding …

“Übersicht” is a German word that means “overview” or “summary” in English. The name of the software was chosen because it allows users to have a quick overview of various information on their desktop. It’s also a play on words, because in German the name of the software can be translated as “super sight” which refers to the ability to have a lot of information at a glance.
Übersicht is a lightweight and powerful application that allows users to create and customize desktop widgets using web technologies such as HTML, CSS, and JavaScript. With Übersicht, you can create widgets that display information such as the weather, calendar events, system resource usage, and more. The widgets can be customized to display the information in any format and can be positioned anywhere on the desktop, allowing you to create a personalized and efficient workspace.
Übersicht widgets are created using a simple and user-friendly interface that allows you to preview and edit the widget’s code. The widgets are also highly customizable, allowing you to change the appearance and behavior of the widgets to suit your needs. Additionally, Übersicht widgets can be shared with other users, and there are a variety of widgets available for download from the developer’s website.
The application is open-source and free to use, and it’s also lightweight, it won’t affect your computer performance. Overall, Übersicht is a powerful and versatile tool for creating custom desktop widgets on macOS.
There are several other tools similar to Übersicht that allow you to create custom desktop widgets. Some of the most popular alternatives include:
With many external systems in play, its always crucial to keep an eye on things. I have build nice dashboards, using Grafana, InfluxDB, NetData and Prometheus. But they are either displayed in a browser window or on a separate screen.
If you have 2 / 3 monitors or an ultra-wide screen, you have a lot of Desktop real-estate you can use.
That is something that I have been looking at for years, but only tried for a short period of time. This year I want to really build out desktop and menu widgets , that help me to get an even better overview of things and help reduce repetitive tasks.
I will share links to things I like and share access to the widgets I build myself or tweaked.
These are the current things that are in progress or planned.
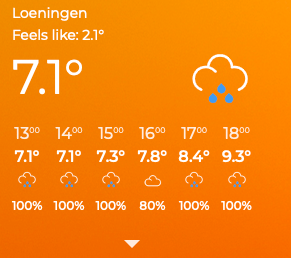
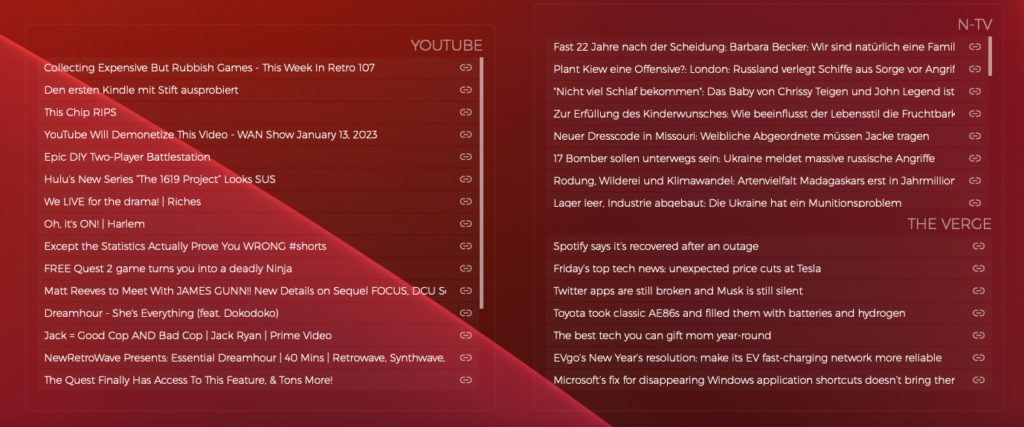

Nothing to share yet ….