
Create a system cron for WordPress, that is accessible and can be easily tweaked to provide more details. Here some basic information about crons and the tools I am going to use …
In WordPress, the term „cron“ refers to the system used for scheduling tasks to be executed at predefined intervals. The WordPress cron system allows various actions to be scheduled, such as publishing scheduled posts, checking for updates, sending email notifications, and running other scheduled tasks.
WordPress includes its own pseudo-cron system, which relies on visitors accessing your site. When a visitor loads a page on your WordPress site, WordPress checks if there are any scheduled tasks that need to be executed. If there are, it runs those tasks. This system works well for most sites, but it has limitations, particularly for low-traffic sites or sites that need precise scheduling.
To overcome these limitations, WordPress also provides the option to use a real cron system. With a real cron system, tasks are scheduled and executed independently of visitor traffic. This can be more reliable and precise than relying on visitors to trigger cron tasks.
To set up a real cron system for WordPress, you typically need to configure your server’s cron job scheduler to trigger the wp-cron.php file at regular intervals. This file handles the execution of scheduled WordPress tasks.
WP Crontrol is a solid UI, to list and see whats happening in the background.
WP-CLI (WordPress Command Line Interface) is a powerful command-line tool that allows developers and administrators to interact with WordPress websites directly through the command line, without needing to use a web browser.
It provides a wide range of commands for managing various aspects of a WordPress site, such as executing crons / scheduled tasks, installing plugins, updating themes, managing users, and much more.
Most WordPress hosts have it preinstalled. Installation
Test CRON
|
1 2 3 |
# Test WP Cron spawning system $ wp cron test Success: WP-Cron spawning is working as expected. |
Run CRON
|
1 2 3 4 5 6 7 8 9 10 11 12 13 14 15 |
# Schedule a new cron event $ wp cron event schedule cron_test Success: Scheduled event with hook 'cron_test' for 2024-01-31 10:19:16 GMT. # Run all cron events due right now $ wp cron event run --due-now Success: Executed a total of 2 cron events. # Delete all scheduled cron events for the given hook $ wp cron event delete cron_test Success: Deleted 2 instances of the cron event 'cron_test'. # List scheduled cron events in JSON $ wp cron event list --fields=hook,next_run --format=json [{"hook":"wp_version_check","next_run":"2024-01-31 10:15:13"},{"hook":"wp_update_plugins","next_run":"2016-05-31 10:15:13"},{"hook":"wp_update_themes","next_run":"2016-05-31 10:15:14"}] |
ntfy (pronounced notify) is a simple HTTP-based pub-sub notification service. It allows you to send notifications to your phone or desktop via scripts from any computer, and/or using a REST API.
You can host your own docker instance or use the hosted solution.
The documentation is detailed and offers many ways to tweak the resulting notification.
|
1 2 |
/** Disable virtual cron in wp-config.php */ define('DISABLE_WP_CRON', true); |
|
1 |
0 13 * * * wget -q -O - https://domain.com/wp-cron.php?doing_wp_cron >/dev/null 2>&1 |
I am not showing you how to create a system cron, that can vary depending on your hosting provider. Some of you will just setup / modify the crontab themselves. So here an example of how I use it these days …
|
1 |
*/30 * * * * OUTPUT=$(/bin/bash -c "/path/to/wp-cli/wp --path=/path/to/wp/install/ cron event run --url=https://your-website.com/if/multisite/ --due-now" 2>&1) && curl -u %ntfy_token% -H "Filename:your_cron_output.txt" -H "Title:Your Cron" -d "$OUTPUT" "https://ntfy.server.com/topic" |
Lets dissect this :)
See example usage on crontab.guru.
|
1 |
*/30 * * * * |
Im using a variable to capture the output, allowing me to pass it to ntfy.
|
1 |
OUTPUT=$() |
Use bash to launch wp-cli, passing in required parameters to make sure the right website is targeted.
I am using –due-now to only launch those schedules that are actually pending. >/dev/null 2>&1 prevents any emails to be send for this cron job, it redirects the error stream into the output stream. Always helpful to remove it for the first testdrive.
>/dev/null: redirects standard output (stdout) to /dev/null
2>&1: redirects standard error (2) to standard output (1), which then discards it as well since standard output has already been redirected :)
|
1 |
/bin/bash -c "/path/to/wp-cli/wp --path=/path/to/wp/install/ cron event run --url=https://your-website.com/if/multisite/ --due-now" >/dev/null 2>&1 |
This part sends the output to a ntfy instance / topic.
|
1 2 3 4 5 |
curl -u %ntfy_token% -H "Filename:your_cron_output.txt" -H "Title:Your Cron" -d "$OUTPUT" "https://ntfy.server.com/topic" |
You can set many other things as well, like tags, images …. Check the documentation about publishing for more options. You can even redirect to an email account ;)
|
1 2 3 |
if ( defined( 'WP_CLI' ) && WP_CLI ) { // Do WP-CLI specific things. } |
|
1 2 3 4 |
if ( defined( 'DOING_CRON' ) ) { // Do something } |
Enjoy coding …
Alex

Slowly getting into the 2024 spirit. 3 projects coming to a close this month and looking forward to a couple of new smaller projects in between.
Redoing my whole website this year, so will slowly transition and move content …
… im currently testdriving or expanding upon!
Yes I do, either via a standard / multisite installation or headless. Not reinventing the wheel for everything ;) Have done some amazing integrations using just the Rest API layer last year.
Also still enjoying creating multi-lingual websites using WPML.
When it comes to templating, I am doing pure custom layouts using Timber, Gutenberg or Elementor. The client decides what he wants and I deliver ;)
Love my local open source stack. Tried paid solutions, but rather not spend money and enjoy the rapid fire of new open source models ;)
Have a good start into 2024 and enjoy coding.
Alex

This has been a busy and interesting year. I am always looking forward to new challenges and this year really had some nice puzzles to solve ;)
2023 has brought us „AI“ in all its glory, for content creation and in many development areas. There is no way around it and no way to stop the current revolution. Either we adapt or parish as a developer or content creator.
I have never been a bloom and doom person. If I was, I would no longer be working as a fullstack developer.
LM Studio, ComfyUI and invokeAI, are only a part of the local tools I have been experimenting with. I have always set a side a day during my week to play with new tools or expand my knowledge.
New clients, new connections, old friends and thrilling puzzles :)
Its always difficult to find time to work on my own tools, website and experiments. I really hope that I can set aside a bit more for this 2024.
I wish you all Happy Holidays and a joyful transition into 2024.
Keep on coding!
Alex

Artificial intelligence (AI) has revolutionized the way we interact with images, and the current AI image solutions are a testament to this. AI image solutions are applications of AI that can identify, classify, and manipulate images with remarkable accuracy and speed. With the rise of deep learning and computer vision, AI image solutions have become increasingly sophisticated, and their applications have expanded to fields such as healthcare, finance, entertainment, and more. Some of the most prominent AI image solutions and their applications.
Image recognition is the process of identifying and classifying objects, people, or other elements in an image. AI-powered image recognition solutions use deep learning algorithms to recognize images with high accuracy. Image recognition is widely used in various fields, including healthcare, security, and retail. For example, in healthcare, AI image solutions are used to analyze medical images such as X-rays and MRIs to detect diseases and conditions such as cancer, brain injuries, and more. In security, AI-powered image recognition solutions are used to identify faces, license plates, and other elements in surveillance videos. In retail, AI image solutions are used to identify and classify products and improve inventory management.
Object detection is a subset of image recognition that involves detecting the location of specific objects in an image. AI-powered object detection solutions can identify and locate objects in an image with high accuracy. Object detection is used in various fields, including self-driving cars, security, and e-commerce. For example, in self-driving cars, AI image solutions are used to detect pedestrians, traffic lights, and other objects on the road. In security, AI-powered object detection solutions are used to identify suspicious behavior and detect objects such as weapons and explosives. In e-commerce, AI image solutions are used to detect and locate products in images, improving search and recommendation algorithms.
Image segmentation is the process of dividing an image into multiple segments or regions based on specific criteria. AI-powered image segmentation solutions use deep learning algorithms to identify different objects and elements in an image and segment them accordingly. Image segmentation is widely used in various fields, including healthcare, entertainment, and transportation. For example, in healthcare, AI image solutions are used to segment medical images such as CT scans and MRIs to aid in diagnosis and treatment. In entertainment, AI-powered image segmentation solutions are used to create special effects and manipulate images in movies and games. In transportation, AI image solutions are used to segment images of roads and traffic to aid in autonomous driving.
Image generation is the process of creating new images using AI algorithms. AI-powered image generation solutions can generate highly realistic images based on specific inputs, such as text descriptions or reference images. Image generation is used in various fields, including art, fashion, and advertising. For example, in art, AI image solutions are used to generate unique and creative designs and artworks. In fashion, AI-powered image generation solutions are used to create new designs and prototypes. In advertising, AI image solutions are used to generate highly realistic product images and visualizations.
AI image solutions are transforming the way we interact with images and are being used in various fields to improve efficiency, accuracy, and creativity. From image recognition and object detection to image segmentation and generation, AI image solutions are increasingly sophisticated and capable. As AI technology continues to evolve, we can expect to see more applications of AI image solutions in the future, and they will undoubtedly play an essential role in many industries.
Some of the tools are already used in new ways, to help reconstruct or understand archaeology dig sites. They help analyse genes and will help to discover new remedies or cures for illnesses in the future.
Even though many complain about the exponential growth of AI, it brings so many positive angels into the mix, allowing us to fix and elevate our lives. Sadly change often comes at a cost, but it lies in our hands to direct and secure AI technology to help and not destroy lives.

I had the chance this year to meetup with my client Thomas Dowson from „Archaeology Travel Media“ at the Travel Innovation Summit in Seville.
Over the past 2 years we have been revamping all the content from archaeology-travel.com and integrated a sophisticated travel itinerary builder system into the mix. We are almost feature complete and are currently fine-tuning the system. New explorers are welcome to signup and testdrive our set of unique features.
It was so nice to finally meet the whole team in person and celebrate what we have accomplished together so far.
Directly taken from the front-page :)
„EXPLORE THE WORLD’S PASTS WITH ARCHAEOLOGY TRAVEL GUIDES, CRAFTED BY EXPERIENCED ARCHAEOLOGISTS & HISTORIANS
Whatever your preferred style of travel, budget or luxury, backpacker or hand luggage only, slow or adventure, if you are interested in archaeology, history and art this is an online travel guide just for you.
Here you will find ideas for where to go, what sites, monuments, museums and art galleries to see, as well as information and tips on how to get there and what tickets to buy.
Our destination and thematic guides are designed to assist you to find and/or create adventures in archaeology and history that suit you, be it a bucket list trip or visiting a hidden gem nearby.“
More Details
About
Mission & Vision
Code of Ethics
We are constantly expanding our set of curated destinations, locations and POIs. Our plan is it, to make it even easier to find unique places for your next travel experience.
We are also working on partnerships to enhance travel options and offer a even broader variety of additional content.
Looking forward to all the things to come, as well as to the continued exceptional collaboration between all team members.

First a bit of context :)
Translation within WordPress is based of Gettext. Gettext is a software internationalization and localization (i18n) framework used in many programming languages to facilitate the translation of software applications into different languages. It provides a set of tools and libraries for managing multilingual strings and translating them into various languages.
The primary goal of Gettext is to separate the text displayed in an application from the code that generates it. It allows developers to mark strings in their code that need to be translated and provides mechanisms for extracting those strings into a separate file known as a „message catalog“ or „translation template.“
The translation template file contains the original strings and serves as a basis for translators to provide translations for different languages. Translators use specialized tools, such as poedit or Lokalize, to work with the message catalog files. These tools help them associate translated strings with their corresponding original strings, making the translation process more manageable.
At runtime, Gettext libraries are used to retrieve the appropriate translated strings based on the user’s language preferences and the available translations in the message catalog. It allows applications to display the user interface, messages, and other text elements in the language preferred by the user.
Gettext is widely used in various programming languages, including C, C++, Python, Ruby, PHP, and many others. It has become a de facto standard for internationalization and localization in the software development community due to its flexibility and extensive support in different programming environments.
WordPress uses dedicated language files to store translations of your strings of text in other languages. Two formats are used:
There has been a discussion for years, if it makes sense to cache mo-files, to speedup WordPress when multiple languages are in use. Discussion of the WordPress Core team.
There have been a couple of plugins trying to fix this and prevent reloading of language files on every pageload.
Most of these use transients in your database and object caches if active.
Well it all depends on the amount of language files and your infrastructure. This load/parse operation is quite CPU-intensive and does spend quite a significant amount of time.
I have decided, not to bother with it in the past :) But I am always looking for ways to speed up multi-lingual websites, as that is my daily bread & butter ;) Checkout Index WP MySQL For Speed & Index WP Users For Speed, which optimizes the MySQL Indexes for optimal speed. That change, really does make a bit difference!
One thing that can help to speed up things, is to use the native gettext extension and not the WordPress integration of it. This will indeed help speedup translation processing and help big multilingual websites.
Native Gettext for WordPress by Colin Leroy-Mira, provides just that.
Create a must use plugin and add this:
|
1 2 3 |
<?php /** Plugin Name: Disable Gettext */ add_filter('override_load_textdomain','__return_true'); |
This will prevent any .mo file from loading.
Please consider the performance impact. Read about it at the main documentation.
|
1 2 3 4 5 6 7 8 9 10 11 12 13 14 15 16 17 18 19 20 21 |
<?php /** * Change text strings * * @link http://codex.wordpress.org/Plugin_API/Filter_Reference/gettext */ function my_text_strings( $translated_text, $text, $domain ) { switch ( $translated_text ) { case 'Sale!' : $translated_text = __( 'Clearance!', 'woocommerce' ); break; case 'Add to cart' : $translated_text = __( 'Add to basket', 'woocommerce' ); break; case 'Related Products' : $translated_text = __( 'Check out these related products', 'woocommerce' ); break; } return $translated_text; } add_filter( 'gettext', 'my_text_strings', 20, 3 ); |
Enjoy ….

iPanorama 360 for WordPress is a specialized plugin that enables users to create and display interactive 360-degree virtual tours or panoramic images on WordPress websites. It extends the functionality of the WordPress content management system by providing a user-friendly interface and a range of features specifically tailored for creating and showcasing 360-degree content.
With iPanorama 360 for WordPress, you can upload panoramic images or sets of photographs and convert them into interactive virtual tours or panoramic sliders. The plugin offers customization options to adjust the appearance and behavior of the panoramas, such as controlling the speed of rotation, choosing navigation controls, adding hotspots, and incorporating multimedia elements like images, videos, or audio.
The plugin integrates seamlessly with WordPress, allowing you to embed the created virtual tours or panoramic images directly into your website pages or posts. You can also customize the tour settings, such as enabling or disabling auto-rotation, adjusting the initial zoom level, or defining the starting viewpoint.
iPanorama 360 for WordPress typically provides an intuitive visual editor that enables users to create and edit their virtual tours or panoramas using a drag-and-drop interface. This makes it easier to add hotspots, link to other panoramas or external content, and customize the appearance and functionality of the tour.
You can testdrive iPanorama 360 using the Lite version or get the Pro version. The only limitation for the Lite version, is the ability to only create one panorama.

I have tested many different solutions for 360 panoramas in the past and many have been lacking in one or more areas. I always seem to be coming back to iPanorama 360 for my projects, due to its solid editor and support.
One major problem for iPanorama 360 has been the ability to attach an Arial-map / Floor-map to the panorama. Others tried to fill that void, but mostly failed on Mobile.
There are solutions out there that could be reused (Image Map Pro / ImageLinks ) and integrated with iPanorama 360.
I decided to build an image hotspot solution myself, that can also tie into iPanorama. I am building out all the things I need and more :)
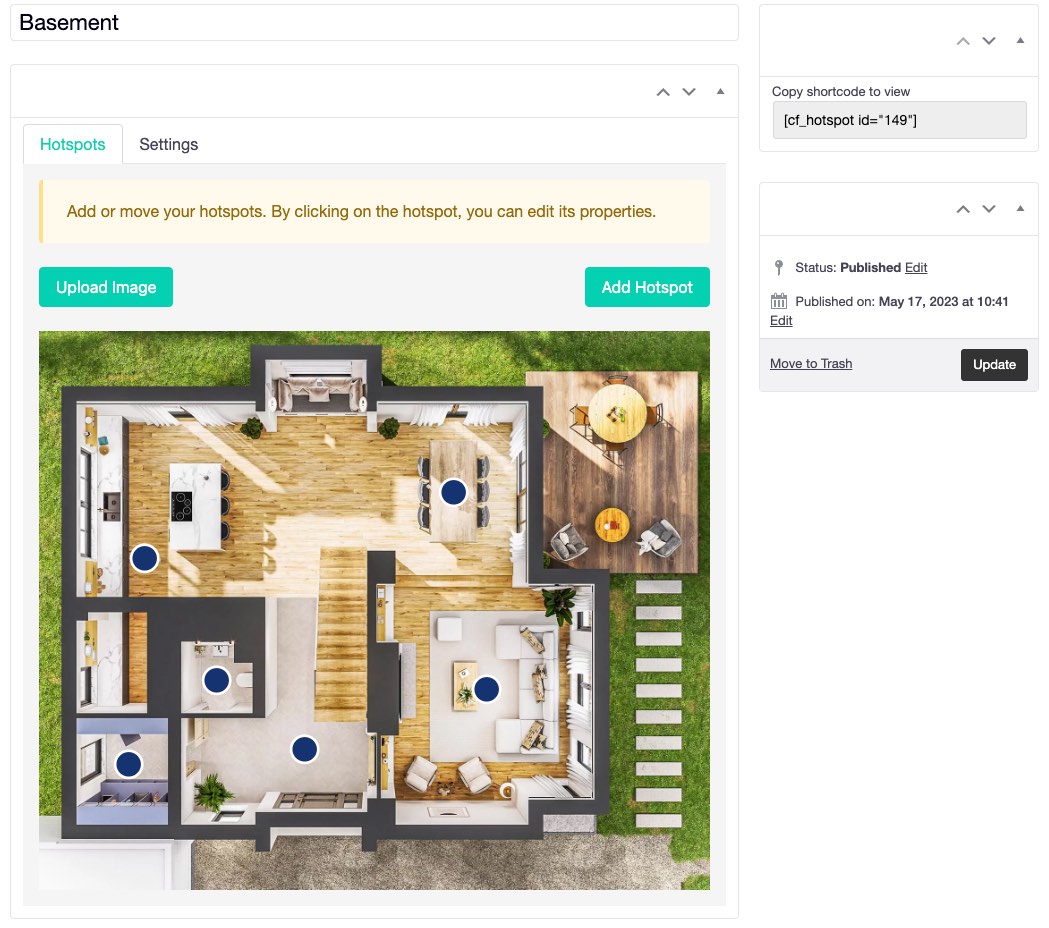
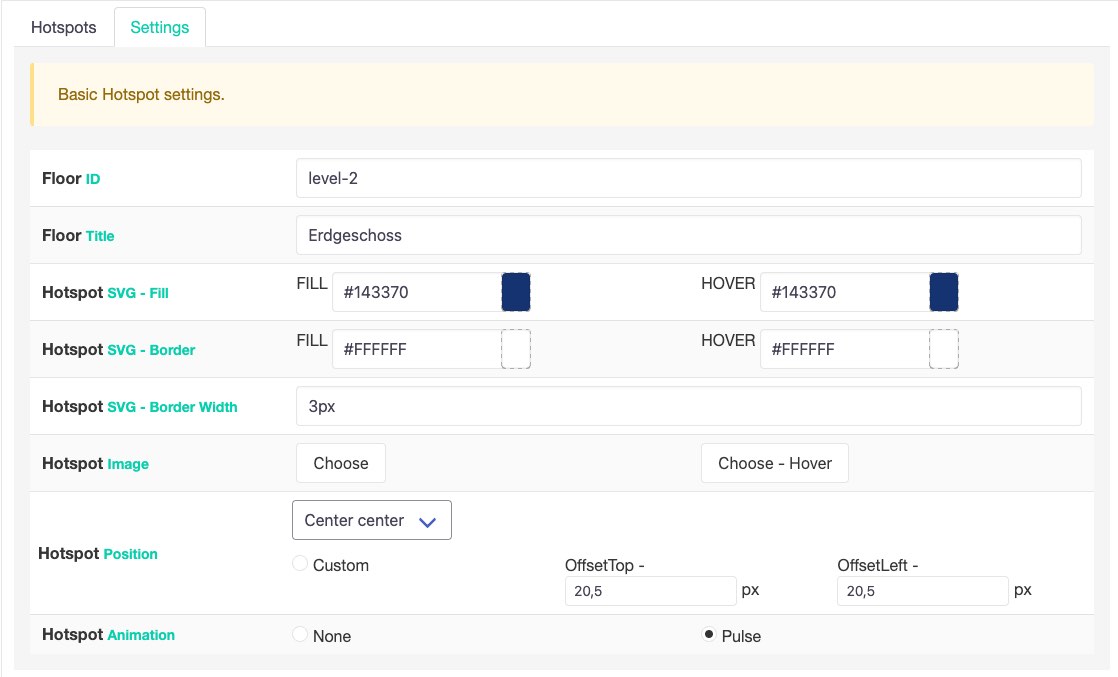
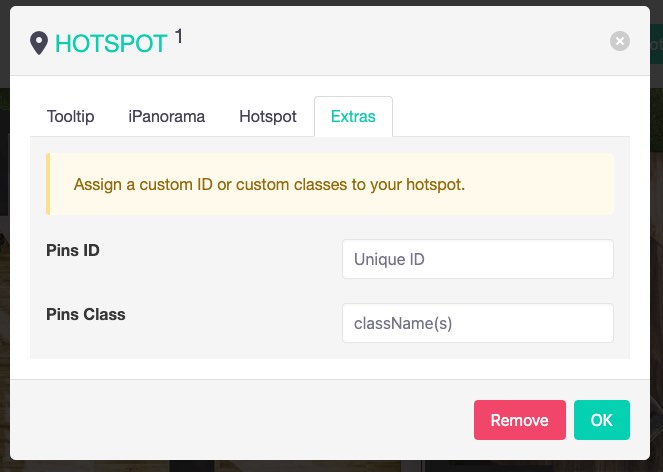
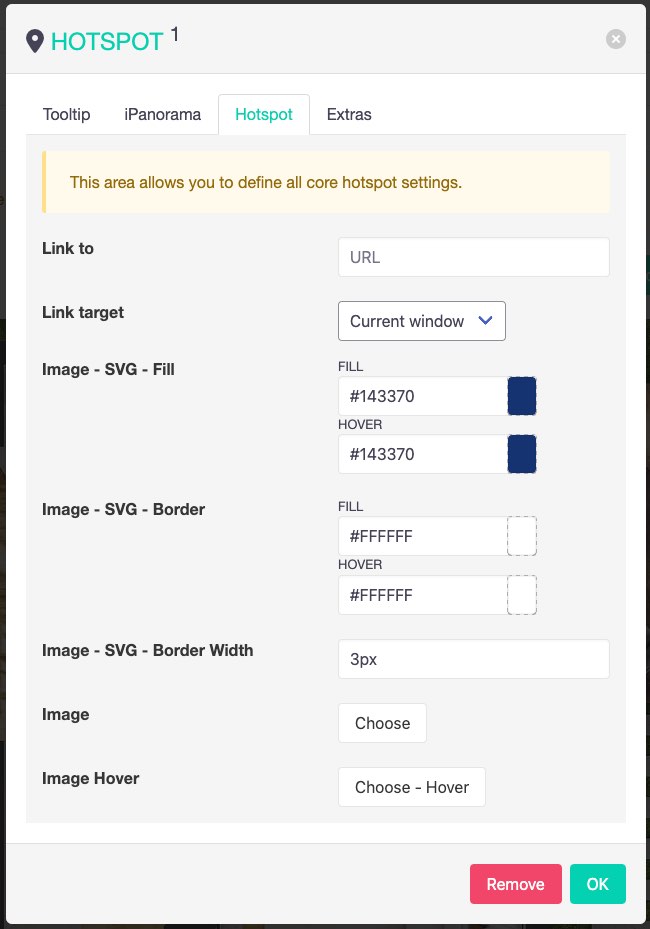
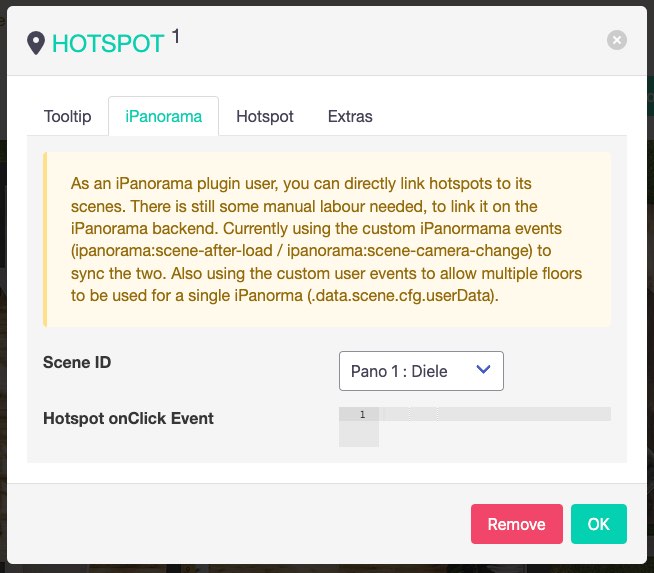
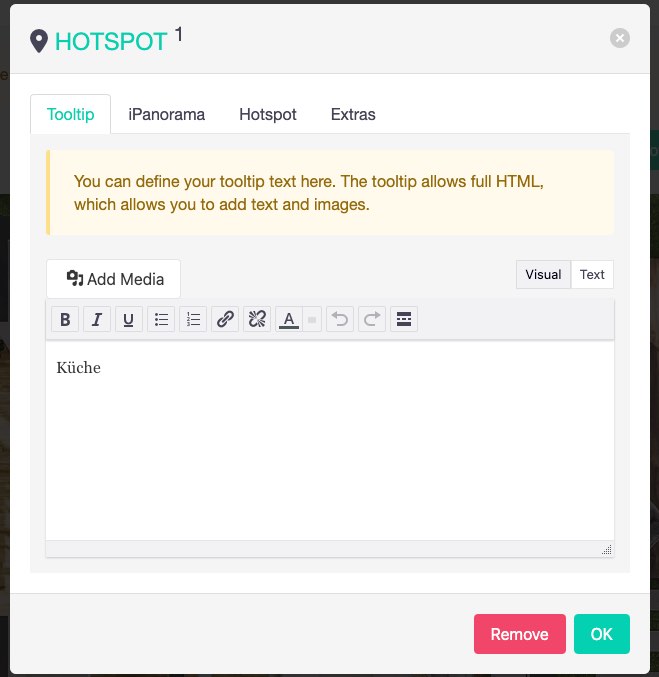
The first version is basically done and I will be using it for a client shortly. If you are interested, please feel free to get in touch. Will setup a demo page soon or link to the client using it ;)
Cheers

I am a huge Docker fan and run my own home and cloud server with it.
„Docker is a platform that allows developers to create, deploy, and run applications in containers. Containers are lightweight, portable, and self-sufficient environments that can run an application and all its dependencies, making it easier to manage and deploy applications across different environments. Docker provides tools and services for building, shipping, and running containers, as well as a registry for storing and sharing container images.
With Docker, developers can package their applications as containers and deploy them anywhere, whether it’s on a laptop, a server, or in the cloud. Docker has become a popular technology for DevOps teams and has revolutionized the way applications are developed and deployed.“
I am always looking for new ways to document the tools I use. This might help others to find interesting projects to enhance their own work or hobby life :)
I will have multiple series of this kind. I am starting with Docker this week, as it is at the core / a hub for many things I do. I often testdrive things locally, before deploying them to the cloud.
I am not concentrating on the installation of Docker itself, there are so many articles about that out there. You will have no problem to find help articles or videos detailing it for your platform.
Docker Compose and Docker CLI (Command Line Interface) are two different tools provided by Docker, although they are often used together.
Docker CLI is a command-line interface tool that allows users to interact with Docker and manage Docker containers, images, and networks from the terminal. It provides a set of commands that can be used to create, start, stop, and manage Docker containers, as well as to build and push Docker images.
Docker Compose, on the other hand, is a tool for defining and running multi-container Docker applications. It allows users to define a set of services and their dependencies in a YAML file and then start and stop the entire application with a single command. Docker Compose also provides a way to manage the lifecycle of the containers as a group, including scaling up and down the number of containers.
I prefer the use of Docker Compose, as it makes it easy to replicate and tweak a setup between different servers.
There are tools like $composerize, which allow you to easily transform a CLI command into a composer file. Also a nice way to easily combine multiple commands into a clean configuration.
Portainer is an open-source container management tool that provides a web-based user interface for managing Docker environments. With Portainer, users can easily deploy and manage containers, images, networks, and volumes using a graphical user interface (GUI) instead of using the Docker CLI. Portainer also provides features for monitoring container and system metrics, creating and managing container templates, and configuring and managing Docker Swarm clusters.
Portainer is designed to be easy to use and to provide a simple and intuitive interface for managing Docker environments. It supports multiple Docker hosts and allows users to switch between them easily from the GUI. Portainer also provides role-based access control (RBAC) to manage user access and permissions, making it suitable for use in team environments.
Portainer can be installed as a Docker container and can be used to manage both local and remote Docker environments. It is available in two versions: Portainer CE (Community Edition) and Portainer Business. Portainer CE is free and open-source, while Portainer Business provides additional features and support for enterprise users.
Portainer is my tool of choice, as it allows to create stacks. A stack is a collection of Docker services that are deployed and managed as a single entity. A stack is defined in a Compose file (in YAML format) that specifies the services and their configurations.
When a stack is deployed, Portainer creates the required containers, networks, and volumes and starts the services in the stack. Portainer also monitors the stack and its services, providing status updates and alerts in case of issues or failures.
As I said, its important for me to easily transfer a single container or stack to another server. The stack itself can be easily copied and reused. But do we easily export the setup of a current single docker file into a docker-compose file?
docker-autocompose to the rescue! This docker image allows you to generate a docker-compose yaml definition from a docker container.
|
1 |
docker pull ghcr.io/red5d/docker-autocompose:latest |
Export single or multiple containers
|
1 |
docker run --rm -v /var/run/docker.sock:/var/run/docker.sock ghcr.io/red5d/docker-autocompose <container-name-or-id> <additional-names-or-ids>... |
Export all containers
|
1 |
docker run --rm -v /var/run/docker.sock:/var/run/docker.sock ghcr.io/red5d/docker-autocompose $(docker ps -aq) |
This has been a great tool to also quickly backup all relevant container information. Apart from the persistent data, the most important information to quickly restore a setup if needed.
Backup , backup … backup! Learned my lesson, when it comes to restoring docker setups ;) Its so easy to forget little tweaks you did to the setup of a docker container.
Starting tomorrow …

In SEO (Search Engine Optimization), there is a concept called „E-A-T“ which stands for „Expertise, Authoritativeness, and Trustworthiness“.
Google uses E-A-T as one of its many ranking factors to evaluate the quality of content on the web. Websites that consistently produce high-quality content that meets the E-A-T criteria are more likely to rank well in search engine results pages (SERPs).
E-A-T is not a specific algorithm or ranking factor that Google uses, but rather a framework or set of guidelines that Google’s quality raters use to evaluate the quality of content on the web. These quality raters assess the content using E-A-T as a benchmark, and their feedback helps Google improve its search algorithms.
It is especially important for content that falls under the category of YMYL (Your Money or Your Life), which includes content related to health, finance, legal, and other topics that can impact people’s well-being or financial stability. Google holds this type of content to a higher standard because inaccurate or misleading information can have serious consequences.
Building E-A-T for your website or content involves a multi-faceted approach that includes creating high-quality, informative, and engaging content, establishing your expertise and authority in your field, and building trust with your audience through transparency and honesty.
Some specific actions you can take to improve your website’s E-A-T include showcasing the expertise of your content creators, publishing authoritative and accurate content, providing clear and transparent information about your business, and building a positive online reputation through reviews, testimonials, and other forms of social proof.
It’s important to note that E-A-T is just one of many factors that Google uses to determine search rankings, and it’s not the only factor. Other factors that can influence search rankings include content relevance, website speed and performance, user experience, and backlinks.
Just another E, for Experience. 2023 Google wants to see that a content creator has first-hand, real-world experience with the topic discussed. Which means that content and there creators are becoming far more entwined. Further pushing the trend for authoritative quality content for audiences.
So back to a solid author bios, detailed author pages and all relevant links that detail an authors expertise. Thank you! Search is really shifting and things are changing rapidly. Real content is queen or king again :)
Enjoy coding …

Productivity tools are software applications that help individuals and teams to manage their time and tasks more effectively. These tools can range from simple time tracking and task management apps to more advanced project management software.
The goal of productivity tools is to increase efficiency, organization, and accountability, allowing users to accomplish more in less time. They can be used for a variety of purposes, such as scheduling meetings, setting reminders, tracking progress, and delegating tasks. With the right productivity tools, individuals and teams can streamline their workflows, increase their productivity, and achieve their goals more easily.
I always use the first week of the year to evaluate my tools, workflows and software. I try to switch as little as possible within every 6 months, as I can not afford any downtime during my projects. This is the first year, that I am sharing a mostly complete list of things I use. Might be interesting for some of you.
Update: Not completely done yet, but close :)
Pretty flexible, when it comes to these tools. I am working with different agencies and customers, some prefer Adobe XD and some Figma.
I am a Mac and Linux guy. Windows only exists virtualised in my work environment ;)
Again trying to free myself from the Adobe subscription model. Might be the last year and than I can finally transition away ;)
Love to switch it up and again be flexible when it comes to customer preferences ;)
I am always staying busy, when it comes to programming languages. Have my side projects, that keep me exploring new stuff. My current top 8 ;)
„A homelab is a personal laboratory or workspace that is set up in a person’s home, typically for the purpose of experimenting with and learning about various technology or IT related topics. This can include things like building and configuring servers, experimenting with different operating systems and software, and learning about network and security concepts.“
I started my Homelab 2020 to allow more flexible workflows, to play with Docker setups, lower costs for external services and have full access to any server tool when ever needed. Allows me to quickly mirror customer setups or simulate possible upgrade paths. Quite addictive once you start building your own server. And the things you learn, can be easily replicated to remote servers, which I just did last year. I am starting to move services from a long-time static server to a scalable docker based foundation.
Will follow up on this section soon ….
Enjoy coding ….