Elementor Pro provides grid containers as an experimental feature. The options provided are limited, when it comes to native controls. The fine-tuning of the grid container items need to be done using Advanced CSS.
If you are looking for a simpler way without using Advanced CSS, I started building out a Grid Tweaker for Elementor.
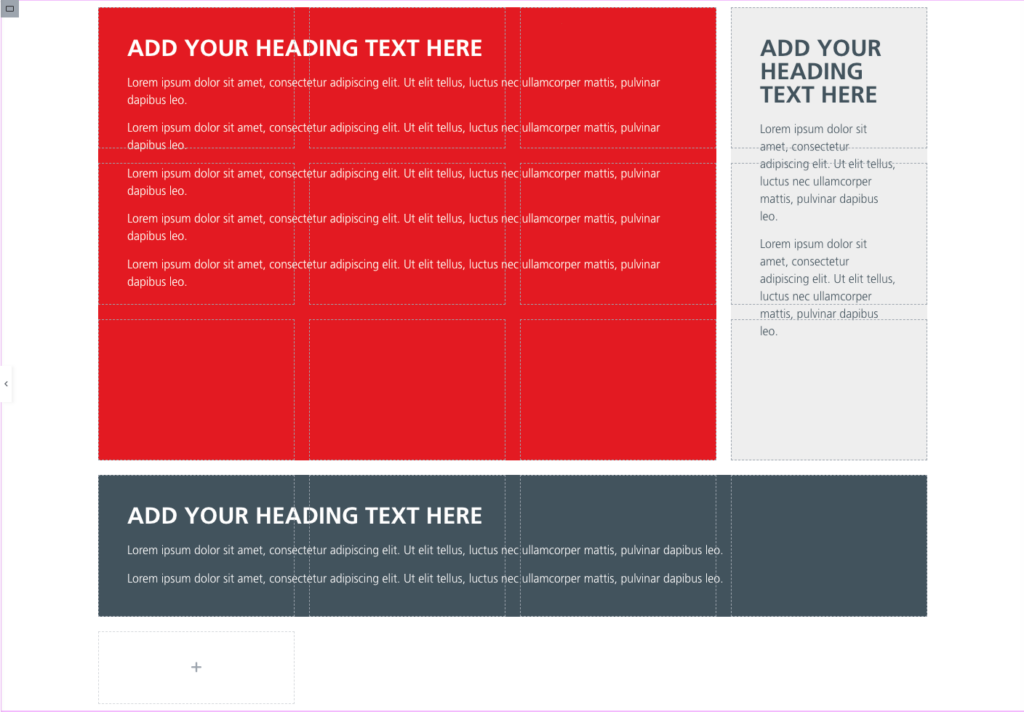
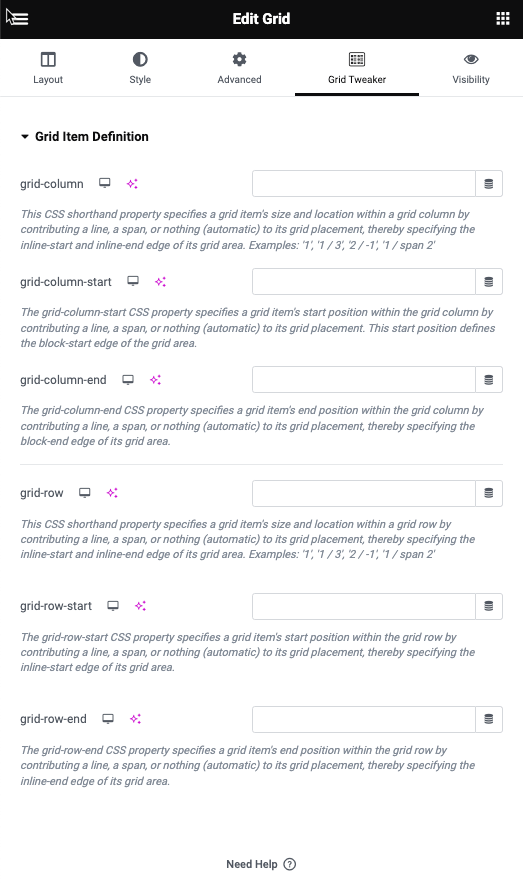
This will add a new tab to all containers and allows you to tweak grid-row / grid-column. Basic work is done. I am currently tweaking the controls a bit and will make it even easier ;)
Added an example template to import into Elementor. For those interested, the plugin can be freely downloaded from my Github repository. You can also do a search for „cubicfusion-grid-tweaker“ on Github.
Cheers and enjoy
Alex

I had the chance this year to meetup with my client Thomas Dowson from „Archaeology Travel Media“ at the Travel Innovation Summit in Seville.
Over the past 2 years we have been revamping all the content from archaeology-travel.com and integrated a sophisticated travel itinerary builder system into the mix. We are almost feature complete and are currently fine-tuning the system. New explorers are welcome to signup and testdrive our set of unique features.
It was so nice to finally meet the whole team in person and celebrate what we have accomplished together so far.
Directly taken from the front-page :)
„EXPLORE THE WORLD’S PASTS WITH ARCHAEOLOGY TRAVEL GUIDES, CRAFTED BY EXPERIENCED ARCHAEOLOGISTS & HISTORIANS
Whatever your preferred style of travel, budget or luxury, backpacker or hand luggage only, slow or adventure, if you are interested in archaeology, history and art this is an online travel guide just for you.
Here you will find ideas for where to go, what sites, monuments, museums and art galleries to see, as well as information and tips on how to get there and what tickets to buy.
Our destination and thematic guides are designed to assist you to find and/or create adventures in archaeology and history that suit you, be it a bucket list trip or visiting a hidden gem nearby.“
More Details
About
Mission & Vision
Code of Ethics
We are constantly expanding our set of curated destinations, locations and POIs. Our plan is it, to make it even easier to find unique places for your next travel experience.
We are also working on partnerships to enhance travel options and offer a even broader variety of additional content.
Looking forward to all the things to come, as well as to the continued exceptional collaboration between all team members.

„Übersicht“ is a German word that means „overview“ or „summary“ in English. The name of the software was chosen because it allows users to have a quick overview of various information on their desktop. It’s also a play on words, because in German the name of the software can be translated as „super sight“ which refers to the ability to have a lot of information at a glance.
Übersicht is a lightweight and powerful application that allows users to create and customize desktop widgets using web technologies such as HTML, CSS, and JavaScript. With Übersicht, you can create widgets that display information such as the weather, calendar events, system resource usage, and more. The widgets can be customized to display the information in any format and can be positioned anywhere on the desktop, allowing you to create a personalized and efficient workspace.
Übersicht widgets are created using a simple and user-friendly interface that allows you to preview and edit the widget’s code. The widgets are also highly customizable, allowing you to change the appearance and behavior of the widgets to suit your needs. Additionally, Übersicht widgets can be shared with other users, and there are a variety of widgets available for download from the developer’s website.
The application is open-source and free to use, and it’s also lightweight, it won’t affect your computer performance. Overall, Übersicht is a powerful and versatile tool for creating custom desktop widgets on macOS.
There are several other tools similar to Übersicht that allow you to create custom desktop widgets. Some of the most popular alternatives include:
With many external systems in play, its always crucial to keep an eye on things. I have build nice dashboards, using Grafana, InfluxDB, NetData and Prometheus. But they are either displayed in a browser window or on a separate screen.
If you have 2 / 3 monitors or an ultra-wide screen, you have a lot of Desktop real-estate you can use.
That is something that I have been looking at for years, but only tried for a short period of time. This year I want to really build out desktop and menu widgets , that help me to get an even better overview of things and help reduce repetitive tasks.
I will share links to things I like and share access to the widgets I build myself or tweaked.
These are the current things that are in progress or planned.
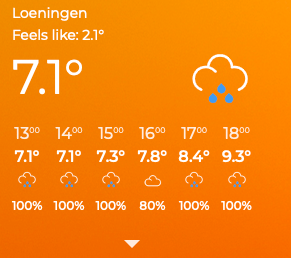
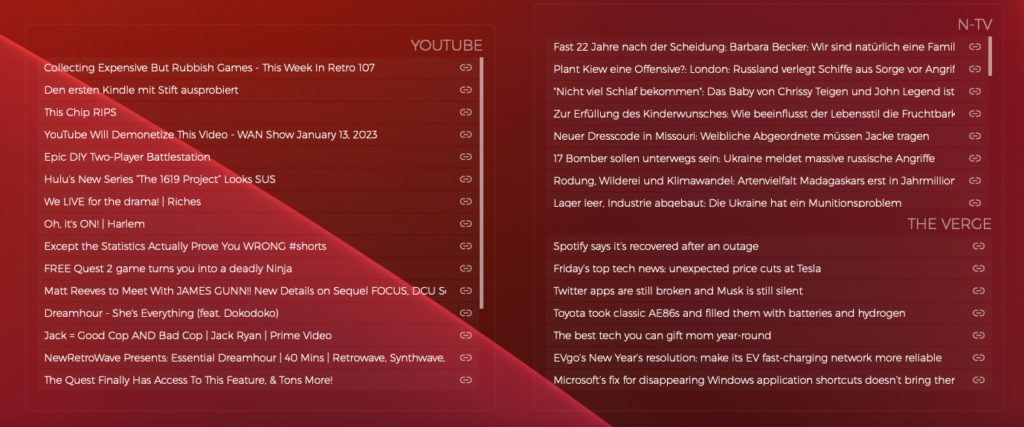

Nothing to share yet ….

Color correction is important to me and to the projects I do. Regularly calibrating your monitor is essential in order to create prints that accurately represents what you see on your monitor.
I have color-profiles (ICC – International Color Consortium) for different light conditions and I do recalibrate every few months, as the light output and colors degrade on my displays.
I am still using an old Spyder3 from datacolor for calibration, which is not really supported anymore. Hard to find working software for my Windows 10 machines and Mac M1.
To the rescue comes DisplayCAL, an Open Source calibration solution that allows you to calibrate your displays using even older calibration hardware.
ArgyllCMS – is an ICC compatible color management system, available as Open Source. This is requested by DisplayCAL to make the magic work. ( MAC M1 – Fork)
I have calibrated all machines with this and love it :)

This is not a tutorial, but more like sharing a nice geeky road-trip ;)
I have a pretty good understanding of the Youtube Data API, as I have actively used it on portalZINE TV in the past, to upload videos and dynamically link them to my local post-types.
For one of my latest customer projects (TYPEMYKNIFE / typemyknife.com), the task was a bit more complicated and the goal was to make it as future-proof as it can be with the Google APIs :)
Prerequisites / References to get you started:
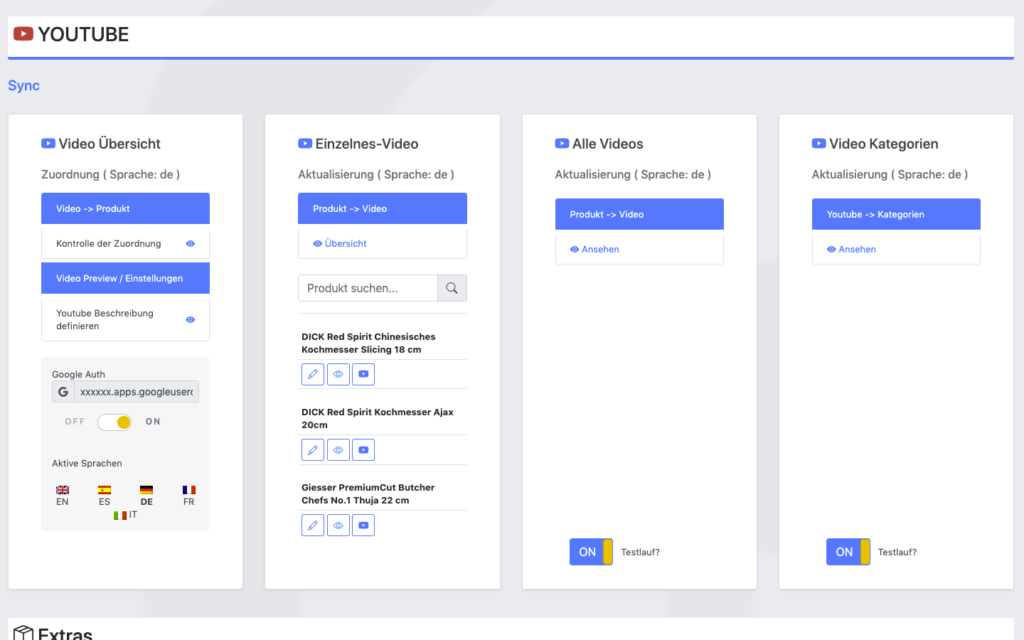
The goal for the setup was to actively synchronize WooCommerce products with linked / attached videos, with their source at Youtube.
As the website is multilingual, WPML integration is critical as well. And as Youtube allows localization of title and description, that can be added into the mix quiet easily in the future ;)
The following product attributes should be mirrored and optimised for Youtube:
The following attributes should be integrated into the description to enrich the Youtube description:
All of these attributes will be collected internally and assigned using a simple template system, which allows the customer to move parts around freely and freely layout the description for Youtube.
The following stats will be collected for review:
Youtube SEO
These are the relevant key aspects, that help to get your videos more views.
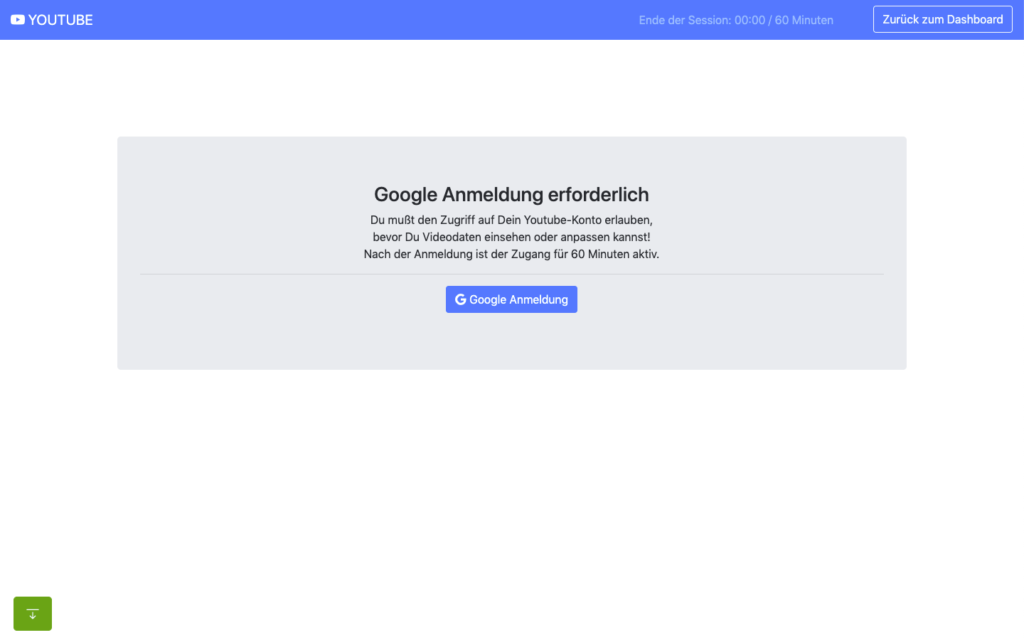
In the past access to the Youtube Data API was far easier and less limited, when it comes to offline / none expiring OAuth2 refresh tokens.
When you are building a server-side application that is only available to your customer or moderators, it makes no sense to run that app through the Google App verification. Your app will never be used in public.
The Youtube Data API and its scopes, are defined as sensitive and therefor require third-party security assessment for public access.
The scopes I am requesting are https://www.googleapis.com/auth/youtube.upload + https://www.googleapis.com/auth/youtube.
Because of that its far easier to just setup OAuth 2 in test mode and restrict access to your customer and specific additional accounts only (up to 100 test users allowed). What all these account need, is access to your own or Brand Youtube Channel.
Preparation in the Google Cloud Console:
A detailed description can be found here.
You can circumvent verification for the consent screen, by using an organisation setup at Google. Here some infos about that. With that setup offline refresh tokens should work fine.
Update: Just tried that, but wont work with a branded youtube account, even though the cloud user has admin access to it. Not giving up yet, but Google / Youtube really makes it difficult to just have a simple offline solution for specific tasks ;) BTW also forced the login hint, to make sure the right account is logged in : $client->setLoginHint(‚YourWoreksapceAccount‘); !
You might have heard of the „The League of Extraordinary Packages„. It is a group of developers who have banded together to build solid, well tested PHP packages using modern coding standards.
They also offer an OAuth2-client + OAuth2 Google extension that can be used.
On the server, the Google API PHP SDK can be easily integrated using Composer.
In my customer plugin I neatly separated all relevant areas in classes & traits:
You can check the expiry time of your access token by accessing:
https://www.googleapis.com/oauth2/v1/tokeninfo?access_token=YOUR_TOKEN„A Google Cloud Platform project with an OAuth consent screen configured for an external user type and a publishing status of „Testing“ is issued a refresh token expiring in 7 days.“ – Google
Basic Auth example from the SDK:
|
1 2 3 4 5 6 7 8 9 10 11 12 13 14 15 16 17 18 19 20 21 22 23 24 25 26 27 28 29 30 31 32 33 34 35 36 37 38 39 40 41 42 43 44 45 46 47 48 49 50 51 52 53 54 55 56 57 58 59 60 61 62 63 64 65 66 67 68 69 70 71 72 73 74 75 76 77 78 79 80 81 82 83 84 85 86 87 88 89 90 91 92 93 94 95 96 97 98 99 100 101 102 103 104 105 106 107 |
<?php // Call set_include_path() as needed to point to your client library. set_include_path($_SERVER['DOCUMENT_ROOT'] . '/directory/to/google/api/'); require_once 'Google/Client.php'; require_once 'Google/Service/YouTube.php'; session_start(); /* * You can acquire an OAuth 2.0 client ID and client secret from the * {{ Google Cloud Console }} <{{ https://cloud.google.com/console }}> * For more information about using OAuth 2.0 to access Google APIs, please see: * <https://developers.google.com/youtube/v3/guides/authentication> * Please ensure that you have enabled the YouTube Data API for your project. */ $OAUTH2_CLIENT_ID = 'XXXXXXX.apps.googleusercontent.com'; $OAUTH2_CLIENT_SECRET = 'XXXXXXXXXX'; $REDIRECT = 'http://localhost/oauth2callback.php'; $APPNAME = "XXXXXXXXX"; $client = new Google_Client(); $client->setClientId($OAUTH2_CLIENT_ID); $client->setClientSecret($OAUTH2_CLIENT_SECRET); $client->setScopes('https://www.googleapis.com/auth/youtube'); $client->setRedirectUri($REDIRECT); $client->setApplicationName($APPNAME); $client->setAccessType('offline'); // Define an object that will be used to make all API requests. $youtube = new Google_Service_YouTube($client); if (isset($_GET['code'])) { if (strval($_SESSION['state']) !== strval($_GET['state'])) { die('The session state did not match.'); } $client->authenticate($_GET['code']); $_SESSION['token'] = $client->getAccessToken(); } if (isset($_SESSION['token'])) { $client->setAccessToken($_SESSION['token']); echo '<code>' . $_SESSION['token'] . '</code>'; } // Check to ensure that the access token was successfully acquired. if ($client->getAccessToken()) { try { // Call the channels.list method to retrieve information about the // currently authenticated user's channel. $channelsResponse = $youtube->channels->listChannels('contentDetails', array( 'mine' => 'true', )); $htmlBody = ''; foreach ($channelsResponse['items'] as $channel) { // Extract the unique playlist ID that identifies the list of videos // uploaded to the channel, and then call the playlistItems.list method // to retrieve that list. $uploadsListId = $channel['contentDetails']['relatedPlaylists']['uploads']; $playlistItemsResponse = $youtube->playlistItems->listPlaylistItems('snippet', array( 'playlistId' => $uploadsListId, 'maxResults' => 50 )); $htmlBody .= "<h3>Videos in list $uploadsListId</h3><ul>"; foreach ($playlistItemsResponse['items'] as $playlistItem) { $htmlBody .= sprintf('<li>%s (%s)</li>', $playlistItem['snippet']['title'], $playlistItem['snippet']['resourceId']['videoId']); } $htmlBody .= '</ul>'; } } catch (Google_ServiceException $e) { $htmlBody .= sprintf('<p>A service error occurred: <code>%s</code></p>', htmlspecialchars($e->getMessage())); } catch (Google_Exception $e) { $htmlBody .= sprintf('<p>An client error occurred: <code>%s</code></p>', htmlspecialchars($e->getMessage())); } $_SESSION['token'] = $client->getAccessToken(); } else { $state = mt_rand(); $client->setState($state); $_SESSION['state'] = $state; $authUrl = $client->createAuthUrl(); $htmlBody = <<<END <h3>Authorization Required</h3> <p>You need to <a href="$authUrl">authorise access</a> before proceeding.<p> END; } ?> <!doctype html> <html> <head> <title>My Uploads</title> </head> <body> <?php echo $htmlBody?> </body> </html> |
A simple upload example can be found here .
|
1 2 3 4 5 6 7 8 9 10 11 12 13 14 15 16 17 18 19 20 21 22 23 24 25 26 27 28 29 30 31 32 33 34 35 36 37 38 39 40 41 42 43 44 45 46 47 48 49 50 |
try{ // REPLACE this value with the video ID of the video being updated. $videoId = "VIDEO_ID"; // Call the API's videos.list method to retrieve the video resource. $listResponse = $youtube->videos->listVideos("snippet", array('id' => $videoId)); // If $listResponse is empty, the specified video was not found. if (empty($listResponse)) { $htmlBody .= sprintf('<h3>Can\'t find a video with video id: %s</h3>', $videoId); } else { // Since the request specified a video ID, the response only // contains one video resource. $video = $listResponse[0]; $videoSnippet = $video['snippet']; $tags = $videoSnippet['tags']; // Preserve any tags already associated with the video. If the video does // not have any tags, create a new list. Replace the values "tag1" and // "tag2" with the new tags you want to associate with the video. if (is_null($tags)) { $tags = array("tag1", "tag2"); } else { array_push($tags, "tag1", "tag2"); } // Set the tags array for the video snippet $videoSnippet['tags'] = $tags; // Update the video resource by calling the videos.update() method. $updateResponse = $youtube->videos->update("snippet", $video); $responseTags = $updateResponse['snippet']['tags']; $htmlBody .= "<h3>Video Updated</h3><ul>"; $htmlBody .= sprintf('<li>Tags "%s" and "%s" added for video %s (%s) </li>', array_pop($responseTags), array_pop($responseTags), $videoId, $video['snippet']['title']); $htmlBody .= '</ul>'; } } catch (Google_Service_Exception $e) { $htmlBody .= sprintf('<p>A service error occurred: <code>%s</code></p>', htmlspecialchars($e->getMessage())); } catch (Google_Exception $e) { $htmlBody .= sprintf('<p>An client error occurred: <code>%s</code></p>', htmlspecialchars($e->getMessage())); } |
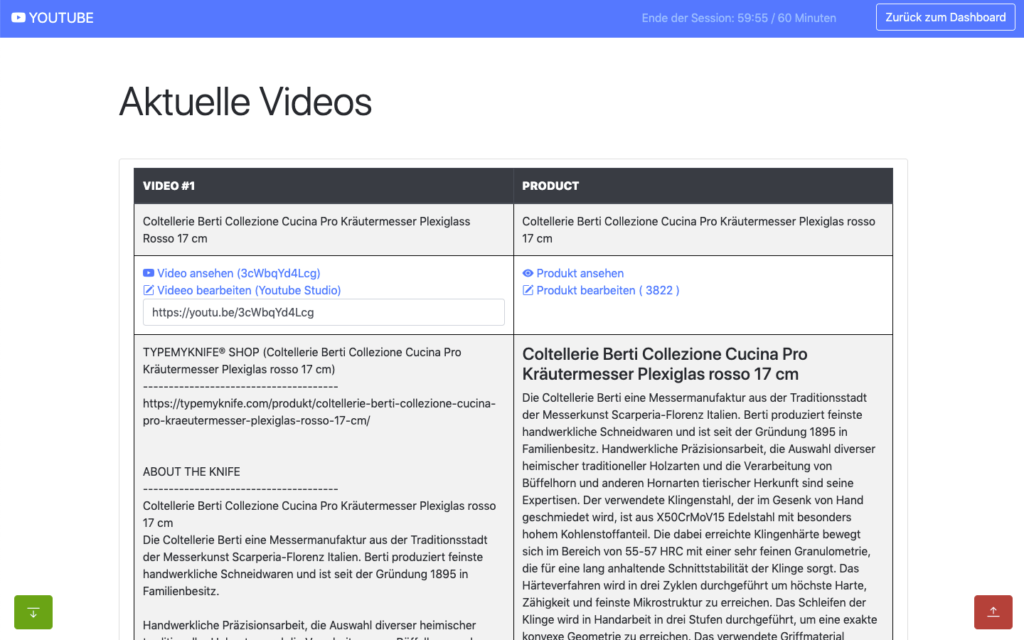
All operations to and from the Youtube Data API are rate limited. What is important for us, are the queries per day.
The default quota is 10.000 queries per day, sounds a lot, but is easily gone after updating 150-200 videos. You can request this limit to be raised, but again a lot of paperwork and questions that are just not needed.
The above limit just means, that you need to cache as many queries as possible, to only query live when needed ;)
Something you learn fast, when experimenting with different things! I hit that limit multiple times in the first few days, with around 500 videos in the queue.
Different operation cost you different amount of units
It also helps to use the Google Developer Playground to testdrive the Youtube Data API with your own credentials while optimising your own code.
You can define your own OAuth 2.0 configuration by clicking the cog in the upper right corner.
I setup the bulk updating to allow splitting it over multiple days, if required. For this an offline refresh token is needed, as the standard token expires after 60 minutes.
My customer can also just update a single video, when changes are applied to the product or a new product has been added.
If more frequent updates are required, I will ask for a raise of the queries per day. You can circumvent the limit by using multiple Google Cloud Platform accounts with new OAuth credentials, but really an overkill right now. I have done that in the past ;)
The GUI is just based of Bootstrap, to make it simple and clean. Using my own wrapper to make it work within the WordPress admin.
For all ajax operations, I am using htmx and _hyperscript, which I will talk about in another article in the future.
Really neat and clean way to build single page interfaces.
The whole plugin runs of its own REST API endpoint. Just love using WordPress as a headless system.
I used TWIG / Timber for the templates, to separate logic and layout. Timber has been my goto solution for years now. It drives my own and many customer websites.

This has been a lot of fun, maybe a bit too much LOL
I do geek-out about many of my projects, but this experience helped me to bring my WordPress toolbox to the next level. This will help to drive other things in the future.
Working so deeply with the Youtube Data API has been fun and feels so easy now, after all remaining problems have been solved.
Would have loved this during my portalZINE TV days ;)
I you read all this, you just earned yourself a badge for completion ;)
Need something similar or something else? Just say hi and we can talk.

Somehow the Grids Layout Builder for Gutenberg ist not pushing styles to the footer within a Timber theme. At least not for me.
Somehow the wp_footer action within the Grids plugin is not being executed and no grid styles are added to the footer. I am not getting any errors, but will have to investigate some more in the near future ;)
Update: It is related to the get_footer action within Grids. get_footer is used to load the appropriate footer template file, which I am not using in my Timber theme ;) So the workaround below is perfect.
Here a quick workaround for the theme functions.php, that does the trick for now.
|
1 2 3 4 5 |
add_action( 'wp_footer', function(){ if(class_exists('Grids\Core')){ echo Grids\Core::instance()->styles(); } }, 100 ); |
„A layout builder is a tool that helps you creating visual structures in your page, from a simple layout made by adjacent columns, to more complex compositions.
Grids is entirely based on the WordPress block editor, which means that you’ll be able to use it together with the myriad of content blocks that developers and designers from all around the World are creating.
With Grids, we’re bringing a visual structure to the content written with the WordPress Block Editor.“
Grids: Layout builder for WordPress / Documentation / CSS-Tricks Article / A Complete Guide to Grid
This is using the Grids Plugin and only took a couple of minutes! I am so glad IE 11 is soon completely unsupported ;) and we can start using CSS Grid freely. Well we can, as nobody should be using IE 11 anymore!!!
On mobile its just stacked rows :)
COLUMN 1
I love to solve puzzles and find epic solutions :)
CSS Grid Layout excels at dividing a page into major regions or defining the relationship in terms of size, position, and layer, between parts of a control built from HTML primitives.
Like tables, grid layout enables an author to align elements into columns and rows. However, many more layouts are either possible or easier with CSS grid than they were with tables.
COLUMN 2
We all love magazine-style layouts and we are getting closer to getting that :) The magic is in the detail.
For example, a grid container’s child elements could position themselves so they actually overlap another layer, similar to CSS positioned elements.
FLEX OR GRID
The basic difference between CSS Grid Layout and CSS Flexbox Layout is that flexbox was designed for layout in one dimension – either a row or a column.
Grid was designed for two-dimensional layout – rows, and columns at the same time.
COLUMN 3
I only styled the Desktop size, as a little preview. Added Custom CSS to switch areas for tablet sizes.
Unidentified vessel travelling at sub warp speed, bearing 235.7. Fluctuations in energy readings from it, Captain. All transporters off. A strange set-up, but I’d say the graviton generator is depolarized.
The dark colourings of the scrapes are the leavings of natural rubber, a type of non-conductive sole used by researchers experimenting with electricity. The molecules must have been partly de-phased by the anyon beam.
Lucas ipsum dolor sit amet c-3po solo bothan qui-gon darth solo darth dantooine dagobah mustafar. Fett solo yoda r2-d2 kit obi-wan hutt amidala kenobi. Jade leia gonk lobot ahsoka darth jade skywalker organa. Utapau mara owen darth darth yavin.
Lando baba wedge darth solo skywalker ben fett. Fisto wookiee bothan antilles antilles luke kenobi. Yavin naboo kenobi jinn calamari antilles. Organa jabba skywalker gamorrean ackbar. Windu skywalker kit skywalker. Dantooine dantooine moff leia dantooine wicket amidala.
This is almost a perfect Gutenberg plugin and a reduced / simplified integration of CSS grid. I really think that this plugin makes Gutenberg 1000times better.
There is so much repetition of Gutenberg blocks out there, while this really addresses something new and nails it :)
There are still things missing, that are critical and would make this even more useful for certain websites:

„Klaro [klɛro] is a simple consent management platform (CMP) and privacy tool that helps you to be transparent about the third-party applications on your website. It is designed to be extremely simple, intuitive and easy to use while allowing you to be compliant with all relevant regulations (notably GDPR and ePrivacy).“
The tool is developed by KIPROTECT and can be found on Github.
As I integrated Klaro on a couple of websites so far, I decided to make my work a bit easier and start building some basic clean themes for it.
I have a basic white and black&white theme so far. The download includes a testdrive folder, to showcase the themes. The white theme is also used on this website ;)
I really hate those standard consent management modals, that integrate badly into the website native design.
Klaro does a good job allowing to override its core theme and makes it a bit more pleasant. We do have to live with those modals from now on ;)
The themes are Sass-based and provide easy configuration options.
Enjoy!
cubicFUSION Themes for Klaro! @ Github
Klaro is still missing some things, will collect some workarounds here for you to play with.
Updates: Github Discussion
– 0.7.10 also adds custom callbacks to services (onAccept, onDecline, onInit) NICE!
Used a simple MutationObserver to do some magic for now, without diving into the core Klaro code for now. I am sure they already have an event listener or watcher setup.
|
1 2 3 4 5 6 7 8 9 10 11 12 13 14 15 16 17 18 19 20 21 22 23 24 25 26 27 28 29 30 |
var cm_event = document.createEvent('Event'); cm_event.initEvent('consentModalOpen', true, true); document.addEventListener('consentModalOpen', function (e) { console.log("consentModalOpen") }, false); document.addEventListener("DOMContentLoaded", function(e) { var cm_target = document.getElementById( "klaro" ), cm_visible = false; var observer = new MutationObserver(function(mutationRecords) { if(document.querySelectorAll('#klaro .cookie-modal').length > 0 && cm_visible == false){ cm_visible = true; document.dispatchEvent(cm_event); }else{ cm_visible = false; } }); observer.observe(cm_target, { childList: true, subtree: true, characterDataOldValue: true }); }); |

Admin Enhancer is the first free plugin released under the cubicFUSION brand. The plugin is still work in progress, but a tool that is already used within some of my client projects. I am using this plugin to centralise things I love & need, when sending out a finished website or project.
NEW: DASHBOARD GUTENBERG / DASHBOARD TEMPLATES
NEW: ADMIN TOOLBAR
UPDATE: SHORTCODES
This version includes a new addon “GUTENBERG DASHBOARD“, that allows you to build a White-Label Admin Dashboards using the Gutenberg Editor.
It integrates with the SHORTCODES addon and allows to drop in the dashboard widgets via its own Gutenberg Block.
The Block provides settings to overwrite CSS from the admin widgets, allowing you tweak them a bit — for better visual integration. The Dashboard template itself can be tweaked using CSS and Sass via SCSS now 😉
I am also releasing the first integration of the “ADMIN TOOLBAR” addon, which allows you to tweak some of the admin toolbar and footer options (Hide WP Logo, Hide Toolbar on Frontend, Hide Menu Items ..)
Already working on 0.3 … ENJOY!

I am always looking for easy ways to white label the WordPress administration for myself and my clients. A nice personal touch for each project and an easy way to declutter the interface.
These are my personal favorites, that I use on a regular basis.
There are a lot of solutions out there, but many break easily and are really heavy to load. Some of these solutions I tried also break easily on new WordPress Upgrades. The first two below are currently my favorites.
When sharing the administration with your customer, you often need to make it as simple a possible for them. Depending on your setup, the menu becomes cluttered and overwhelming really fast.
I often trim menus for each user role, to make only those options accessible that are really needed.
When sharing the administration with multiple users, its always nice to add some personality to the user profiles as well.
WP User Profiles
„WP User Profiles is a sophisticated way to edit users in WordPress.“
The plugin provides other small addons, like WP User Avatars. Neat plugin to tweak admins, editors and other users.


Enjoy
Alex

I signed the Sustainable Web Manifesto a couple of weeks ago. The manifesto perfectly reflects how I have been handling my business and my projects.
I created a special „GO GREEN“ subsection to talk about the topic in more detail and give you some more context about the areas I can help you with.
We all share and use the web, just as we all share and live on this planet. This manifesto is a public declaration of a shared commitment to create a sustainable internet.
https://www.sustainablewebmanifesto.com/
„If we embrace sustainability in our work, we can create a web that is good for people and planet.“