
Particle network animations in JavaScript typically involve creating visual representations of particles (often small dots or shapes) that move around in a defined space, interacting with each other based on predefined rules or behaviors. These animations are commonly used for visual effects on websites, data visualization, or interactive demos.
Particle network animations in JavaScript offer a visually appealing way to represent various phenomena or data in a dynamic and interactive manner on the web. There are multiple solutions out there to create a nice particle network animation in Javascript.
Depending on the amount of particles interacting, they will all spin up your fan at some point depending on your hardware ;) You can also use Three.js / D3.js / PixiJS or Anime.js to create it, but that might be an overkill.
These libraries offer different features and capabilities, so you can choose the one that best fits your project requirements and familiarity with the tools.

I had the chance this year to meetup with my client Thomas Dowson from „Archaeology Travel Media“ at the Travel Innovation Summit in Seville.
Over the past 2 years we have been revamping all the content from archaeology-travel.com and integrated a sophisticated travel itinerary builder system into the mix. We are almost feature complete and are currently fine-tuning the system. New explorers are welcome to signup and testdrive our set of unique features.
It was so nice to finally meet the whole team in person and celebrate what we have accomplished together so far.
Directly taken from the front-page :)
„EXPLORE THE WORLD’S PASTS WITH ARCHAEOLOGY TRAVEL GUIDES, CRAFTED BY EXPERIENCED ARCHAEOLOGISTS & HISTORIANS
Whatever your preferred style of travel, budget or luxury, backpacker or hand luggage only, slow or adventure, if you are interested in archaeology, history and art this is an online travel guide just for you.
Here you will find ideas for where to go, what sites, monuments, museums and art galleries to see, as well as information and tips on how to get there and what tickets to buy.
Our destination and thematic guides are designed to assist you to find and/or create adventures in archaeology and history that suit you, be it a bucket list trip or visiting a hidden gem nearby.“
More Details
About
Mission & Vision
Code of Ethics
We are constantly expanding our set of curated destinations, locations and POIs. Our plan is it, to make it even easier to find unique places for your next travel experience.
We are also working on partnerships to enhance travel options and offer a even broader variety of additional content.
Looking forward to all the things to come, as well as to the continued exceptional collaboration between all team members.

Extending iPanorama 360 can be a challenge, as none of the events are documented. You can talk to the developer or ask for support to get things done.
You can also read up on the core assets used:
ipanorama.min.js
jquery.ipanorama.min.js.
You can easily search for the events and figure out the parameters passed. Here a quick reference for things I used so far.
|
1 2 3 4 5 |
ipanorama:ready ipanorama:config ipanorama:fullscreen ipanorama:mode ipanorama:transform-mode-changed |
|
1 2 |
ipanorama:tooltip-show ipanorama:tooltip-hide |
|
1 2 |
ipanorama:popover-show ipanorama:popover-hide |
|
1 2 3 4 5 6 7 8 9 10 11 12 13 14 15 16 17 18 19 20 21 22 23 24 25 26 27 28 29 30 31 |
ipanorama:scene-before-load ipanorama:scene-after-load ipanorama:scene-progress ipanorama:scene-error ipanorama:scene-show-start ipanorama:scene-show-complete ipanorama:scene-hide-start ipanorama:scene-hide-complete ipanorama:scene-clear ipanorama:scene-index ipanorama:scene-point-add ipanorama:scene-point-remove ipanorama:scene-point-dragstart ipanorama:scene-point-dragend ipanorama:scene-point-select ipanorama:scene-point-deselect ipanorama:scene-point-hide ipanorama:scene-point-show ipanorama:scene-point-change ipanorama:scene-plane-add ipanorama:scene-plane-remove ipanorama:scene-plane-dragstart ipanorama:scene-plane-dragend ipanorama:scene-plane-select ipanorama:scene-plane-deselect ipanorama:scene-camera-start ipanorama:scene-camera-end ipanorama:scene-camera-change |
|
1 2 3 4 5 6 7 |
var instance = this, $ = jQuery; instance.$container.on("ipanorama:scene-after-load", function(e, data) { data.scene.control.minPolarAngle = 90 * Math.PI / 180; data.scene.control.maxPolarAngle = 90 * Math.PI / 180; }); |
|
1 2 3 4 5 6 7 8 9 10 11 12 13 14 15 |
var instance = this, $ = jQuery; function onMarkerClick(e) { var userData = this.cfg.userData; if(userData) { var $iframe = $(userData); $.featherlight($iframe); } } for(var i=0;i<instance.markers.length;i++) { var marker = instance.markers[i]; marker.$marker.on('click', $.proxy(onMarkerClick, marker)); } |
|
1 2 3 4 5 6 7 8 9 10 |
const plugin = this; const $ = jQuery; const $loading = $('<div>').addClass('myloading').text('loading'); plugin.$container.append($loading); plugin.$container.on('ipanorama:scene-progress', (e, data) => { const flag = data.progress.loaded == data.progress.total; $loading.toggleClass('active', !flag); }); |

iPanorama 360 for WordPress is a specialized plugin that enables users to create and display interactive 360-degree virtual tours or panoramic images on WordPress websites. It extends the functionality of the WordPress content management system by providing a user-friendly interface and a range of features specifically tailored for creating and showcasing 360-degree content.
With iPanorama 360 for WordPress, you can upload panoramic images or sets of photographs and convert them into interactive virtual tours or panoramic sliders. The plugin offers customization options to adjust the appearance and behavior of the panoramas, such as controlling the speed of rotation, choosing navigation controls, adding hotspots, and incorporating multimedia elements like images, videos, or audio.
The plugin integrates seamlessly with WordPress, allowing you to embed the created virtual tours or panoramic images directly into your website pages or posts. You can also customize the tour settings, such as enabling or disabling auto-rotation, adjusting the initial zoom level, or defining the starting viewpoint.
iPanorama 360 for WordPress typically provides an intuitive visual editor that enables users to create and edit their virtual tours or panoramas using a drag-and-drop interface. This makes it easier to add hotspots, link to other panoramas or external content, and customize the appearance and functionality of the tour.
You can testdrive iPanorama 360 using the Lite version or get the Pro version. The only limitation for the Lite version, is the ability to only create one panorama.
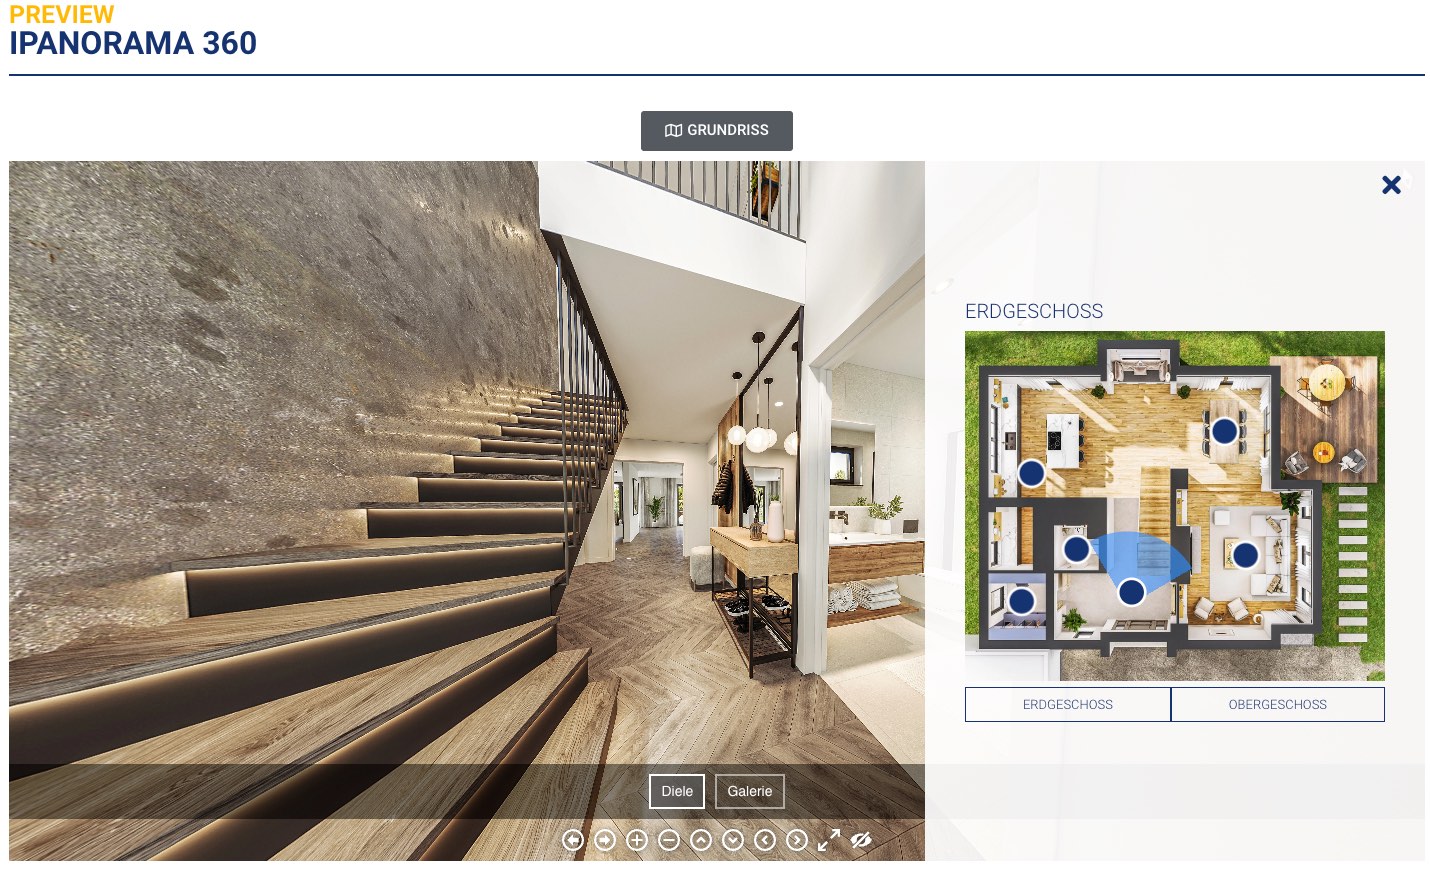
I have tested many different solutions for 360 panoramas in the past and many have been lacking in one or more areas. I always seem to be coming back to iPanorama 360 for my projects, due to its solid editor and support.
One major problem for iPanorama 360 has been the ability to attach an Arial-map / Floor-map to the panorama. Others tried to fill that void, but mostly failed on Mobile.
There are solutions out there that could be reused (Image Map Pro / ImageLinks ) and integrated with iPanorama 360.
I decided to build an image hotspot solution myself, that can also tie into iPanorama. I am building out all the things I need and more :)
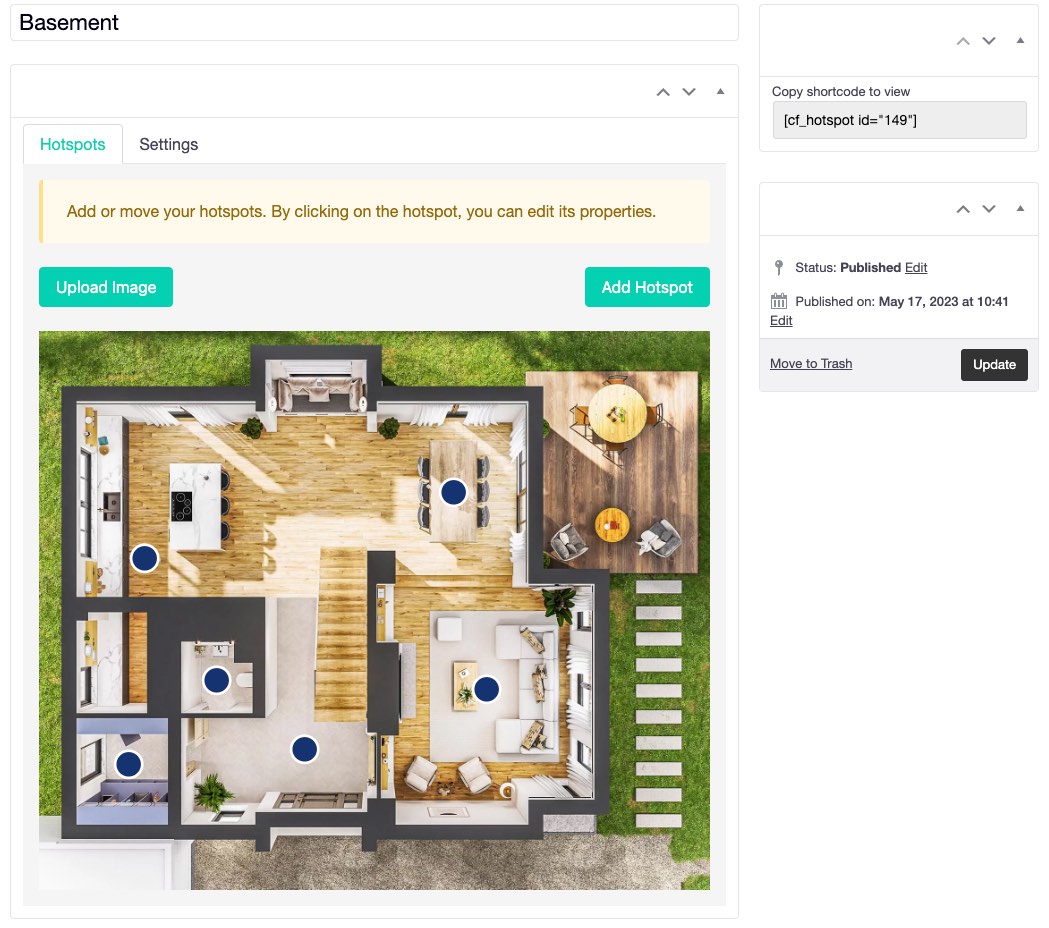
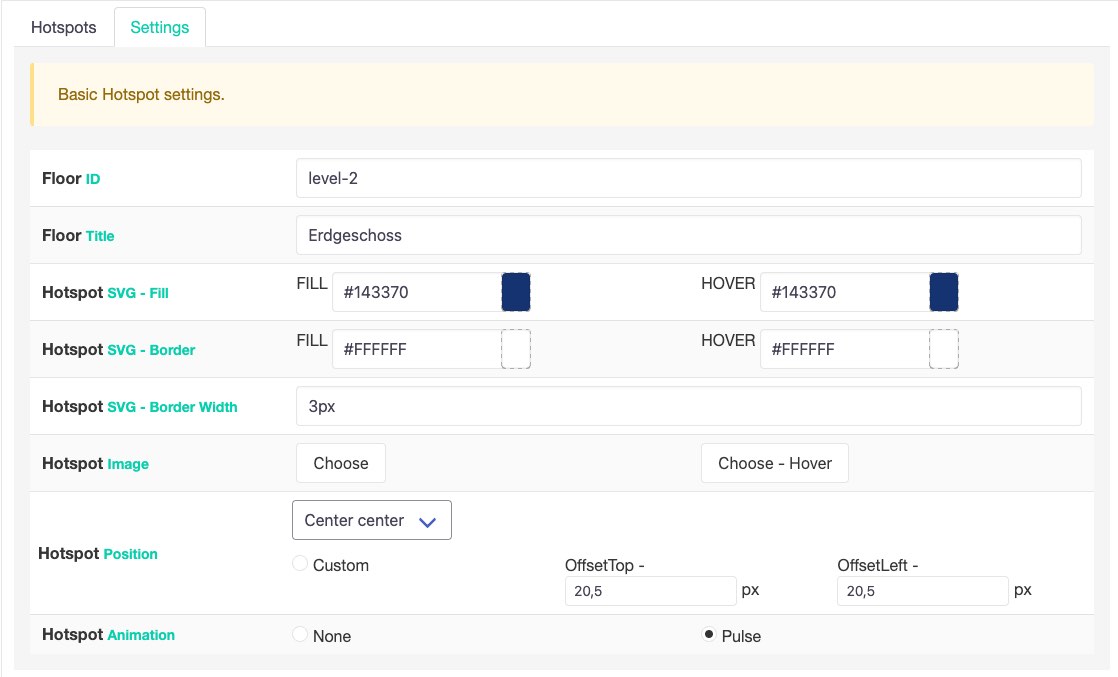
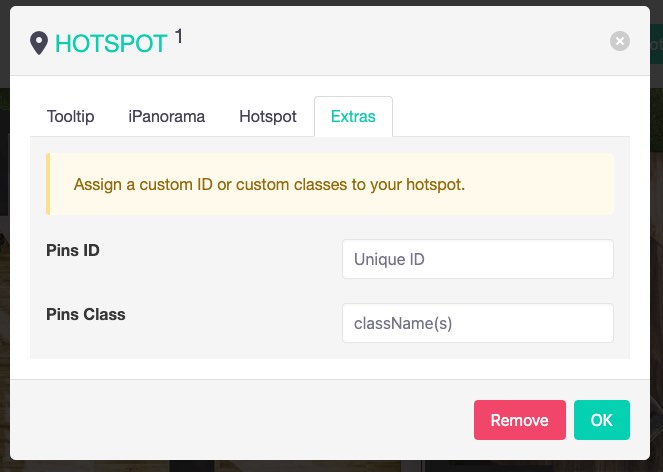
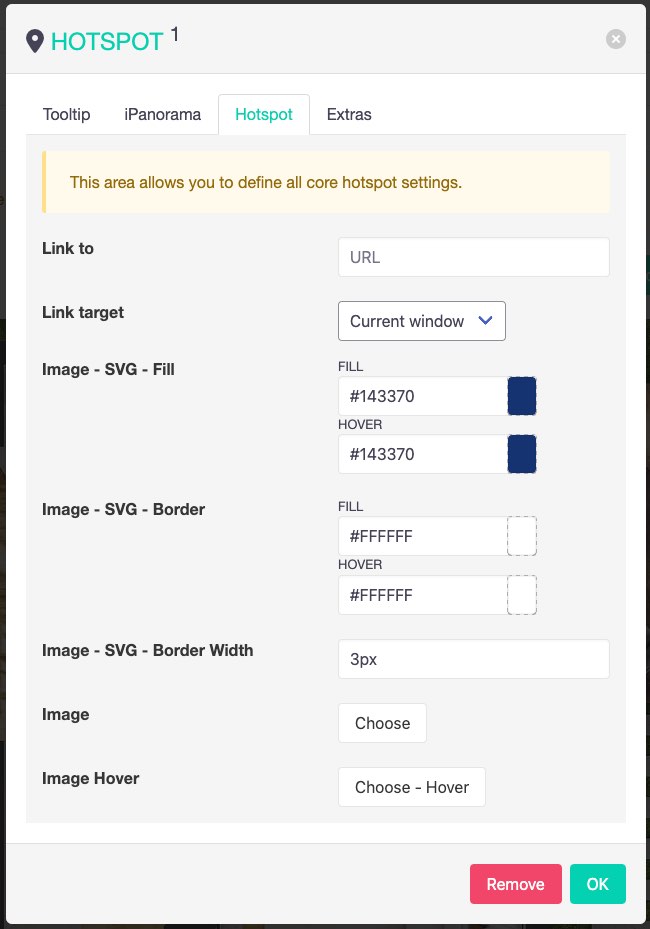
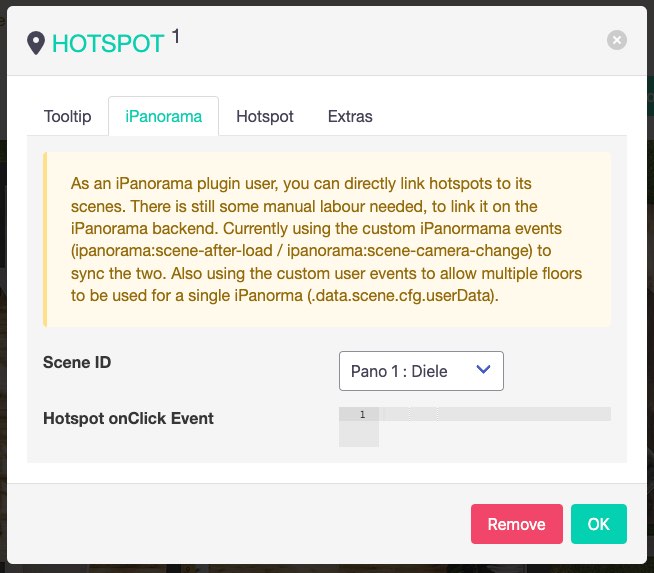
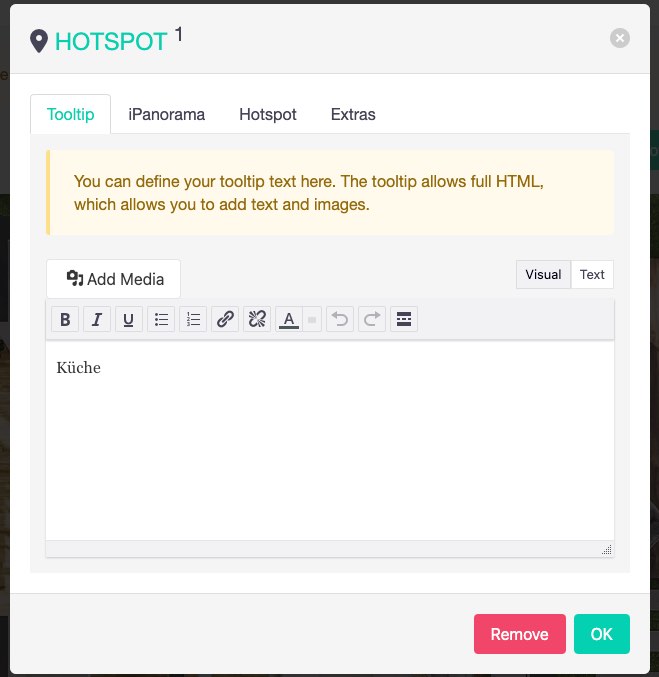
The first version is basically done and I will be using it for a client shortly. If you are interested, please feel free to get in touch. Will setup a demo page soon or link to the client using it ;)
Cheers

BookStack is an open-source, web-based platform for organizing, storing, and sharing knowledge and documentation. It was developed to provide a user-friendly and intuitive interface for creating and managing knowledge bases, wikis, and other types of structured content.
BookStack allows users to create books, chapters, and pages, and to organize them hierarchically. Users can also add images, files, and links to their content, and collaborate with others by assigning roles and permissions. BookStack also supports full-text search, version control, and commenting, making it easy to find and update information.
BookStack is written in PHP and uses the Laravel framework, and it is available for free under the MIT License.
This is my internal homelab documentation system, I use it for private and client related content. Bookstack is fast, clean and well documented. It has really elevated the way I store and access important reminders / how-tos and documentation.
The system provides API access and has many ways to tweak it. Bookstack documentation.
CSV stands for „Comma-Separated Values“. It is a simple file format used to store tabular data, such as spreadsheets or databases, in plain text. In a CSV file, each line represents a row of data, and each column is separated by a comma (or sometimes a semicolon or tab).
There are always CSV exports or other data stored in CSV format, that i need quick access to sometimes.
Bookstack allows to add files to pages and insert links to them, but it does not embed or parse those files in any way. There are similar hacks to mine, this example allows to embed PDFs and here the main Hacks page.
We need something to parse the CSV file and something to display the information in a nice visual & flexible grid.
Included and linked CSV files look something like that in source.
|
1 2 3 |
<p id="bkmrk-samplecsvfile_2kb.cs"> <a href="https://bookstack.instance/attachments/12" target="_blank" rel="noopener">SampleCSVFile_2kb.csv</a> </p> |
The settings allow you to add custom code to your instance. Another option would be to tweak template files, but its easier to do these light tweaks using the header customizer.
This can be found under: https://bookstack.instance/settings/customization
Either link them externally or better use locally stored versions of these.
|
1 2 3 |
<script type="text/javascript" src="https://cdn.jsdelivr.net/npm/papaparse@5.4.0/papaparse.min.js"></script> <script src="https://unpkg.com/gridjs/dist/gridjs.umd.js"></script> <link href="https://cdn.jsdelivr.net/npm/gridjs/dist/theme/mermaid.min.css" rel="stylesheet" /> |
|
1 2 3 4 5 6 7 8 9 10 11 12 13 14 15 16 17 18 19 20 21 22 23 24 25 26 27 28 29 30 31 32 33 34 35 36 37 38 39 40 41 42 43 44 45 46 47 48 49 50 51 52 |
<script> function init() { document.querySelectorAll('.page-content a').forEach((node, i) => { let parent = node; let unique = i; let text = node.textContent let link = node.href if (text.search(".csv") !== -1) { let header; let rows = []; let json = JSON.parse(node.getAttribute("title")); Papa.parse(link, { download: true, header: false, complete: function(results) { results.data.map(function(data, index) { if(!!json){ let removeValFrom = json.remove_cols; data = data.filter(function(value, index) { return removeValFrom.indexOf(index) == -1; }) } if (index == 0) { header = data; } else { rows.push(data); } }); const csv_wrapper = document.createElement("div"); csv_wrapper.setAttribute("id", "csv_wrapper_" + unique_id); parent.after(csv_wrapper); new gridjs.Grid({ search: true, columns: header, data: rows, fixedHeader: true, sort: true, pagination: { limit: 6 } }).render(document.getElementById("csv_wrapper_" + unique_id)); } }); } }); } window.addEventListener('DOMContentLoaded', init); </script> |
Github: Will be adding more hacks, as I clean some of them up :)
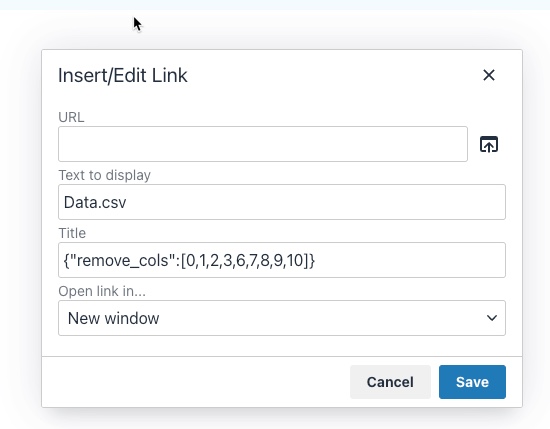
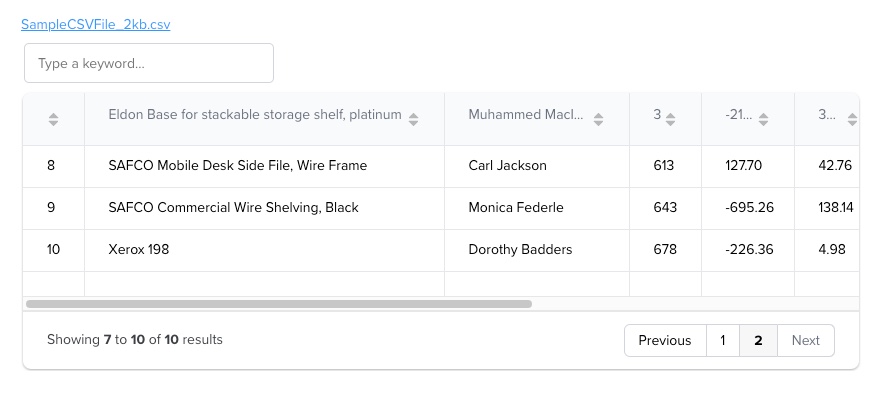
You can use the title attribute to pass some config data, in JSON format. Currently only to strip columns, but will extend that a bit more for flexible usage ;)
|
1 |
{"remove_cols":[0,1,2,3,6,7,8,9,10]} |
Should look something like that …
Enjoy coding …

„Übersicht“ is a German word that means „overview“ or „summary“ in English. The name of the software was chosen because it allows users to have a quick overview of various information on their desktop. It’s also a play on words, because in German the name of the software can be translated as „super sight“ which refers to the ability to have a lot of information at a glance.
Übersicht is a lightweight and powerful application that allows users to create and customize desktop widgets using web technologies such as HTML, CSS, and JavaScript. With Übersicht, you can create widgets that display information such as the weather, calendar events, system resource usage, and more. The widgets can be customized to display the information in any format and can be positioned anywhere on the desktop, allowing you to create a personalized and efficient workspace.
Übersicht widgets are created using a simple and user-friendly interface that allows you to preview and edit the widget’s code. The widgets are also highly customizable, allowing you to change the appearance and behavior of the widgets to suit your needs. Additionally, Übersicht widgets can be shared with other users, and there are a variety of widgets available for download from the developer’s website.
The application is open-source and free to use, and it’s also lightweight, it won’t affect your computer performance. Overall, Übersicht is a powerful and versatile tool for creating custom desktop widgets on macOS.
There are several other tools similar to Übersicht that allow you to create custom desktop widgets. Some of the most popular alternatives include:
With many external systems in play, its always crucial to keep an eye on things. I have build nice dashboards, using Grafana, InfluxDB, NetData and Prometheus. But they are either displayed in a browser window or on a separate screen.
If you have 2 / 3 monitors or an ultra-wide screen, you have a lot of Desktop real-estate you can use.
That is something that I have been looking at for years, but only tried for a short period of time. This year I want to really build out desktop and menu widgets , that help me to get an even better overview of things and help reduce repetitive tasks.
I will share links to things I like and share access to the widgets I build myself or tweaked.
These are the current things that are in progress or planned.
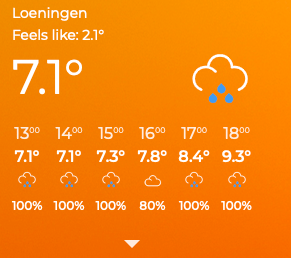
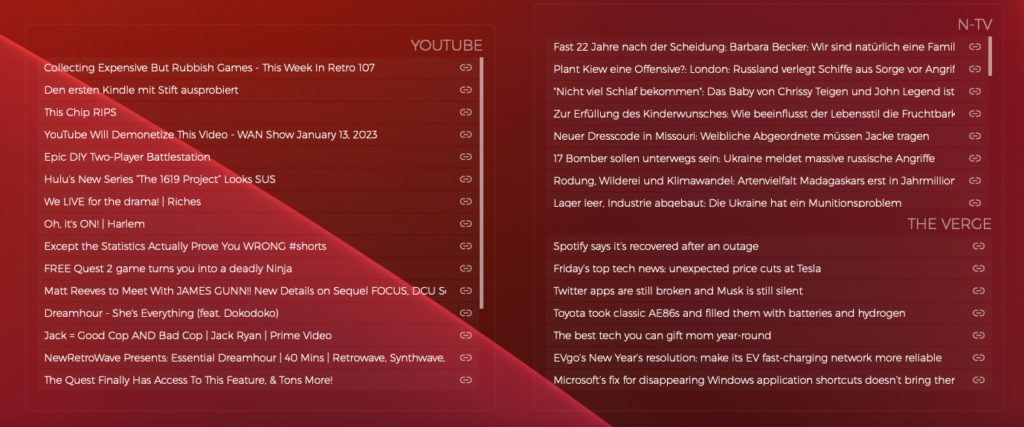

Nothing to share yet ….

jQuery has provided easy access to complicated core Javascript solutions in the past and has been shielding us from difficult workarounds for legacy browsers. But times have changed and many of those things can be done as easily using Javascript directly.
jQuery is a fast, small, and feature-rich JavaScript library. It makes interactions with HTML documents easy, and is widely used in web development to add features to web pages and to simplify the process of writing JavaScript. With a combination of versatility and extensibility, jQuery has changed the way that millions of people write JavaScript.
That being said, jQuery is still a popular and widely used library, and there are many valid reasons to continue using it. It is ultimately up to you to decide whether the benefits of using jQuery outweigh the potential drawbacks in your particular situation.
Easily search and compare direct Javascript solutions to jQuery ….
How jQuery does it:
|
1 |
$.getJSON('/my/url', function (data) {}); |
Pure Javascript:
|
1 2 |
const response = await fetch('/my/url'); const data = await response.json(); |
UmbrellaJS is a lightweight JavaScript library that provides a number of utility functions and features for working with DOM elements and handling events. It was designed to be small, fast, and easy to use, and it does not have any dependencies on other libraries.
Some of the features provided by UmbrellaJS include:
UmbrellaJS is a good choice for developers who want a simple, lightweight library for working with DOM elements and handling events. It is especially well-suited for smaller projects or for developers who want to avoid the overhead of larger libraries like jQuery.
Selector demos:
|
1 2 3 4 5 6 7 |
u('ul#demo li') u(document.getElementById('demo')) u(document.getElementsByClassName('demo')) u([ document.getElementById('demo') ]) u( u('ul li') ) u('<a>') u('li', context) |
Documentation
Migrate from jQuery
HTMX (HTML enhanced for asynchronous communication and XML) is a JavaScript library that allows you to add asynchronous communication and other interactive features to your web pages using HTML attributes and elements. It allows you to make AJAX (Asynchronous JavaScript and XML) requests and handle responses directly in your HTML, without the need for writing any JavaScript code.
HTMX works by intercepting events on HTML elements and making asynchronous requests based on the attributes you specify. For example, you can use the hx-get attribute to make a GET request to a specified URL, and use the hx-trigger attribute to specify an event that should trigger the request. You can also use the hx-target attribute to specify an element on the page where the response should be inserted.
Here’s an example of how you might use HTMX to make a GET request and insert the response into a div element:
|
1 2 3 |
<button hx-get="/some/url" hx-target="#target">Load Data</button> <div id="target"></div> |
When the button is clicked, HTMX will make a GET request to /some/url and insert the response into the div element with the id of target.
HTMX is designed to be easy to use and flexible, and it can be used to add a wide range of interactive features to your web pages.
I am currently using HTMX in one of my longterm projects and will be talking about it more in a separate article in the future !
HTMX Reference / Documentation
It is ultimately up to you to decide which approach is best for your particular project. Sometimes a combination is needed ;)

I am doing a Podcast on portalZINE.TV since last year and always host a backup of the MP3 episodes on Google Drive.
The link that you create, when enabling file sharing on Google Drive, can not be used to actually embed it on your website.
The link looks something like that:
|
1 |
https://drive.google.com/file/d/78BygKccgGms9ET2lUM0RPVUI1T0U/view?usp=sharing |
To actually use it directly, we need to get the ID. Sure, you could just extract the ID, but often we just want to copy and paste. The sharing link is also your actual reference to the original file, which I store together with the podcast.
We use a simple Regex to extract the ID:
|
1 |
https://drive.google.com/file/d/([a-zA-Z0-9_]+)\/ |
PHP
|
1 2 3 4 5 |
$input = "https://drive.google.com/file/d/78BygKccgGms9ET2lUM0RPVUI1T0U/view?usp=sharing"; preg_match("/https:\/\/drive.google.com\/file\/d\/([a-zA-Z0-9_]+)\//", $input, $match); $GoogleDriveFileID = $match[1]; |
JAVASCRIPT
|
1 2 3 4 5 |
var input = "https://drive.google.com/file/d/78BygKccgGms9ET2lUM0RPVUI1T0U/view?usp=sharing"; var res = input.match(/https:\/\/drive.google.com\/file\/d\/([a-zA-Z0-9_]+)\//) var googleDriveFileID = res[1]; |
This ID can than be used to embed the file directly using HTML5 audio controls.
Its important to use the „https://docs.google.com/uc?export=open&id=“ url to open the file, as it provides the direct access to the shared file
|
1 2 3 4 |
<audio controls> <source src="https://docs.google.com/uc?export=open&id=<?php echo $GoogleDriveFileID; ?>" type="audio/mp3"> <p>This browser does not support HTML5 audio</p> </audio> |

Papa Parse is a powerful, in-browser CSV parser for the big boys and girls :)
If you do need easy CSV parsing and conversion back to CSV, take a look at it!
|
1 2 3 4 5 6 7 8 9 10 11 12 13 14 15 16 17 18 19 20 |
// Parse CSV string var data = Papa.parse(csv); // Convert back to CSV var csv = Papa.unparse(data); // Parse local CSV file Papa.parse(file, { complete: function(results) { console.log("Finished:", results.data); } }); // Stream big file in worker thread Papa.parse(bigFile, { worker: true, step: function(results) { console.log("Row:", results.data); } }); |
|
1 |
<input type="file" name="File Upload" id="txtFileUpload" accept=".csv" /> |
|
1 2 3 4 5 6 7 8 9 10 11 12 13 14 15 16 17 18 19 20 21 |
document.getElementById('txtFileUpload').addEventListener('change', upload, false); function upload(evt) { var data = null; var file = evt.target.files[0]; var reader = new FileReader(); reader.readAsText(file); reader.onload = function(event) { var csvData = event.target.result; var data = Papa.parse(csvData, {header : true}); console.log(data); }; reader.onerror = function() { alert('Unable to read ' + file.fileName); }; } |
Papa Parse is the fastest in-browser CSV (or delimited text) parser for JavaScript. It is reliable and correct according to RFC 4180, and it comes with these features:
<input type="file"> elementsI am currently using it to quickly parse Adobe Audition CSV marker files and prepare them for storage for my podcast.
|
1 2 3 4 5 6 |
Name Start Duration Time Format Type Description Ankündigungen 0:20.432 0:00.000 decimal Cue Stargate Table Read 1:12.811 0:00.000 decimal Cue Dune Part One 2021 1:58.677 0:00.000 decimal Cue Dust - Cosmo 2:20.925 0:00.000 decimal Cue Nina - Beyond Memory 2:51.276 0:00.000 decimal Cue |
|
1 2 3 4 5 6 |
Papa.unparse(tabData, { delimiter: "\tab", header: true, newline: "\r\n", skipEmptyLines: true }) |

This is not a tutorial, but more like sharing a nice geeky road-trip ;)
I have a pretty good understanding of the Youtube Data API, as I have actively used it on portalZINE TV in the past, to upload videos and dynamically link them to my local post-types.
For one of my latest customer projects (TYPEMYKNIFE / typemyknife.com), the task was a bit more complicated and the goal was to make it as future-proof as it can be with the Google APIs :)
Prerequisites / References to get you started:
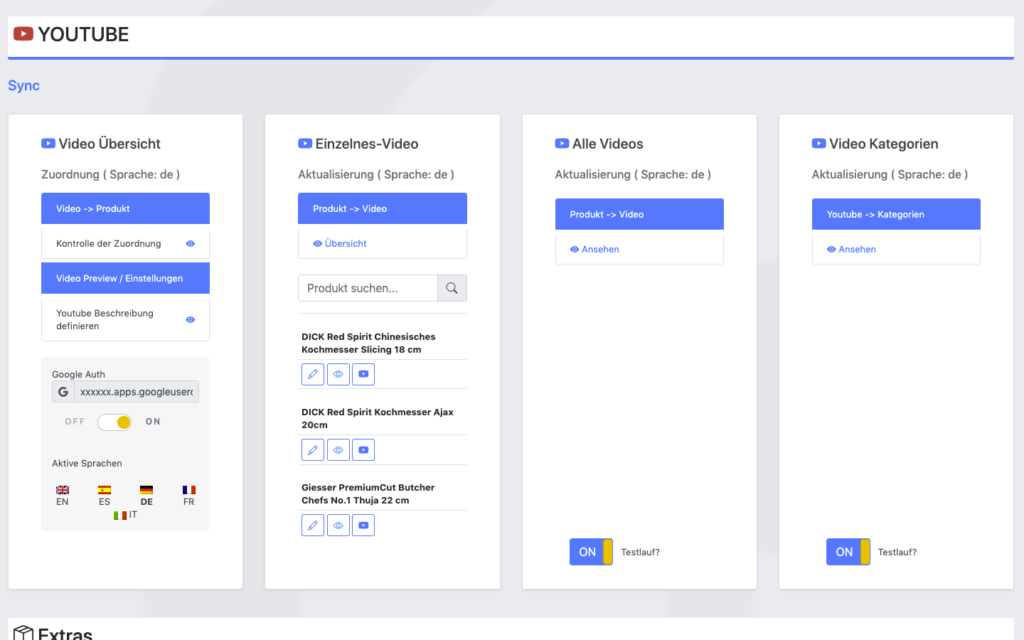
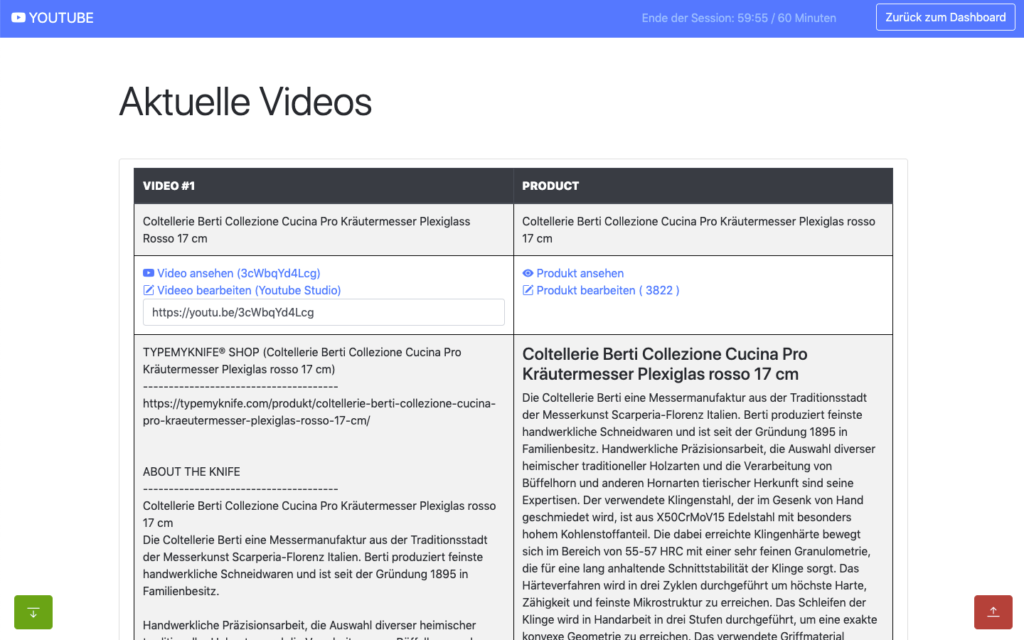
The goal for the setup was to actively synchronize WooCommerce products with linked / attached videos, with their source at Youtube.
As the website is multilingual, WPML integration is critical as well. And as Youtube allows localization of title and description, that can be added into the mix quiet easily in the future ;)
The following product attributes should be mirrored and optimised for Youtube:
The following attributes should be integrated into the description to enrich the Youtube description:
All of these attributes will be collected internally and assigned using a simple template system, which allows the customer to move parts around freely and freely layout the description for Youtube.
The following stats will be collected for review:
Youtube SEO
These are the relevant key aspects, that help to get your videos more views.
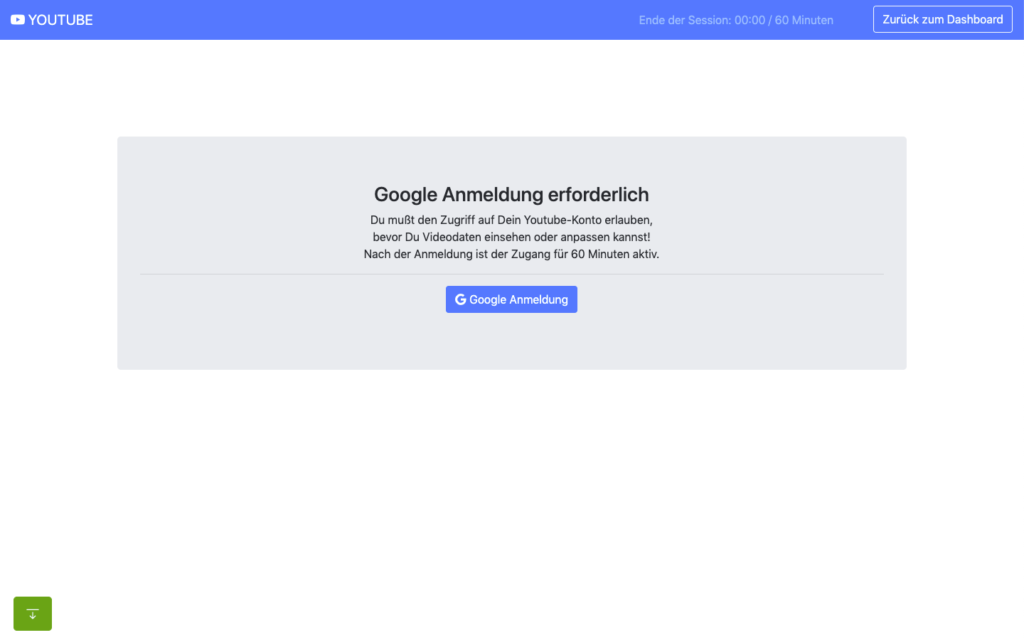
In the past access to the Youtube Data API was far easier and less limited, when it comes to offline / none expiring OAuth2 refresh tokens.
When you are building a server-side application that is only available to your customer or moderators, it makes no sense to run that app through the Google App verification. Your app will never be used in public.
The Youtube Data API and its scopes, are defined as sensitive and therefor require third-party security assessment for public access.
The scopes I am requesting are https://www.googleapis.com/auth/youtube.upload + https://www.googleapis.com/auth/youtube.
Because of that its far easier to just setup OAuth 2 in test mode and restrict access to your customer and specific additional accounts only (up to 100 test users allowed). What all these account need, is access to your own or Brand Youtube Channel.
Preparation in the Google Cloud Console:
A detailed description can be found here.
You can circumvent verification for the consent screen, by using an organisation setup at Google. Here some infos about that. With that setup offline refresh tokens should work fine.
Update: Just tried that, but wont work with a branded youtube account, even though the cloud user has admin access to it. Not giving up yet, but Google / Youtube really makes it difficult to just have a simple offline solution for specific tasks ;) BTW also forced the login hint, to make sure the right account is logged in : $client->setLoginHint(‚YourWoreksapceAccount‘); !
You might have heard of the „The League of Extraordinary Packages„. It is a group of developers who have banded together to build solid, well tested PHP packages using modern coding standards.
They also offer an OAuth2-client + OAuth2 Google extension that can be used.
On the server, the Google API PHP SDK can be easily integrated using Composer.
In my customer plugin I neatly separated all relevant areas in classes & traits:
You can check the expiry time of your access token by accessing:
https://www.googleapis.com/oauth2/v1/tokeninfo?access_token=YOUR_TOKEN„A Google Cloud Platform project with an OAuth consent screen configured for an external user type and a publishing status of „Testing“ is issued a refresh token expiring in 7 days.“ – Google
Basic Auth example from the SDK:
|
1 2 3 4 5 6 7 8 9 10 11 12 13 14 15 16 17 18 19 20 21 22 23 24 25 26 27 28 29 30 31 32 33 34 35 36 37 38 39 40 41 42 43 44 45 46 47 48 49 50 51 52 53 54 55 56 57 58 59 60 61 62 63 64 65 66 67 68 69 70 71 72 73 74 75 76 77 78 79 80 81 82 83 84 85 86 87 88 89 90 91 92 93 94 95 96 97 98 99 100 101 102 103 104 105 106 107 |
<?php // Call set_include_path() as needed to point to your client library. set_include_path($_SERVER['DOCUMENT_ROOT'] . '/directory/to/google/api/'); require_once 'Google/Client.php'; require_once 'Google/Service/YouTube.php'; session_start(); /* * You can acquire an OAuth 2.0 client ID and client secret from the * {{ Google Cloud Console }} <{{ https://cloud.google.com/console }}> * For more information about using OAuth 2.0 to access Google APIs, please see: * <https://developers.google.com/youtube/v3/guides/authentication> * Please ensure that you have enabled the YouTube Data API for your project. */ $OAUTH2_CLIENT_ID = 'XXXXXXX.apps.googleusercontent.com'; $OAUTH2_CLIENT_SECRET = 'XXXXXXXXXX'; $REDIRECT = 'http://localhost/oauth2callback.php'; $APPNAME = "XXXXXXXXX"; $client = new Google_Client(); $client->setClientId($OAUTH2_CLIENT_ID); $client->setClientSecret($OAUTH2_CLIENT_SECRET); $client->setScopes('https://www.googleapis.com/auth/youtube'); $client->setRedirectUri($REDIRECT); $client->setApplicationName($APPNAME); $client->setAccessType('offline'); // Define an object that will be used to make all API requests. $youtube = new Google_Service_YouTube($client); if (isset($_GET['code'])) { if (strval($_SESSION['state']) !== strval($_GET['state'])) { die('The session state did not match.'); } $client->authenticate($_GET['code']); $_SESSION['token'] = $client->getAccessToken(); } if (isset($_SESSION['token'])) { $client->setAccessToken($_SESSION['token']); echo '<code>' . $_SESSION['token'] . '</code>'; } // Check to ensure that the access token was successfully acquired. if ($client->getAccessToken()) { try { // Call the channels.list method to retrieve information about the // currently authenticated user's channel. $channelsResponse = $youtube->channels->listChannels('contentDetails', array( 'mine' => 'true', )); $htmlBody = ''; foreach ($channelsResponse['items'] as $channel) { // Extract the unique playlist ID that identifies the list of videos // uploaded to the channel, and then call the playlistItems.list method // to retrieve that list. $uploadsListId = $channel['contentDetails']['relatedPlaylists']['uploads']; $playlistItemsResponse = $youtube->playlistItems->listPlaylistItems('snippet', array( 'playlistId' => $uploadsListId, 'maxResults' => 50 )); $htmlBody .= "<h3>Videos in list $uploadsListId</h3><ul>"; foreach ($playlistItemsResponse['items'] as $playlistItem) { $htmlBody .= sprintf('<li>%s (%s)</li>', $playlistItem['snippet']['title'], $playlistItem['snippet']['resourceId']['videoId']); } $htmlBody .= '</ul>'; } } catch (Google_ServiceException $e) { $htmlBody .= sprintf('<p>A service error occurred: <code>%s</code></p>', htmlspecialchars($e->getMessage())); } catch (Google_Exception $e) { $htmlBody .= sprintf('<p>An client error occurred: <code>%s</code></p>', htmlspecialchars($e->getMessage())); } $_SESSION['token'] = $client->getAccessToken(); } else { $state = mt_rand(); $client->setState($state); $_SESSION['state'] = $state; $authUrl = $client->createAuthUrl(); $htmlBody = <<<END <h3>Authorization Required</h3> <p>You need to <a href="$authUrl">authorise access</a> before proceeding.<p> END; } ?> <!doctype html> <html> <head> <title>My Uploads</title> </head> <body> <?php echo $htmlBody?> </body> </html> |
A simple upload example can be found here .
|
1 2 3 4 5 6 7 8 9 10 11 12 13 14 15 16 17 18 19 20 21 22 23 24 25 26 27 28 29 30 31 32 33 34 35 36 37 38 39 40 41 42 43 44 45 46 47 48 49 50 |
try{ // REPLACE this value with the video ID of the video being updated. $videoId = "VIDEO_ID"; // Call the API's videos.list method to retrieve the video resource. $listResponse = $youtube->videos->listVideos("snippet", array('id' => $videoId)); // If $listResponse is empty, the specified video was not found. if (empty($listResponse)) { $htmlBody .= sprintf('<h3>Can\'t find a video with video id: %s</h3>', $videoId); } else { // Since the request specified a video ID, the response only // contains one video resource. $video = $listResponse[0]; $videoSnippet = $video['snippet']; $tags = $videoSnippet['tags']; // Preserve any tags already associated with the video. If the video does // not have any tags, create a new list. Replace the values "tag1" and // "tag2" with the new tags you want to associate with the video. if (is_null($tags)) { $tags = array("tag1", "tag2"); } else { array_push($tags, "tag1", "tag2"); } // Set the tags array for the video snippet $videoSnippet['tags'] = $tags; // Update the video resource by calling the videos.update() method. $updateResponse = $youtube->videos->update("snippet", $video); $responseTags = $updateResponse['snippet']['tags']; $htmlBody .= "<h3>Video Updated</h3><ul>"; $htmlBody .= sprintf('<li>Tags "%s" and "%s" added for video %s (%s) </li>', array_pop($responseTags), array_pop($responseTags), $videoId, $video['snippet']['title']); $htmlBody .= '</ul>'; } } catch (Google_Service_Exception $e) { $htmlBody .= sprintf('<p>A service error occurred: <code>%s</code></p>', htmlspecialchars($e->getMessage())); } catch (Google_Exception $e) { $htmlBody .= sprintf('<p>An client error occurred: <code>%s</code></p>', htmlspecialchars($e->getMessage())); } |
All operations to and from the Youtube Data API are rate limited. What is important for us, are the queries per day.
The default quota is 10.000 queries per day, sounds a lot, but is easily gone after updating 150-200 videos. You can request this limit to be raised, but again a lot of paperwork and questions that are just not needed.
The above limit just means, that you need to cache as many queries as possible, to only query live when needed ;)
Something you learn fast, when experimenting with different things! I hit that limit multiple times in the first few days, with around 500 videos in the queue.
Different operation cost you different amount of units
It also helps to use the Google Developer Playground to testdrive the Youtube Data API with your own credentials while optimising your own code.
You can define your own OAuth 2.0 configuration by clicking the cog in the upper right corner.
I setup the bulk updating to allow splitting it over multiple days, if required. For this an offline refresh token is needed, as the standard token expires after 60 minutes.
My customer can also just update a single video, when changes are applied to the product or a new product has been added.
If more frequent updates are required, I will ask for a raise of the queries per day. You can circumvent the limit by using multiple Google Cloud Platform accounts with new OAuth credentials, but really an overkill right now. I have done that in the past ;)
The GUI is just based of Bootstrap, to make it simple and clean. Using my own wrapper to make it work within the WordPress admin.
For all ajax operations, I am using htmx and _hyperscript, which I will talk about in another article in the future.
Really neat and clean way to build single page interfaces.
The whole plugin runs of its own REST API endpoint. Just love using WordPress as a headless system.
I used TWIG / Timber for the templates, to separate logic and layout. Timber has been my goto solution for years now. It drives my own and many customer websites.

This has been a lot of fun, maybe a bit too much LOL
I do geek-out about many of my projects, but this experience helped me to bring my WordPress toolbox to the next level. This will help to drive other things in the future.
Working so deeply with the Youtube Data API has been fun and feels so easy now, after all remaining problems have been solved.
Would have loved this during my portalZINE TV days ;)
I you read all this, you just earned yourself a badge for completion ;)
Need something similar or something else? Just say hi and we can talk.